Category Archives: Music Hardware

IKMultimedia iLoud Micro Monitor Review

Today we bring you a long overdue review of the . This one is something new, and we were pretty much inclined to use it in our everyday productions. This is why it took so long, but rest assured we have used it extensively, in the studio and on the go and are here to tell the story.

IKMultimedia iLoud Micro Monitor Review: Portability

From the start, what strikes us the most is the weight and size of this monitoring system. And yes, it is meant to be used on the go, with build quality more than enough for touring with it. And this is precisely what we did. Well, no tours are live right now due to COVID-19 but still, we managed to do some extensive travelling. We are pretty much into this mobile musician thing, and we can pack some gear with us when we do it, like an Elektron Analog4 which is a great synth, doubling as a sound card, to which we connected an Elektron Machinedrum MK1 and an MFB-522 to handle the drum works. Coupled with the power of Ableton and the best VST Synths around (check our article on the best VST Synths in the market right here) we are fully able to make ourselves a nice little studio that more than fits into a VW Golf 6.

Sure, the makers claim that this is the smallest active monitoring system in the world, but we are not sure that this is 100% accurate. But for sure you can snug it in your cabin luggage and take it on flights, to work in your hotel room. You can even buy a dedicated carrying bag on the .

IKMultimedia iLoud Micro Monitor Review: Sound

The second thing that shook us was the IKMultimedia iLoud Micro Monitor’s sound capabilities. This was not a full review if we would not have touched on this, as the sound profile is the most important thing with studio monitors.

Sure, this is no 8 inch powerhouse nor is it a subwoofer, so from the start you have to manage your bass expectations (they go down to 55hz). But sound profiling is more than power. In the upper registers the monitoring system is good to great, but not wow. You get crisp and you can judge your hi-hats with good accuracy. There is some air present, also. The monitors shine in the mid range tho, and are extremely good for vocals, guitars and some synth work.

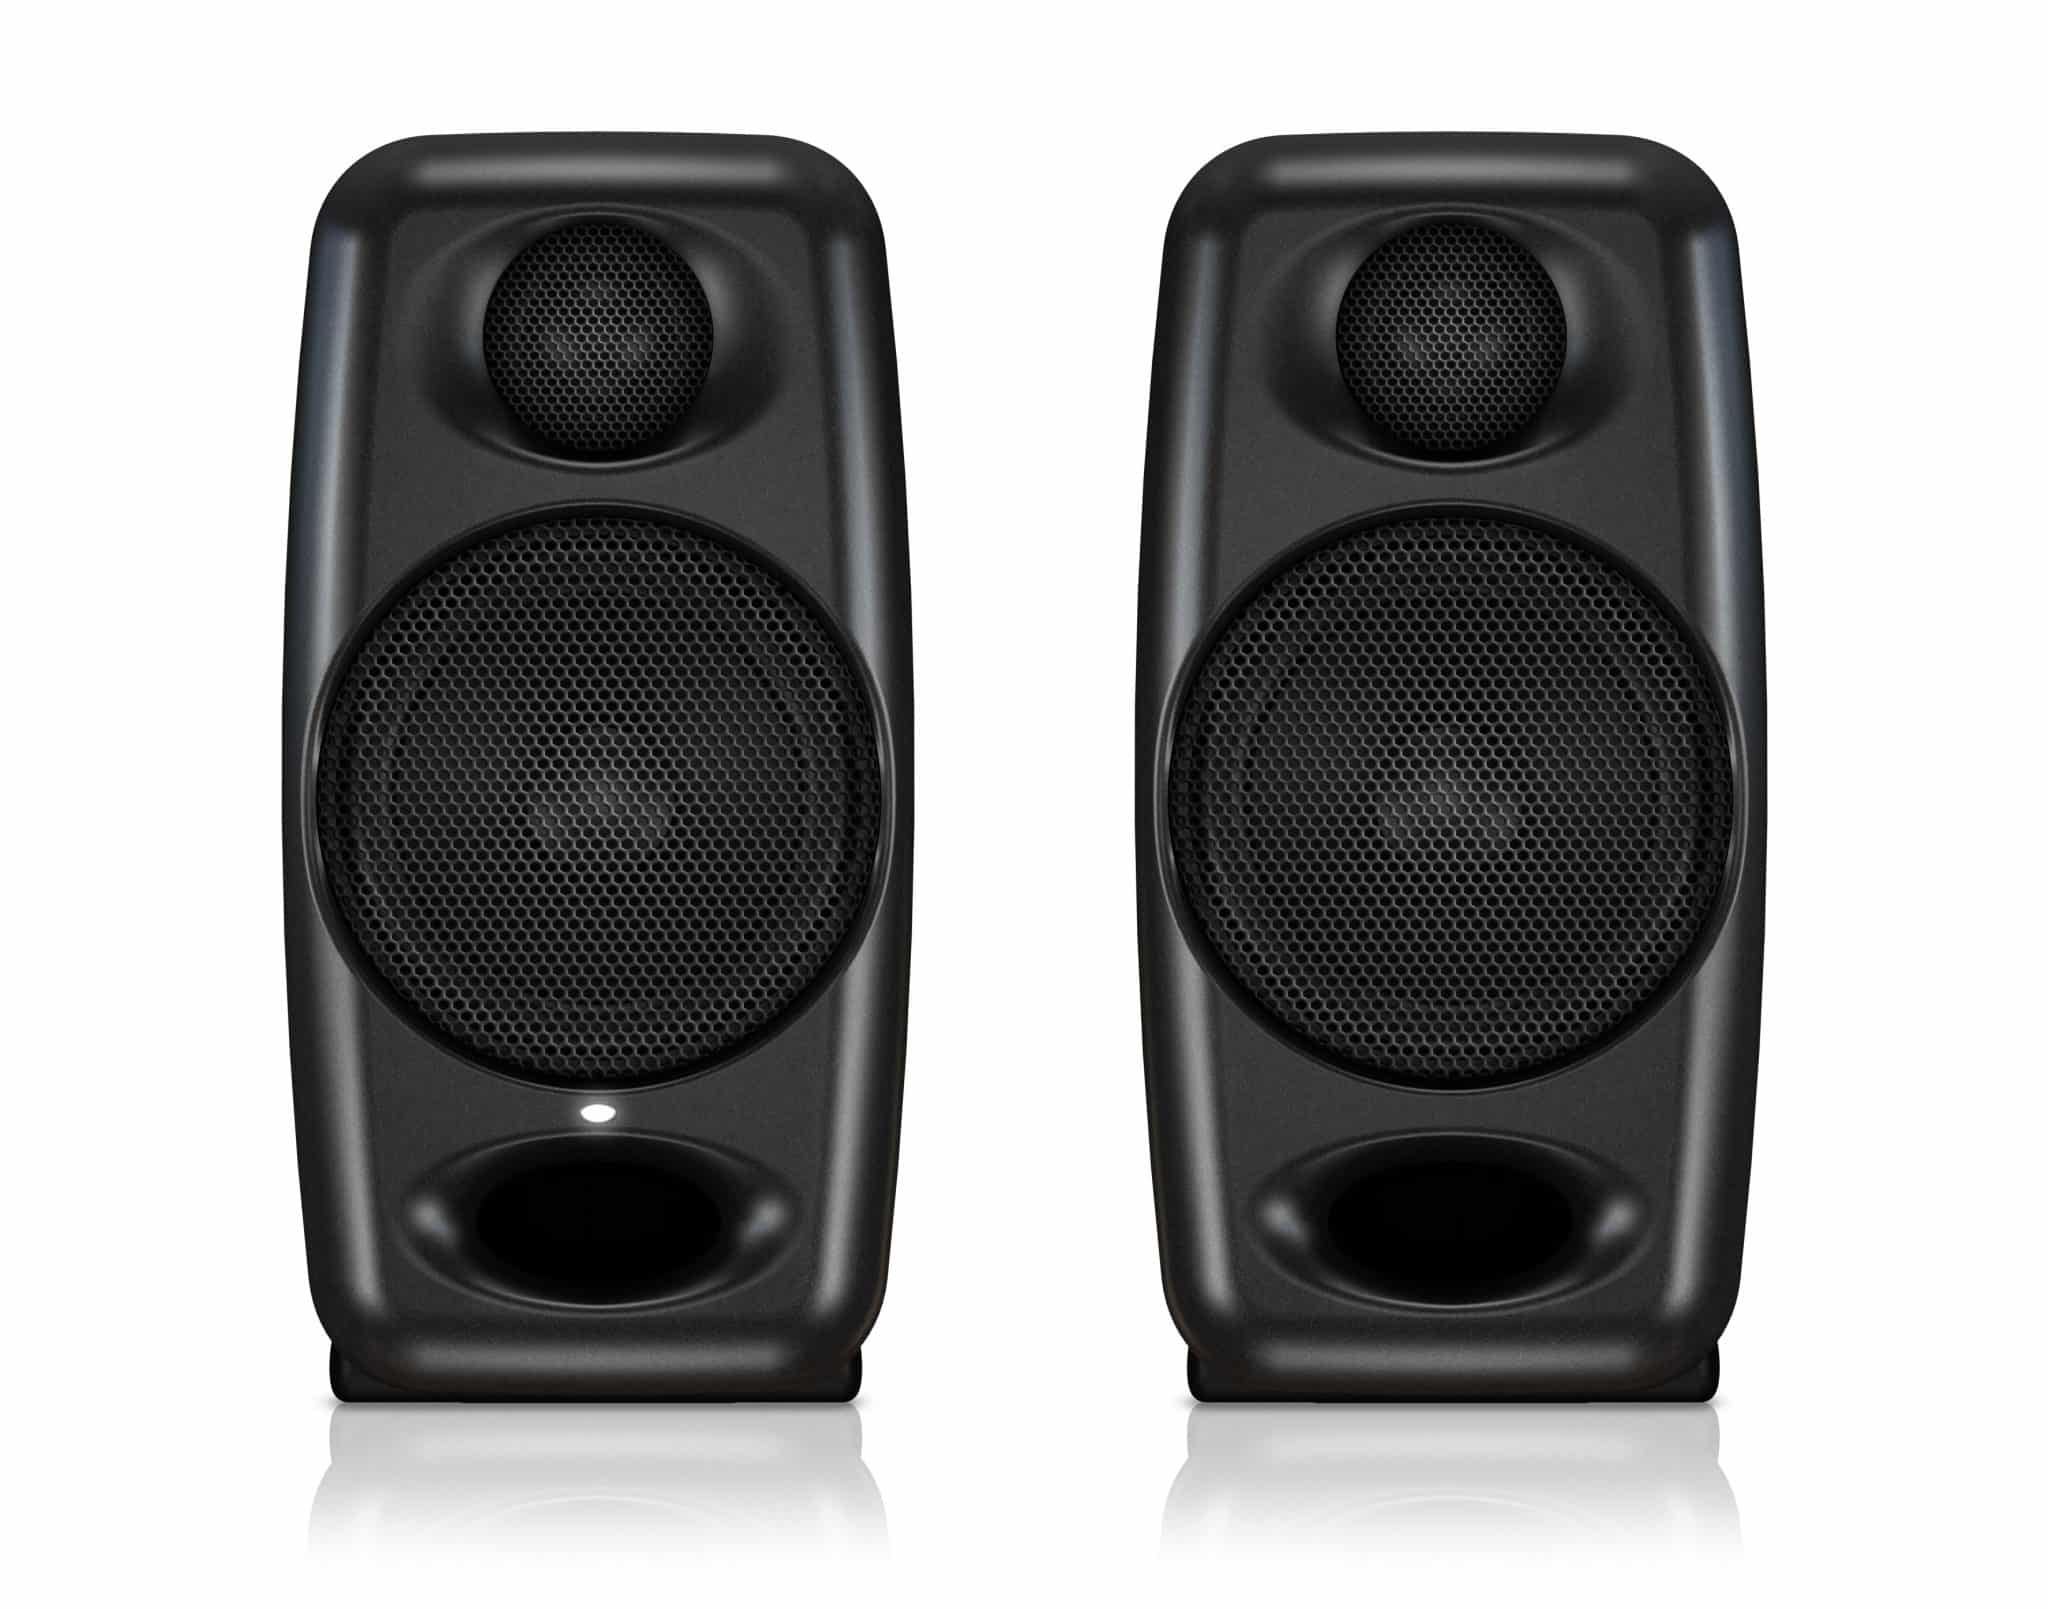
The woofers are 3″ and the twitters are 3/4″. They are perfectly balanced and tuned from the factory, and this thing astounded us for such a small and lightweight package. You are getting a lot for the package, trust us on this. The bass port is in the front, so there is no worry that the bass will reflect from the wall behind the speakers. Also, we found that the monitor pair produced more than adequate headroom. Of course, you cannot compare it to systems costing ten times the money, but for what they are, they bring a lot of utility to the table.

Another thing that surprised us was the stereo field. You get a really immersive experience and can fully work on your tracks with these. When using a stereo widener, you can really feel the setting, as well as for panning and summing into mono. Stereo effects come alive, delays, reverbs, choruses totally make sense and you can pretty much get a feel for each setting that they can offer.

IKMultimedia iLoud Micro Monitor Review: Connectivity

Ok so sound is good, portability is good, what about gear compatibility. This is possibly a weak point for these products, as they do not offer TRS and XLR connections, only RCA. So there is no option to add a balanced cable to this and get rid of interferences. Also, since you will be using them on the go, you should buy a very good quality RCA cable pair, as plugging and unplugging RCA sockets ruin them fast.

We would love to have an XLR and TRS connection just for the sake of it, because most pro studio gear has them and not RCA. But we think that these monitors are perhaps aimed at a different audience, one that travels a lot and simply does not own big studio equipment to plug them in.

The fact that they have Bluetooth connectivity confirms this, you can get away with using just a laptop with no sound card with these, and Bluetooth being fully digital you will not get cable noise in your audio signal path.

You only plug one into your wall socket and audio source, and the other one has a single cable connection and acts as a receiver only. So this might open other issues like imbalanced panning, just so you know. This can also be an advantage when travelling, if you don’t want to pack a power extender with you, two sockets will do just fine, one for your laptop and one for your monitors.

IKMultimedia iLoud Micro Monitor Review: Processing

IKMultimedia has a lot of experience in digital sound processing (DSP). Thus, they have fitted the with a very powerful 56-bit chip that can do this, as a unique selling position. DSP features include controlled diffraction / low resonance enclosure and time-aligned crossover. Their chip also handles the linear frequency response, providing real-time micro adjustments to the output sound. Also in control is the dynamic range and the twitter/woofer crossover, so rest assured that you are in good hands when you use this product.

The monitors also have a very nice selectable EQ room correction so you can adjust them to where you are at that particular moment in time.

Included in the package is also a very nice software monitoring suite, so you can get to work straight away. Yes, we are talking about IKMultimedia’s own T-RackS 5 metering VST suite, worth $125 + VAT.

Final Thoughts

For what it is, this product is great. Yes, you get a very small package and this is by far the best feature of the IKMultimedia iLoud Micro Monitor system. You can adjust them both physically and sonically to your listening environment. They fit in a small bag and are very lightweight.

The sound is much better than expected. Sure, they lack low end but that is natural and it is advised to use headphones for bass anyway. The materials are quality and the productivity increase is huge, especially when travelling.

The monitors have very powerful DSP features built-in but they lack professional connection types, which can be a let-down in some cases. However, you will not be travelling with your full-sized mixing desk and the use of a direct Bluetooth connection with your laptop eliminates the need for a sound card entirely.

For the price, there is no better travelling sound monitoring solution than the

The Best Microphone for Podcasts and Youtube – Reviewed and Compared [2023]

So you are starting your channel and are in the market for the BEST Microphone for Podcasts and Youtube. Starting your own media outlet feels very nice, but not having the best gear can really ruin your day. Follow us further and we will guide you to get the best gear for your needs, without breaking the bank.

Editor’s note: This list is always updated to always reflect the status of the market, so make sure you bookmark it and come back for your future purchases.

You are going to need a couple of things, a good microphone, a great microphone arm, a sound card and a good computer that allows you to also record video on top of your microphone and voice. You should never overlook the basic stuff, like cables, internet connection and software.

The best thing about microphones for podcasts and youtube is that there are a lot of choices for you in the market right now. This niche is no longer narrow and expensive, and there are even some microphones that run on USB so you don’t need a sound card. We picked a winner for best performance and one for best value. Both our winners only have the USB audio option, so if you want a better sounding piece of hardware, be prepared to also pay for a sound card. If you are on a laptop and prefer to be on the move, then get an USB-only microphone as the value is extremely good.

Note: if you are on a mobile device, scroll left and right in the table to see all the entries, and up and down in the cells to see all the content.

Product Name Main Features Our Rating Price
Editor’s BEST Choice
Blue Yeti USB Microphone
– USB Only
– Excellent build quality
– Versatile microphone
– Small footprint
– Does not need arm
9.4 100$ – 150$
CHECK CURRENT PRICE
Editor’s VALUE Choice
Blue Snowball USB Microphone
– Does not need arm
– USB only
– Mini stand included
– Choose your own color
8.9 50$ – 100$
CHECK CURRENT PRICE
Audio Tehnica AT2020
– Accessible studio quality
– Very correct sound reproduction
– XLR/Audio connection only
– Does NOT come with XLR Cable
9.4 150$ – 200$
CHECK CURRENT PRICE
Shure MV7
– Built in Headphone Output
– May be too expensive for what you need
– Never needs an upgrade
– A lot of software control for it
9.8 Under 300$
CHECK CURRENT PRICE
Presonus Dynamic Broadcast/Podcast Microphone
– Made for podcasts
– Interesting design
– XLR/Audio connection only
– Good bang for buck
9.0 100$ – 150$
CHECK CURRENT PRICE

Microphone for Podcasts and Youtube – market overview

Over the last few years or so, we’ve seen the rise of famous YouTubers and it seems that many other people are trying their luck in this field. They, or at least the ones that aspire for greatness should be using good microphones in order to sound great, especially on headphones where a bad quality microphone can simply ruin the viewer’s overall experience. Especially true for podcasts and content where only the voice is heard.

We have rounded up our own little Top 5 of aspiring products for the title of BEST Microphone for Podcasts and Youtube. We have a varied selection, ranging in the 50$ to 300$, and all products can be found on amazon.com. Our overall winner is a flexible, trusted solution that sends audio signal straight to the computer via USB. If you want more sound quality though, you will have to go with an XLR connection and a sound card. But if you are travelling for interviews or just don’t have the space, an USB connection only microphone could be more attractive.

Luckily, we have an article on the BEST Sound card for Podcasts and Youtube here.

#1 BEST USB Microphone for Podcasts and Youtube – Blue Yeti USB Microphone

After much deliberating, we’ve decided to award the title of BEST Microphone for Podcasts and Youtube to the Blue Yeti USB Microphone. Yes, you will say that it is standard but it is there for a reason. We like the Blue Yeti product because it has USB audio, so you get to cut a lot of the costs associated with your podcast or youtube channel, that is has a very small footprint and that you don’t need a stand for it.

The microphone is extremely easy to use and sounds great because of the three condenser capsules it has. The microphone just sits neatly on your desk and captures your voice in good isolation. But if you also want to capture some background sound for any reason, you can have it do this as-well due to the shape selection switch.

The Blue Yeti USB Microphone has a headphone output and volume control on the front.

This microphone has four mic type patterns, depending on the way you want it to capture sound: Cardioid, Omni, Figure-8 and Stereo. Cardioid is recommended for just recording your voice, but if you want to delve deeper or require also ambient sound or effects, you can use it to capture more with ease.

#2 BEST Value USB Microphone for Podcasts and Youtube – Blue Snowball USB Microphone

This is somewhat of a cheaper product if you don’t feel like investing a lot of capital in great microphone right away, and want to try the waters first and see if you like doing podcasts or Youtube content. The Blue Snowball is the younger, smaller brother of the Yeti microphone as both products are made by same company.

Again, we have an USB-only audio connection. Fitting for simple setups, with limited budgets. Unfortunately, the DAC (the component that translates analog sound vibrating through the air into digital signal for your computer to process) is integrated into this cheap microphone. You don’t have the option to upgrade the DAC like you would a sound card so you are stuck with average sound quality.

The Blue Snowball Microphone for Podcasts and Youtube shines in the value department, you pay a small entry price into the world of content creation and you honestly get a lot for this cost.

Just like the Blue Yeti USB Microphone, the Snowball also has a selection of geometric modes, but sadly the “stere” one is missing. And if lighting is your thing, you can choose from up to six color styles with the brushed aluminium variant. If you don’t want vibrant coloring and are going for a more professional, refrained look, try the “Textured White” or “Gloss Black” finish.

XLR connection vs. USB connection

And now we would like to move to the professional segment. These microphones require a sound card with an XLR socket to function, they also require phantom power (supplied by the sound card). But having these things means actually means that there is more space in the microphone for actual sound components.

XLR connected Microphones for Podcasts and Youtube are always a better choice than USB ones.

This is because instead of having a DAC and a power supply built in (so it can take power and send direct digital messages to USB), they offload this task to the sound card so that they can pack a much better sound quality puch.

The downside is that you also need something to plug them into via XLR connection. This secondary device captures the analog sound signal from the microphone and transforms it into digital data for the computer to read. That is what the sound card does, and this is why you pay for it.

XLR connected Microphones and their soundcards cost way more than the USB option.

Still, these types of content creation microphones are very relevant to those that need sound quality, especially if you also create sound that is not voice based for your content and thus use instruments that you plug into your sound card as-well.

#3 XLR Microphone for Podcasts and Youtube – Audio Tehnica AT2020

This one is the first XLR product on our list. It represents a mid-range condenser microphone pretty well. We would always recommend this one as an entry level XLR microphone because it will introduce you pretty well to the dynamic nature of voice recordings. You will be able to sound more dramatic or more mellow depending on your content.

For this market segment we decided to award the Audio Tehnica AT2020 the title of BEST Value XLR Microphone for Podcasts and Youtube.

The battle was with another Audio Tehnica product that is a bit more expensive, the AT2035. We have a whole article about the AT2035 vs AT2020 them here. The article also explains the XLR standard to some extent, so you can understand analog sound specifications.

#4 USB+XLR Microphone for Podcasts and Youtube – Shure MV7

This one marks the entry into the high end market space. If you are here, you know what you want and you can specify it. The Shure MV7 is a mixed connection type microphone, it will take USB or XLR depending on your label.

It is fully advised that you if you can spare the money and don’t have a sound-card yet, get the Shure MV7 and use it on USB until you can afford it.

The specifications of this microphone look very good, and there are also a lot of “handling” features like an integraded headphone output, panel touch controls and the software suite you can use to process the sound on a desktop or laptop further. Imagine that this is three times more expensive that the BEST USB Microphone for Podcasts and Youtube, but believe us, it is worth it. We cannot recommend an upgrade mic to the Shure MV7 that doesn’t cost more than 1000$.

#5 XLR Microphone for Podcasts and Youtube – Presonus Dynamic Vocal Microphone

And we had to have a Dynamic microphone in our top because sometimes you don’t have the best studio out there and you want something that can just work in any conditions.

The Presonus Dynamic Vocal Microphone for Broadcasting and Podcasts is a budget XLR-only option that can deliver. Sure, it will lack mostly all the features that the 300$ option puts on the table, but at least sound quality is good.

We can recommend this microphone for content creators that already have a sound card for other projects, and want to describe their projects with a microphone. Just pay a small fee for this microphone, plug it into your sound card and start creating.

Final Thoughts on Microphone Choice

As you can see, the microphone market is very mature and options abound in 2023. Still, we stick to our internal way of thought, and would recommend an USB option if you want to start your channel pretty fast and don’t know how to operate audio equipment. We have provided two choices here.

If instead you know how to record audio and have a soundcard, we would recommend the high end or the budget option for XLR Connections.

Still, there is a third way, if you know how to record sound, but don’t have a sound card yet, buy the Shure MV7 since it has both XLR and USB.

As always, we welcome your feedback in the comment section.

Modular Synth workflow for beginners – Visualise patch cable voltage values

Building and having a modular synth can be a bit of a hassle. And when I say a bit, I mean a lot. Not being able to see any modulation values is one thing. Then, there is the fact that you will never be able to save a general patch due to the flexible nature of the synth. Also, another drawback is that stereo is close to non existent (unless you want to buy two of the same modules), not to mention polyphony (unless you want to buy six of the same modules to get a six voice synth).

But programming, or should we say patching a modular synth is so much fun. And you get a wonderful sense of freedom.

Still this alone does not make modular so attractive, especially if you are new to synths all along. Today, I will show you one product that makes entering this very distinct domain much more easy.

Yes, I am talking about Producertools’ new product, their Patchcables with Bi-color LED built in. This is a long time coming guys, for sure somebody would have done this by now. Now there is basically no excuse for you to not build that eurorack system that you wanted. This a pre-order program for now, delayed due to the COVID-19 pandemic. Still, shipping is supposed to be in March 2021.

So basically with these patch cables you will be able to see the polarity of the voltage and a rough estimation of its value. The built in LEDs will glow red or green depending if the voltage is plus or minus, so if the envelope or LFO is basically negative sloped or positive sloped. Also, the light the LEDs emit varies in intensity. You can see how it looks in the video below:

There are of course drawbacks for now, but the manufacturer said that there is minimal interference with the Eurorack Control Voltage that passes through. They even had to design their own LEDs for this.

Still, a bit of voltage does get used by the LEDs so will not reach the source.

So don’t use it with signals that require precision, like controling the pitch of oscillators with 1v/Oct signals. Best use is for non random (S&H) LFOs and Envelopes, where you can just offset/increase send voltage in order to compensate for LED consumption.

Get your own set of Patchcables with Bi-color LEDs on the Producertools website here.

Mixing vocals tutorial & cheat sheet – FREE PDF

Hey friends, good to talk to you again! For those of you that are not subscribed to the iDesignSound.com newsletter, you may have missed this very interesting document in regards to mixing or should I say, fitting, vocals into tracks.

It would be so not like you to miss out on this very important information so we would suggest that you sign-up for the iDesignSound.com newsletter. We will not spam you, but provide very important and relevant information in the field. Our subscribers got this information ahead of time but we figured it is too good to miss so we are providing it to you as well, at the bottom of the article.

Please find the newsletter register form below:

Now, Slate Digital, the company know for very very good emulation of hardware outboard unit, have released this very good pdf booklet about mixing vocals.

Vocals are extremely tricky to get right given the dynamic nature of the human voice, the broad range of frequencies it covers and the somewhat hard to obtain sweet spot of modern music mixing.

And if you plan to record your own voice and process it with this guide, we have written a very extensive comparrison and review for the best microphone arm on the market right now.

Slate Academy, the tutorial side of Slate Digital’s business, has got this covered with six parts, following the signal path and the natural way of sound treatment:

  1. Corrective Eq
  2. Compression
  3. Tone shaping
  4. De-essing
  5. Air
  6. Stereo processing (Reverb/Delay)

We found this list very handy, from the perspective of information contained as well as structuring, so without further ado, here is the download link for the PDF:

Key differences between Chorus, Flanger & Phaser Explained

If guitars were rifles, pedal effects would be ammunition.

There’s only so much you can achieve with a clean guitar sound, and it’s more than safe to say that effects such as Chorus, Flanger, and Phaser are capable of completely shifting and changing your tone, for better or worse.

Now, skilled guitar players instinctively know the differences between various pedal effects, but most of the time people are more concerned about where and when they can use a certain type of sound rather than wreck their heads trying to explain ‘how and why’.

Today we are going to attempt to thoroughly examine some of the key differences between chorus, flanger, and phaser effects, so buckle up and stay for a while.

Chorus in a nutshell

The ‘chorus effect’ is easily one of the most iconic pedal effects among guitar players.

We could go as far as to call it ‘choir-us’ mainly because it’s supposed to make the guitar sound much bigger than it actually is.

It’s ideal for single-guitar bands, troupes, and performers who want to duplicate (or triplicate) their sound in a live setting and for studio musicians who don’t particularly like laying down numerous tracks where they can achieve the same effects with a pedal as simple as this.

How it works

The Chorus effect modulates the pitch of your tone ever so slightly; it basically reproduces the exact signal of your guitar’s vibrations but at a slightly different pitch and time.

The potential of the chorus effect is vast, which means that it can subtly enhance the depth of your tone or it can simulate another live guitar, depending on how you set its parameters.

In a bit more technical terms, the chorus effect is achieved when the pedal takes the signal before melding it with pitch-modulated copies of the original signal.

Depending on the model and parameters, the post-produced signal copy can be singular or there could be numerous. The more ‘layers’ the pedal makes, the bigger your tone will become. 

How to use it properly

Essentially, it’s a straightforward effect that doesn’t exactly require much skill and experience to be used, although it’s kind of addictive in the sense that it may leave you with the feeling that you always need ‘more’.

It’s a modulation pedal, which basically means that it’s supposed to sit at the back end of the signal chain, right after wah-wahs, compressors, overdrives, or distortions.

Due to the fact that chorus pedals aren’t necessarily the most intricate contraptions and feature only a handful of control knobs, you’ll typically only have depth and rate to worry about.

Set these parameters low to enrich your sound in a subtle, delicate way; when set at halfway you’ll add plenty of character to your tone while going anywhere beyond this point is not recommended if your signal chain is encumbered as it is.

Flanger in a nutshell

The flanger effect is one of the most enigmatic guitar gizmos to this day; it was artificially created (by accident) in old-school studios back in the tape-recording days (4-track and 8-track machines) by touching the flange (the rim of the tape), although nowadays the process of ‘flanging’ has been tamed and digitalized.

The ‘flanger’ effect sports characteristics of numerous other pedal effects – it’s based on delay pedals, but its unpredictability often leads it towards phasers, overdrives, and distortions, obviously depending on its parameters.

Furthermore, this effect was created by playing two tracks at the same time, which further means that it also shares some similarities with choruses to some extent. As we’ve already discussed, chorus pedals modulate and blend the altered signal with the original one, which is partially what happens with the ‘flanging’ effect too.

How it works

Flanger works in the same way as most modulation pedals do; this pedal splits the signal in 2 identical paths where the original is untouched and the second one is just slightly delayed (measured in milliseconds).

The tweaked signal is then modulated both by speeding it and slowing it cyclically. The ‘modulated’ signal is then blended with the original signal.

What’s most important to understand about flangers is that their altered signal is actually tweaked at ‘random’ unpredictable intervals whereas other modulation pedals offer more control and precision.

The randomness of this effect is the reason why some people use it as their go-to pedal and other guitarists avoid it.

How to use it properly

Flanger pedals are by default wild and pretty hard to tame, but there are more ways than one by which you can gap the small obstacles they present.

The most intimidating parameter of typical flangers is the ‘manual control’, which basically allows guitarists to pick and choose which frequencies they want to alter.

When untouched, the pedal will automatically calculate compatible frequencies and reinforce them (incompatible frequencies will always nullify each other), leading to a slightly clearer tone without sacrificing the punchy feel.

Most flangers typically feature ‘resonance’ or ‘intensity’, both of which relate to the same thing. This parameter affects the effect’s intensity by clipping or feeding a portion of the delay straight back to the original input.

By increasing the ‘intensity’ you’ll add more grit to your tone and achieve a more distorted high-gain sound.

Phaser in a nutshell

Phaser pedals sound almost identical to laymen and beginner guitarists, but in actuality, they share more differences than similarities.

This effect can potentially be used to achieve a mild flanging effect only if its parameters are basically untouched and set on ultra-low settings.

A well-known fact among veteran guitar players is that the phaser effect was introduced to the scene around the same time when flangers came to be. This is probably the reason why new-school players typically don’t make a clear distinction between the two.

In a nutshell, Phasers create a swirling-like sound, much akin to a plane taking off with the only difference being that it is constantly circulating in the fashion of stereo speakers.

One of the most notable benefits of Phaser pedals is that it allows guitar players to create a much bigger atmosphere and ambient, even with smallish amps and relatively mediocre gear. 

How it works

Flangers and phasers operate on similar principles; the original signal is divided into two paths, one path is modulated and the other is completely untouched.

The modulated signal path passes through a series of all-pass filters, which shift the signal’s phase revolving around a variety of (pre-calculated) frequencies. In this regard, the Phaser is not as unpredictable as the flanger, but it’s not as controllable as the chorus.

The modulated signal path is later mixed with the untouched signal path, which results in the ‘swooping’ circular tone.

How to use it properly

The Flanger effect is significantly less punishing towards beginner players; its parameters are not as sensitive, and it’s a bit more versatile altogether.

As far as we’re talking about the signal chain, most people don’t use both flanger and phaser pedals, so you should ideally place either of the two near the end of the chain (after distortion, equalizers, compressors, delays, and choruses).

Typical phaser pedals (such as MXR’s Phase 100) feature simplistic tone controls like Intensity and Speed. The ‘intensity’ basically governs the number of phased stages whereas the ‘speed’ affects the rapidity of signal shifts.

In simpler words, the ‘intensity’ knobs allow you to create different ‘geometric’ signal patterns while the ‘speed’ knobs are there for you to finalize and shape them in more concrete ways.

Similarities between Chorus, Phaser, and Flanger

Essentially, Chorus, Phaser, and Flanger pedals belong to the ‘modulation effect’ category.

Aside from this little formality, they’re also meant to be used in similar ways and operate under similar principles.

All three of these effects divide the original guitar signal path in two after which they alter it in different ways. Although the outcomes are vastly different, these split signals all utilize delays to modulate the frequencies.

From a more practical side, all of these effects have been made available in both pedal and plug-in formats.

The initial modes of achieving chorus, flanger, and phaser (particularly the last two) were almost unwieldy and required a dose of technical expertise, whereas today these effects are beginner-friendly and suitable for use by immediate beginner players.

In technical terms, these pedal effects always leave one signal path completely untouched, which means that at least ‘half’ of your tone will remain exactly the same as it originally was, even though this is not entirely a quantifiable matter.

Even though there are numerous minor other similarities, the most crucial and highlighted ones are:

  1. Chorus, Phaser, and Flanger effects all belong to the ‘modulation’ category
  2. The same method of operation and functional principles
  3. The unfiltered signal path is always non-modulated and identical to the original
  4. All three effects utilize delays to affect the filtered signal path
  5. Modern-day pedals have made these effects more accessible to beginner guitar players

Differences between Chorus, Phaser, and Flanger

Now that we’ve touched upon the similarities between Chorus, Phaser, and Flanger it’s time to dig into the main course – the key differences that separate them.

Though there are many dissimilarities between them, we’ve plucked out the most notable ones and grouped them in the appropriate categories, starting with…

Sonic differences

The Chorus effect is, essentially, much different from Phaser and Flanger, at least sound-wise. It’s ‘mellow’ tonally whereas Phaser and Flanger are closer to overdriven types of sounds.

Even when the parameters of a Chorus pedal are set to their extremes the end result still boasts clarity when isolated. However, choruses are seldom used as standalone effects.

This pedal effect is more of an ‘adhesive’ type in the sense that it extends itself across the spectrum of other effects used in the chain. Phasers and Flangers tend to dominate the chain with their grit.

Differences in application

Distortion effects are commonly associated with rock & heavy metal while chorus, phaser, and flanger effects can be used in pretty much any music genre and can fit into any playing style.

These effects are as versatile as the player’s creativity; in that regard, they can be used in almost any song or performance piece, although exceptions should be obvious.

Since phasers and flangers affect the frequencies of the guitar’s signal in a relatively similar way, they almost cross each other out.

In simpler words, most guitar players use either a phaser pedal or a flanger; rarely both.

Differences in versatility

In this particular scenario, ‘versatility’ refers to the flexibility and freedom as far as tweaking with control knobs and parameters are in question.

Tuning up all the knobs to their extreme would make any sound muddy, but especially so in the case of phasers and flangers.

As mentioned before, these effect types tend to dominate the signal chain, which oftentimes diminishes the presence of other pedals and effects.

In that regard, Phasers and Flangers are slightly less versatile than choruses.

Obviously, Phase and Flange pedals are fairly different between themselves too. Phasers are slightly easier to control, but more importantly, they offer a more calculated and more predictable approach to tone-tweaking.

 On the opposite end of the spectrum, Flangers don’t affect the tone so drastically and can be used for extended periods of time without compromising the tone’s integrity.

The swirling of Phasers makes them ideal for song parts that need to be accentuated (particularly solo sections) whereas Flange pedals can easily substitute for overdrive and distortion when need be.

Conclusion

Every pedal effect type is different. Moreover, every model is different from another; two different pedals that belong to the same category can be so strikingly different that some people would assume they serve different purposes.

Even so, the contrasts between Chorus, Flanger, and Phaser are undeniable and to a certain extent obvious.

From the variance in sound, over dissimilarities in application to differences in application, by now we hope that we’ve helped you make a distinction between these pedal effects.

Famous Synth Emulations- Classic Hardware Without All The Hassle

Iconic analogue synthesizers are either too hard to find, too pricey, or both.

Even though we’d all love to have beautiful beats such as Steinberg’s E or Roland’s SH 101 physically present in our workspace, the age of technology provides far more convenient and compact alternatives.

Today we are going to talk about some of the most famous synth emulation programs; replicas that are true to the originals in terms of aesthetics and performance, and plugins that are incomparably cheaper. 

Cloud Jupiter 8

The Jupiter 8 is, without any shadow of a doubt, one of the most eclectic synthesizers Roland has released, and it’s now available in a software format called the Cloud Jupiter 8.

It’s an exact replica of the original, sporting all of the features that Jupiter 8 comes supplied with, and it’s a perfect choice for people who are looking for a highly versatile and almost perfectly designed synth.

It offers eight polyphony voices, compatibility with VST, AAX & AU, total hardware control via USB connection to the Roland’s proprietary System 8, and a broad spectrum of configurable parameters, knobs, sliders, and faders.

Starting from the very top, the Cloud Jupiter 8 sports a customizable wavetable packed in the LFO section, a comprehensive modulator panel, two individual VCOs, and two identical envelopes.

Furthermore, it comes outfitted with the classic arpeggiator controls and five assignable modes.

The option to blend different patches, being one of the key elements of the original Jupiter 8 synth is also present.

The effects section is isolated, sitting right next to the 5-octave keyboard.

Even though it’s quite modest, it’s true to the original Jupiter 8 and sports effect type configuration, delay time, and revert type knobs.

Obviously enough, Jupiter Cloud 8 is perhaps not as versatile as some up-and-coming VSTs and plugins, but we should not forget that it’s been the industry’s standard for quality of sound for nearly 40 years straight.

Regardless of whether you’re looking for the Jupiter 8 specifically or simply are in need of a strong, well-rounded synth VST, we can safely say you won’t regret trying it out.

Korg ARP Odyssey

ARP’s Odyssey is almost a decade older than Jupiter 8, which can easily be discerned by its design and features.

Even so, it was a groundbreaking synthesizer at the time, and it certainly garnered quite a following in the old-school rock and alternative world.

Korg’s recreation of this remarkable synth is true to form down to the tiniest of details, but there are a couple of obvious differences.

For example, the original Odyssey has a different method of accessing the patch library (analogue) whereas Korg’s version allows you to do that in a much simpler and faster way.

Another striking difference is the fact that the original Odyssey is pretty small and the Korg’s recreation of it can be ‘stretched out’ a bit, which would make the features a bit more visible and thus easier to use as well.

Starting from the top, the first section is dedicated to a split between FM and wavetable-based features.

There are two frequency modulators that come supplied with the same sliders, only in different color.

The sections that follow are meant for fine-tuning of parameters such as key sync, tempo, cutoff, modulation, and such.

There are only a couple of simplified LFO settings on the table, although the Odyssey makes it up for you with a rich VCF section.

One of the biggest features of the KORG Odyssey is the massive EQ section, sporting sliders in different colors for easier organization and navigability.

Lastly, it packs a 3-octave built-in keyboard, which is excellent for electronic music, but not so much for slightly more complex genres.

EFM Sc P5 (Prophet V)

In a nutshell, EFM’s SCP5 is a free VST that aims to recreate the performance of the heavily acclaimed Prophet V designed by Sequential Circuits back in 1970.

It doesn’t resemble it aesthetically, and it only borrowed a couple of its main features, but on the upside it’s completely free to use.

It did not ‘dress to impress’, rather the layout of its features is as such that whoever’s using it can expect to quickly navigate between the oscillators, envelopes, and arpeggiators, which is the reason why it’s suitable for both professionals and beginners.

Nearly all of the sections that SCP5 is outfitted with sport a multitude of control knobs and selectable modes (such as synchronization, filters, external oscillators, unison, and such), with the exception of the dedicated Filter, Mixer, Amplifier, Delay, Chorus, and Master sections, which offer control of the most basic parameters.

Using the SCP5 certainly has its downfalls too; it does not come supplied with a built-in keyboard, nor does it have any kind of wavetable editorial features; again, it’s a free plugin that does offer access to some of the most important Prophet V features, which makes it worth checking out.

Adam Szabo Access Virus Viper

Viper is the recreation of the infamous Access’s Virus, which is one of the younger top-shelf boutique synthesizers that came out back in 1997.

It offers a mixture of authentic and brand-new features, but its performance is definitely based on the actual performance of the original Virus.

Viper offers an all-encompassing wavetable editor, three oscillators, three LFOs, eight effects (all of which can be used simultaneously), twin filter sections, and a smallish Matrix board. It also sports a very versatile mixer board, as well as onboard amplifier controls.

Should you want to boost the well-roundedness of your Viper software, you can also download Phazor free of charge too.

Basically, this is a complementary plugin that offers stage-selection, an additional mix knob, a basic EQ section, and another LFO.

It was specifically designed to be gentle on CPU usage, and it can even be used as a standalone feature, although it’s pretty basic and offers minimal mixing options.

It fills the gaps in AS’s Viper performance, though, and given the fact that it’s a gratis downloadable feature, there’s no reason not to try it out.

Best Moog VST- The classics, updated for 2023

There’s a lot to be said about Moog and Moog VST products, but in short words it’s the longest-running, best-performing synthesizer that stretched from the realms of analog to the world of digital, increasing its already-massive versatility.

Nowadays with such incredible advancements in technology, Moog’s performance and well-roundedness can be tweaked, refined, and sharpened to cater to the needs of individuals with even greater precision via VST (virtual studio tools).

Today we are going to talk about some of the best Moog VSTs in 2023, so without any further ado, let’s get straight to it.

1. Arturia MiniV Moog VST

Truth be told, when it comes to Moog VSTs it doesn’t get much better than the Mini V.

First and foremost, Arturia is a massive brand, and you should feel free to set your expectations sky-high before checking out its specs and features.

Speaking of which, the highlight feature of Mini V is the fact that all of the original’s MiniMoog keys and control knobs are authentically positioned and replicated onto this software.

The main screen of the MiniV is separated into five main parts, including Controllers, the Oscillator Bank, a small mixing console, modifiers, and output.

Now, the controllers are pretty simple and straightforward; here you’ll be able to tweak the Glide, Tune, and the overall mixing controls; the Oscillator bank features three separate oscillator knobs, each featuring its own control knobs; the mixer is the essential component of the MiniV, although its features are pretty simplistic.

The Modifiers section is absolutely brilliant, as it offers separate Filters and Loudness contour controls; here is where you’ll spend most of your time if you’re into production and mixing more than actual recording and playing.

Last, but not least, let’s not forget the 4-octave keyboard that sports built-in glide, decay, legato, and bend controls. All things considered, the MiniV is a compact feature-packed VST that is an absolute necessity for all Moog enthusiasts.

2. Synapse ‘The Legend’ Moog VST

Just like its name implies, Synapse’s Legend is an iconic VST that boasts unparalleled versatility and unequaled mixing capabilities.

Given the fact that Moog features some of the most authentic sounds that are virtually unattainable via digital software, we daresay that The Legend is one of the very few exceptions.

This VST is perfect for studio engineers who have a couple of years of experience under their belt (to say the least), as it is not as simple and straightforward as our previous pick.

It features multiple mixing, oscillating, and filtering control knobs, all of which are incredibly responsive.

The largest chunk of The Legend’s display is taken up by the Oscillator controls.

Basically, there are three separate Oscillators while each has its own set of fine-tuning controls, including 7 waveform presets, range-warping parameters, and semitone pitching.

The Filters section is relatively basic; it features Cutoff, Resonance, and Keytrack controls, all of which are pretty easy to use with a bit of trial and error.

Next up is the Filter Envelope, featuring four built-in effects that can massively alter your tracks; here you’ll be able to tweak Attack, Decay, Sustain, and Release after you’re done shaping the waveforms and recording the initial tracks.

The Legend Moog style VST is not super-cheap, but luckily you can get it in rent-to-own fashion on Reason Studios (by clicking here) which will allow you to familiarize yourself with its features and decide whether or not it is worth the money.

3. GForce MiniMonsta Moog VST

The ‘MiniMonsta’ is true to its name only in regards to its relatively tiny features; this is a fully digital VST that comes packed with dozens of presets and built-in samples, as well as a fully customizable keyboard, all of which will definitely come in handy while experimenting with tracks regardless of your preferred music genre.

One of the biggest differences between MiniMonsta and other Moog VSTs we’ve covered so far is the fact that it has a digital mixer (instead of an analog one).

This means that it’s significantly more forgiving to beginners and intermediately skilled producers and mixers, as all you have to do is simply choose the samples you want to use from the massive built-in library.

The upper section of the MiniMonsta is also digital, and it features LFO, XADSR, and MIDI controls, again all of which are incredibly easy to use.

There are dozens of analog control knobs too; the Controllers, Oscillators, Mixing knobs, modifiers, output knobs, filters, and the overall settings are all analog and remarkably responsive.

In simple words, the MiniMonsta offers affordable means to spice up your Moog experience; it’s versatile enough to cater to the needs of seasoned veterans, but its most basic features are plain enough to be rewarding to beginners too.

4. Syntronik Instruments ‘Bully’

Our final pick is the ‘Bully’, which is a vehement juggernaut of a VST that can easily overpower most of its competition with dirt-cheap price, accessibility, and sheer simplicity.

Now, this is the first beginner-based VST for Moog on our list, and that does not necessarily mean that it’s not as versatile as its more feature-packed counterparts. 

Basically, this is a digital representation of a fully analog Moog mixer that features simplified FX, oscillators, filters, and volume controls.

This VST features two separate oscillators with Tune and De-tune controls; a relatively basic LFO with 5 built-in waveform samples, pitch, pan, and rate controls; an old-school loudness envelope section with Attack, Hold, Decay, Sustain, and Velocity faders, and lastly, one of the simplest Filter sections laden with a plethora of fader controls.

Although it does not feature a built-in keyboard, it’s supplied with a wonderful array of customization controls, sliders, and faders that more than make up for this little shortcoming.

All things considered, it’s twice as cheap in comparison to most popular VST plugins, and it’s certainly well worth the buck. You can get it on IK Multimedia by clicking here. If you buy using this link, we get a small kickback as affiliates of IK Multimedia so you will be helping our websites a lot by doing this.

Conclusion

In all honesty, Moog is so iconic and authentic that most people don’t quite want to ‘defile’ it with VSTs.

However, we have your back covered for the other topic as well, so make sure to check out the Best VST Synths in 2023 rundown. Stay safe!

Shure SM58 vs Sennheiser E835

Sennheiser and Shure are the names most musicians who are worth their salt have heard already; these brands are ‘responsible’ for numerous groundbreaking instruments and gear pieces that have graced the shelves of both physical and virtual marketplaces worldwide, and today we’ve decided to take a gander at SM58 and E835.

These are, in essence, two low-end microphones that boast performance levels which greatly surpass their price tags.

They sound awesome, they’re pretty versatile, and we aim to delve deep into details that could explain their exact value for the money.

Without any further ado, let’s get straight into it.

Shure SM58 in a nutshell

In simple words, Shure’s SM58 is a dynamic microphone with a super cardioid pickup pattern; it boasts a frequency response range of 50 Hz to 15 kHz; its output impedance is measured at 150 Ohms, and it is light as a feather with only 0.66 pounds of weight.

It sounds great, especially given the fact that it’s barely more expensive in comparison to an average budget microphone, and it’s certainly built to last.

It kind of looks a bit basic, though, and it’s only available in one color style option.

Sennheiser E835 in a nutshell

If it weren’t for the color and size, most people wouldn’t be able to tell the E835 from SM58.

This is a dynamic microphone with a super cardioids pickup pattern (exactly like Shure’s SM58), and it weighs almost the same (0.73 pounds).

The frequency response range of the E835 is a bit broader, spanning from 40 Hz to 16 kHz, and its output impedance is almost twice as strong in comparison to the SM58 (350 Ohms).

Design and aesthetics

Just like we’ve mentioned a second ago, Sennheiser’s E835 and Shure’s SM58 share the same type of design; they’re both dynamic microphones with super cardioid pickup patterns; this makes them extremely versatile for musicians; at the same time, it makes them really hard, and maybe even a bit unwieldy for podcasters, influencers, YouTubers, and such.

In terms of aesthetics, the Sennheiser’s E835 features a grey finish with a black screen whereas Shure’s SM58 has a black finish with a silver screen.

This is entirely a matter of subjective preference, especially given the fact that these are basically the only colors available.

All things considered, we have an obvious draw; both microphones are designed the same, and they look pretty much alike.

Durability, size, and weight

The dimensions of Shure’s SM58 measure 6.3 inches by 2 inches while the dimensions of E835 measure 7.08 inches by 1.88 inches. Obviously, the SM58 is just slightly smaller, but the difference is so small that it’s negligible.

In terms of weight, the SM58 weighs 0.66 pounds while E835 0.73 pounds. Again, we see a bit of a difference, but it’s too small to be discerned unless put under a ‘microscope’.

Now, as for the durability part; Shure’s SM58 is built to last, just like the vast majority of Shure microphones. It features a robust metal construction, and it pretty much feels durable to the touch.

The windscreen also excels in this particular field of performance, which is the reason why many live performers lean on it as their go-to instrument.

The situation with Sennheiser’s E835 is not much different; it’s made of almost exactly the same materials, which provide it with almost the same level of durability. In fact, even the windscreen is as robust as the one that SM58 comes supplied with.

Again we don’t have a clear winner; it’s obvious that there are little differences that set these two microphones apart, but none that are significant enough to actually have an impact on their overall performance.

Frequency response

The first actual difference between SM58 and E835 is their frequency response range. Let’s remind ourselves – Shure’s SM58 has a frequency response range that spans from 50 Hz to 15 kHz while Sennheiser’s E835 has a range of 40 Hz to 16 kHz.

Now, even though the SM58’s range is way better than average, Sennheiser’s E835 beats it by hair’s length. Its range is extended in both ways, which means that it can pick up on even lower frequencies (by 10 Hz) and even higher frequencies (by a full kHz).

Performance in action

These microphones are similar in a plethora of ways, and that includes their intended application.

Both SM58 and E835 are excellent-quality microphones for both on-stage performing and recording.

The main reasons why they are so versatile are that they come supplied with top-shelf features and excellent frequency response ranges.

Price

Ironically, these microphones cost almost exactly the same. In fact, the difference might be a couple of cents, but they’re in the exact same price range, without even a full dollar separating their price tags.

Similarities

It probably would be easier to point out the differences first (since they are in smaller number), but for the sake of formality, let’s number the many similarities that these microphones share between themselves:

  1. Same design (cardioids)
  2. Similar aesthetics
  3. Almost the same price range
  4. Both are great for live performances and studio work
  5. Both are built to last for decades
  6. Excellent sound quality
  7. Phenomenal screens
  8. Adequate impedance levels

Differences

It was pretty hard figuring out which difference between these two microphones was actually the most important one, but after taking the fact that there aren’t so many into consideration, we’ve figured it’s the frequency response range.

Basically, the only edge E835 has over SM58 is the fact that it has a slightly broader range (both lower and upper); it might be worth mentioning that SM58 is slightly lighter, although both are basically equal in terms of durability.

Conclusion

Although E835 is slightly better than SM58 in a couple of performance aspects, they’re very much alike.

In fact, most people wouldn’t be able to tell the difference between these microphones, aside from bands that are tuned in either super-low or super-high tunings.

Overall, you won’t make a mistake by picking either one.

Best Prime Day 2020 Music Promotion Deals

It’s (kind of) finally here- The shopping season is upon us and as always, retailers are starting off with a bang with amazon’s prime day.

Although pioneered by Amazon, several brands have joined in on the fun and have started offering up to 90% off their products.

And, as always, we’re here to guide you through the best deals and freebies

VST Plugins Prime Day Deals

Waves

As usual, Waves is running a series of crazy discounts. They are marketed as black Friday deals, though we’ll include them here are they are still on time for prime day.

We still consider their subscription to be one of the best deals out there, especially because it includes a free trial period of 1 month– more than enough to produce several award-winning tracks.

Scheps Omni Channel- 74% off (38.99$)

The Scheps Omni Channel gets its name from the brilliant Andrew Scheps- engineer to jay z, Adele, Metallica, and many others.

This channel strip is a staple of any modern producer, and it’s now 74% off!

Vocal Rider- 86% off (35.99$)

Vocal rider is known for its simplicity and effectiveness. It will adjust your vocals automatically with great results.

It’s at 86% off for a limited time.

Waves Tune Real Time- 82% off (35.99$)

If you run a studio or record vocals frequently, this is a must have VST. It allows singers to stay in tune in real time. It’s basically a magic box that makes anybody a great singer.

At this price, this is a great tool to just play around if you ever wondered how your voice would sound if recorded professionally.

There are a bunch more waves plugins heavily discounted at the waves website, these are only the ones that caught our attention, for a full list, click on the link below:

WAVES DEALS

Plugin Boutique

W.A Productions Back to School Bundle- 95% off (9.99$)

For the price of an expensive coffee, you’ll get WA Babylon, instascale and instachord.

It’s a no-brainer.

Soundspot Union & Expansions sale 90% off (16$)

IK Multimedia

Total Studio Max 2- 75% off (249.99$)

17 synths with over 2000 presets, 2 400 instruments, 34 effects, 39 high end audio processors, guitar amps, samples, and much more.

All this for 249.99$ (Down from 999$). What more can we say?

Sample Tank 4- 50% off (149.99$)

Included in Total Studio Max 2.

This is a huge sound library of over 260GB with a beautifully designed interface.

IK Multimedia is running a couple of other promotions, which you can check in the link below:

IK MULTIMEDIA

Musical Instruments

Amazon U.S Prime Day Music Deals

Amazon’s prime music deals are too many to list in one single post.

So feel free to browse headphones, musical instruments, and home audio using the link below:

AMAZON DEALS

Best Vocal Mic under $300 reviews

No matter how beautiful and strong your voice is, you’ll need a quality microphone for it to project properly outward.

Some people assume that you’ll need thousands of dollars on a professional microphone, and that might not necessarily be true.

We’ve taken the gander at what the current market has to offer and have come up with a list of the best vocal microphones under $300.

Best Vocal Microphones under $300

Heil Sound PR 35S

Heil Sound’s PR 35S is the best-rounded handheld microphone in the budget section of the market. It sports a three-position roll-off button, an excellent balance between size and weight, and its performance excels at all frequencies.

Speaking of which, it boasts a 40 Hz to 18 kHz frequency range, which is fairly great for a low-cost professional microphone.

What’s more, you’ll also receive a complementary leatherette case that can be used for storage or carrying.

Pros:

  • Excellent frequency response range
  • Ideal balance between size and weight
  • Simple features; easy to use

Cons:

  • A bit more expensive than other microphones in the review

Sennheiser Pro Audio SKM 835

Sennheiser microphones are generally among some of the finest, best-performing models, and we’ve included a handful of them in our review of the best vocal microphones under $300.

The first on the list is Pro Audio SKM 835.

This is an all-purpose tool that will help you out in virtually every scenario possible, be it recording in a studio or performing live.

Although its top end of the frequency response range is a bit lower than average, its versatility is unparalleled in this price range.

Pros:

  • Small and fairly light
  • Exceptionally durable construction
  • Perfect for both recording and performing live

Cons:

  • The slightly inferior upper end of the frequency response range

Sennheiser MD 46

Next up is Sennheiser’s MD 46; in comparison to our previous pick, the MD 46 is slightly heavier and a bit longer, but it’s still considered as lightweight.

It features a double-layer grille basket and a cardioids capsule that excels at picking up the barely audible sounds at the lowest frequencies.

One of the best things about this microphone is that it boasts both wired and wireless connectivity modes, providing you with extra flexibility when determining how you’ll approach using it.

Pros:

  • Built to last
  • Wired and wireless connectivity modes
  • Exceptional performance at the lower frequencies
  • Pretty versatile overall

Cons:

  • A bit heavier and longer than average

Sennheiser E935

The last Sennheiser model in our review is the E935. Just like our previous pick, it boasts wired and wireless connection modes, although it’s strikingly smaller and lighter.

This microphone is perfect for live performers who struggle with on-stage noises, as it eliminates nearly all ambient sounds pretty easily.

Its metal chassis is almost completely impervious to physical damage, and E935 is by far one of the most durable microphones under $300 you can find on the market.

Pros:

  • One of the sturdiest microphones around
  • Excellent for both live performance and recording
  • Top-quality insulation
  • No interference with signals from other amps and instruments

Cons:

  • The heavier head might present problems regarding balance

Saramonic HU9 UHF Microphone

Here we have Saramonic’s HU9 ultra-high frequency microphone; if you’re a gigging musician who’s mainly playing bigger events, such as arenas and larger venues, you might want to check this model out.

Its frequency range is grand, and it actually provides pristine clarity even at super-loud volumes.

The Saramonic HU9 is a wireless microphone that boasts up to 100 meters of operational range while out in the open, and up to 60 meters if there are obstacles present.

It also packs a clearly visible LCD that allows you to see the remaining battery level, active channel, and active effects.

Pros:

  • Excels at handling ultra-loud sounds
  • Tremendous frequency response range
  • Clearly visible LCD
  • Massive operational range

Cons:

  • Potential problems with static interference

Audio-Technica AT2010 Cardioid Condenser Handheld Microphone

Audio Technica’s microphones are designed for professionals by professionals, and this applies to their budget models just as much as it does to top-tier boutique microphones and other pieces of gear.

The AT2010 is one of the most popular cardioids available on the market, as it offers a full package of pristine sound clarity, a balanced and highly durable construction, and a decent frequency response range.

It also sports corrosion-resistant contacts and a high-quality grille design that provides superb protection against physical damage and plosives.

Pros:

  • Extended frequency range
  • Highly durable construction
  • Corrosion-resistant contacts
  • Excellent sound quality and clarity

Cons:

  • Heavier than it looks

Shure SM58-LC

Shure’s microphones invariably find their way into the hands of beginner singers and vocalists, mainly because they sound great while being available at very attractive prices.

The SM58 LC is a true representative of Shure quality, as it offers a frequency response range that spans from 50-15,000 Hz, a pneumatic shock mount system for additional robustness, and a uniform cardioids design that isolates main sounds from ambient noises.

We highly recommend this model for live-performing musicians, although it might not be the best choice for studio recording sessions.

Pros:

  • Optimal frequency response range
  • Works great for rehearsals, band practice, and live performances
  • The built-in spherical pop filter
  • Shock mount system

Cons:

  • Not the best microphone for recording

AKG Pro Audio Perception P5

Let’s wrap it up with AKG’s Pro Audio Perception P5; if you’re looking for a budget high-quality microphone, this might be what you’re after.

It sports a durable wire-mesh cap, as well as a body made of top-shelf metal that can withstand years of use and abuse.

Its sound quality is slightly inferior in comparison to average $300 microphones, but it gets the job done nevertheless.

Pros:

  • Tremendous value for the buck
  • Made of top-quality metal materials
  • Complementary zip bag
  • Integrated windscreen

Cons:

  • Inferior sound quality

Conclusion

Generally speaking, microphones under $300 will get you set for a couple of shows; you might be able to pull off some amazing vocal lines while making records too, and you’ll manage to rise above louder drummers and guitarists, but that’s pretty much it.

However, with some luck, you might end up with a quality microphone that could even potentially become your go-to instrument.

We hope you’ve liked our selection of the best vocal microphones under $300 and wish you all the luck in finding what best suits your needs.