Category Archives: Tutorials

Bedroom Producer Setup – Process, Gear, and Tips

It’s now easier than ever to become a bedroom producer, but with so many options, there can sometimes be very little guidance as to how to get started. A good bedroom producer setup should be in tune with you musically. You should also think it out beforehand so you know it will work with your musical goals. Then, you won’t make any unnecessary investments. 

This article will take you through the basic steps of setup, creating a place to mix and master, and how to tackle the challenges if you are a bedroom producer, don’t have budget to master, or can’t afford much analog gear. 

We’ll also touch on some of the best plugins, whether there is any given genre for a bedroom producer and more. Plus, we’ll look at the easiest way to cover every part of the signal chain for cheap, and what to do if you don’t have space for a proper studio, so read on for the comprehensive guide and some tips for getting started. 

So you want to create a home studio 

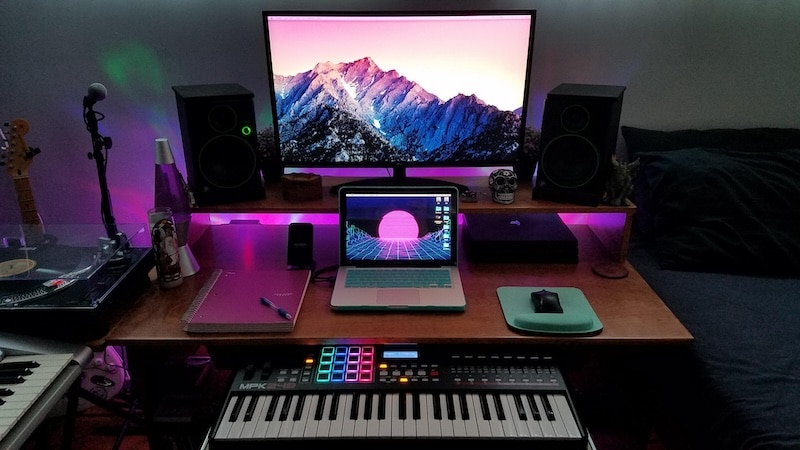
So you want to create a home studio and become a bedroom producer. Even though this might sound like it will cost a huge amount of money, it’s really not that hard. One of the biggest considerations is soundproofing and finding the pace where you can safely keep your gear, as well as setting up a monitor for your DAW and finding an area for taking good recordings, whether vocals or mic’ing up an amp. 

Soundproofing a bedroom producer setup

Soundproofing is one of the hardest parts of setting up a home studio and often one of the costliest. You can minimize a lot of the cost simply by choosing the right space to begin with. 

If you’re a bedroom producer, you most likely won’t be able to soundproof your room fully. Normally, soundproofing involves the use of a floating floor and floating walls so there is a gap between the walls and floor of your studio and the main part of the house. This prevents sound traveling through the walls to the space you’ll be recording in. 

If you can’t manage this, then, how do you soundproof a room? You will need to simply add more mass to muffle the acoustics. You can do this by adding floating fabric panels to the walls or at least one wall, as well as investing in a mic shield and pop filter for when you are recording vocals. 

Monitors

Finding a good pair of monitors is always important! If you’re really on a budget, you may be able to skip this step and just listen to your music through a pair of high-quality producers’ headphones. However, if you’re really serious, it’s best to ultimately invest in a good pair of studio monitors that will allow you to hear your track out loud, like your listeners may do. 

How to choose monitors for your bedroom producer setup

Essentially, you can expect to pay up to around 300 USD for monitors at a beginner level, but that’s not including the costs of other parts of your monitor setup such as mounting them on stands or the foam cushioning needed for this. Brands like Yamaha and IK Multimedia do affordable budget monitors that are ideal for beginner home producers. 

With monitors, you should consider whether you want active or passive speakers. Passive speakers are less expensive, but each variety of speaker or monitor comes with its pros and cons. Passive speakers have to be plugged into an external power socket whereas active speakers have an in-built battery and therefore don’t require external cables for the amplifier. 

Most studio monitors are active and that’s because passive monitors have to be split into multiple components such as subwoofers or eternal amplifiers and so on. This also means that matching impedance within your speaker and amplifier is important so opting for passive monitors, although initially cheaper, is more complex. However, some prefer them as they offer more sonic flexibility over actives. 

Space Consideration For Your Bedroom Producer Setup

When setting up as a bedroom producer, there are a few extra things you should consider in terms of space. Even if you don’t have the ability or budget to put extensive soundproofing in because you’re in a flatshare or similar, you can still do your best to ensure the best sound simply by looking around the room. 

One thing you will have to look out for is standing waves, which can cause interference when sound waves bounce off the walls. This means your mics then sense them. You can do this by positioning your set-up away from any major reflective surfaces. When you position your monitors, they’ll also have to be at least half a meter away from the wall and pointed toward where you will be sitting to produce. Therefore, consider where in your space you set up with reference to the entirety of your workflow. 
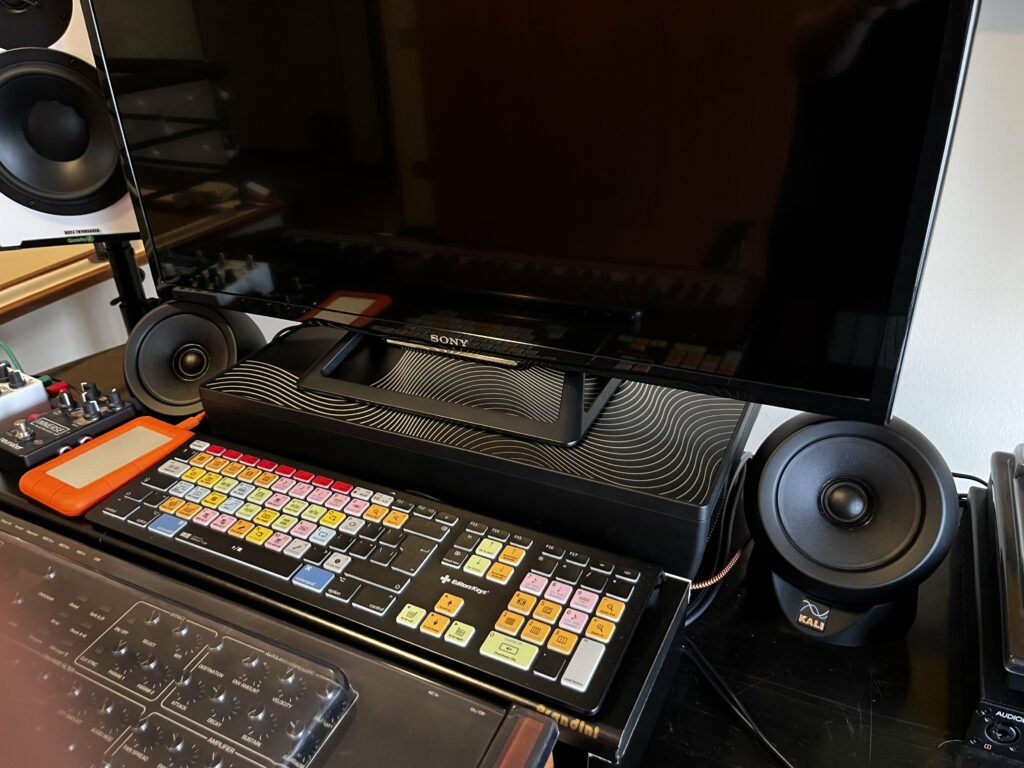
Gear

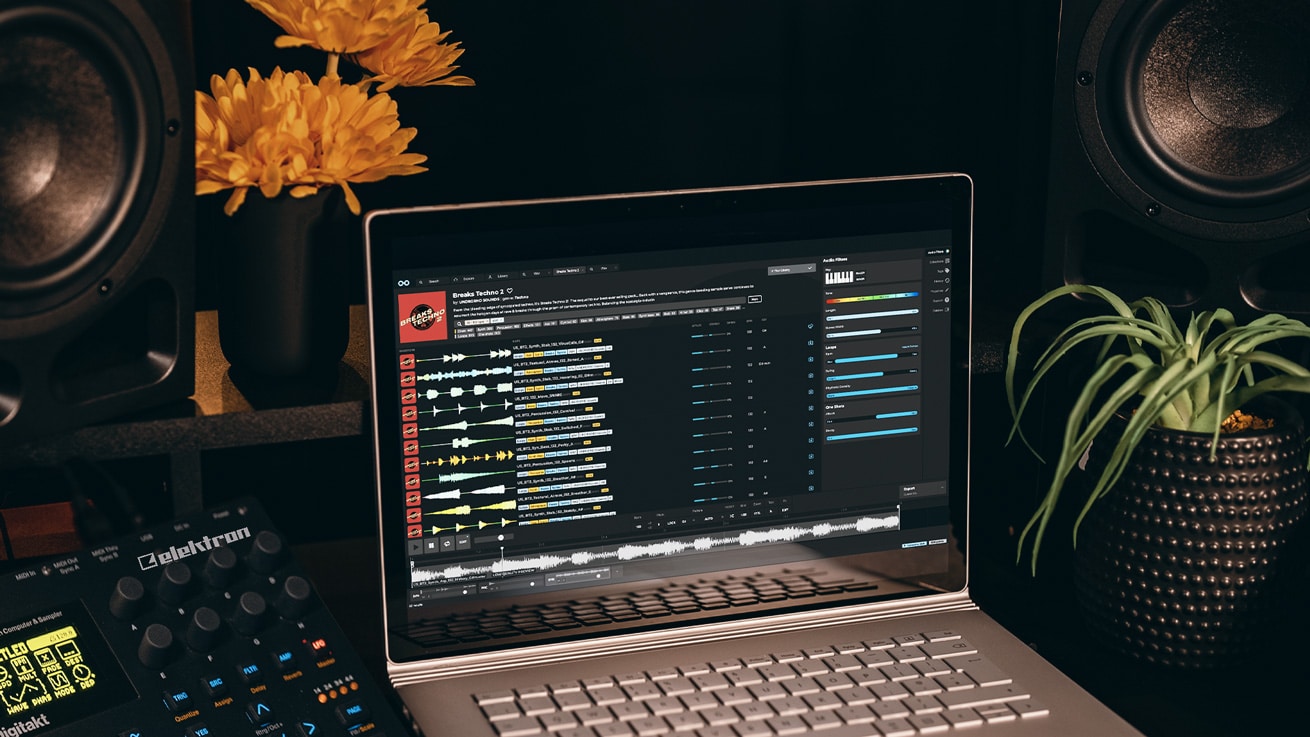
When choosing gear for your bedroom producer setup or home studio, you may have a limited budget and limited space. As a result, think carefully about what you want hardware gear for, how often you will use it, and your genre. What things do you have to have and what can you find a VST substitute for? There are some great VSTS out there on the market now and you may not necessarily have to get the hardware version. There are no specific bedroom producer plugins, although it sometimes hints at lofi, bedroom producer setup does not imply a genre so focus on what you would want to buy as hardware instruments and take it from there. 

That said, some of the top things we think it is good to have hardware of simply because of the scope of sound include a good hardware synth, depending on your genre, one or two amps and the necessary mics for them, and potentially a drum set depending on the genre you are using. You may also like something like Ableton Push depending on your preferred style of working. 

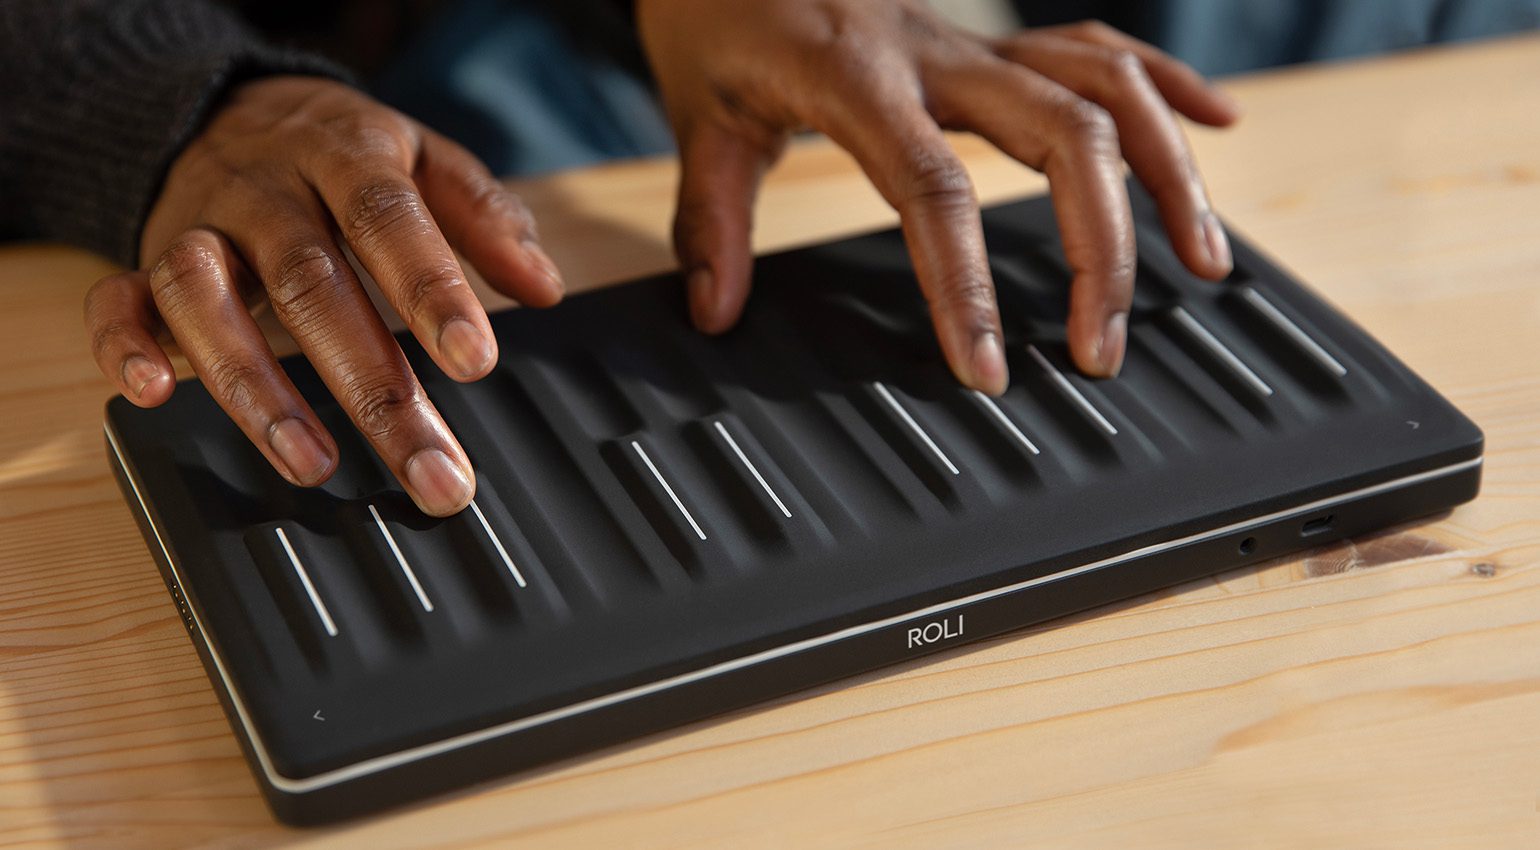
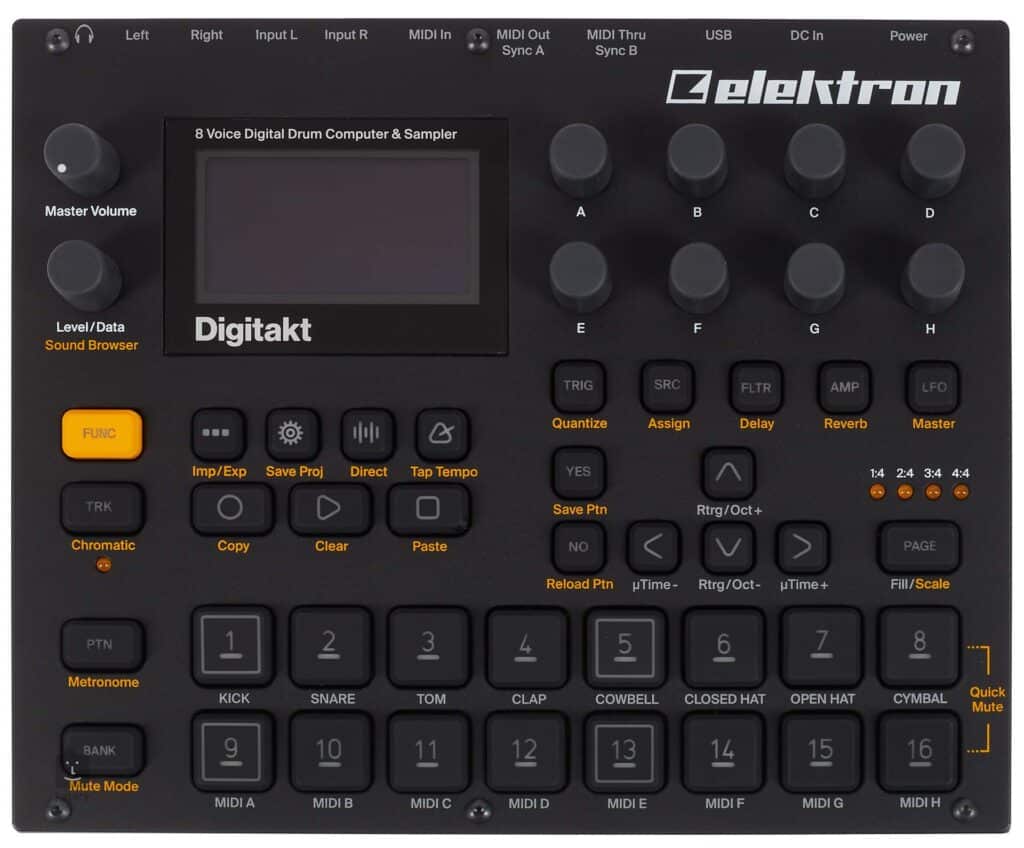
One of the most crucial bits of hardware you will have to get is a MIDI keyboard. Yes, you can go without one, by entering notes manually on your laptop or by only using analog recording, but it broadens the scope of instruments you can use and saves you time. 

Mastering

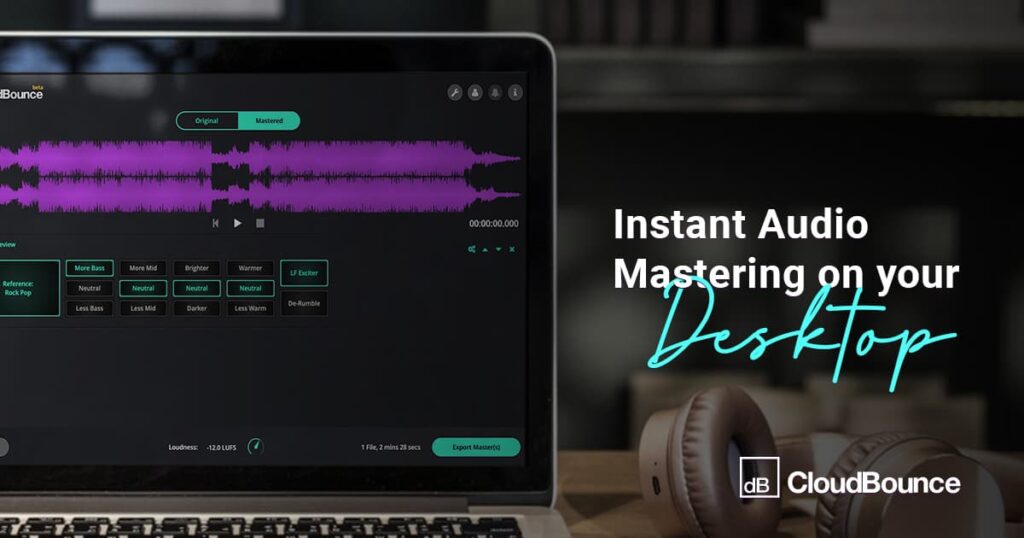
You may wonder whether it’s worth getting any gear for mastering. You may be a bedroom producer, don’t have budget to master, or don’t want to get into the complexities of the mastering process. Don’t worry. Mastering is a process all of its own and in professional studios artists do it with a mastering engineer who specifically on focuses on this. You can substitute with an online mastering service such as the many you can find reviewed on this blog

Remember, there is no right or wrong genre for a bedroom producer. However, some genres might require more analog gear that takes up more space, such as a classic rock band with a full drum kit set up. If you’re stuck, remember you can get a lot of these classic instruments as really good true-to-life emulations

Common Mistakes Before Bedroom Producer Setup

There are lots of great products and places for advice on how to start with a home studio setup. However, there are also some common pitfalls to avoid. Though by no means exhausted, some of the ones to watch out for as a bedroom producer just starting out are: 

Not doing enough research 

Research, research research! How can you know what gear would suit your setup best until you have tried it out? To fully get your space in order, it’s best not just to read reviews (although we have some great ones here) but also to do physical research, watch tutorials, and so on. 

Think about what you want – is tone and technically a big deal or are you just making a studio for fun? Is versatility most important or do you need specialist gear for a niche genre? Knowing also what gear works with your space in terms of acoustics as well as different types of technology such as active or passive speakers will also help you decide, as well as knowing your genre for a bedroom producer setup. 

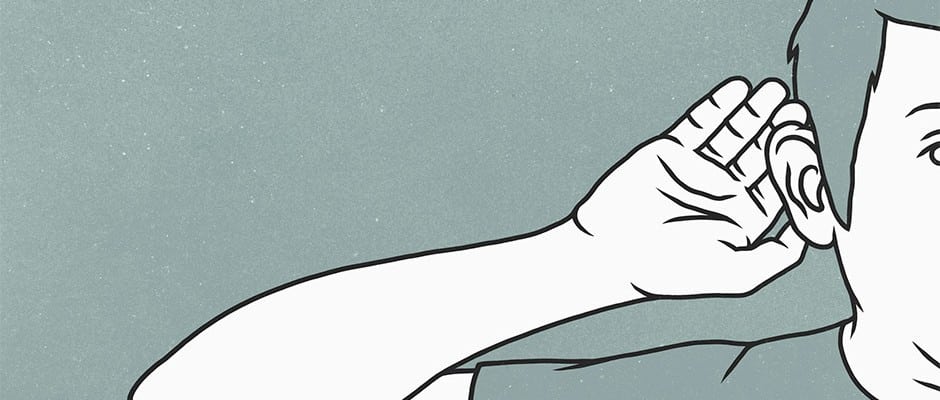
Not Understanding Sound And Signal Flow

It may sound obvious, but in the excitement of buying gear it’s easy to forget this. Having a basic knowledge of signal flow from your mic to your monitors – whether that’s a mic for vocals or a drum kit or amp – is crucial. This will allow you to see how your gear fits together, where you will work, and so on. 

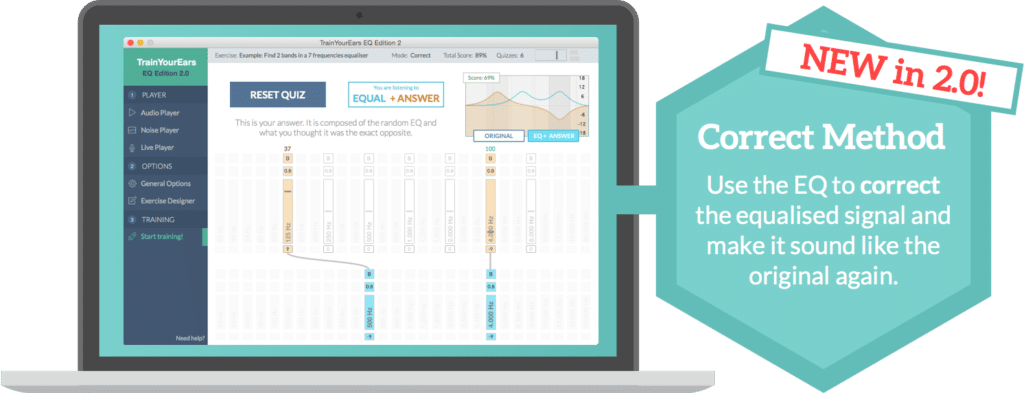
Understanding basic sonic concepts like decibels, ohms, and standing waves will also allow you to get to grips with your monitors and the sound of your space and therefore let you choose your gear and setup more wisely. Yes, you can learn this stuff as you go along. But doing a bit of research can take you a long way. 

Trying to cut costs 

Whilst this may be tempting if you can’t wait to get producing, trying to cut costs may hold you up further down the line as you end up with gear that doesn’t work the way you want or suit your workflow. Yes, it can be fun to have lots of gear, but in a limited space you may find that something that isn’t right for you means there are gaping holes left up in your setup before you research this. 

Conclusion 

All in all, one of the hardest parts of being a bedroom producer or creating a home studio is the actual getting started. As it sometimes means you have to prepare your space beforehand, it may not seem like you have the opportunity. However, with some smart thinking, even the smallest space can be converted into a decent home studio for a relatively low cost. Plus, this can be one that will hopefully inspire you and get you in the mood for creating killer mixes right from the comfort of your bedroom.

Like tutorials? Remember, we have a whole section here.

Musicians’ Guide to Midi Polyphonic Expression: What is MPE, MPE VSTs, and History DONE

MPE is one of the most significant developments in synthesis since the introduction of digital. Yet still, many musicians still find themselves wondering ‘what is mpe’ or ‘what does mpe stand for?’ when they see it listed on a synth. So, if you may have seen the term ‘midi polyphonic expression’ and are unsure about what it actually means, his article is your crash course.

Here, we will break down common questions like ‘what is mpe midi’ and ‘how does mpe work?’ as well as going deeper into the best compatible gear out there and when and why you might use it, so read on…

What is MPE?

What is MPE? MPE, standing for midi polyphonic expression, is one of the latest innovations in synthesis since the development of digital FM synths. However, MPE is not a kind of synthesis. Instead it is a way of playing that makes synths sound more like actual instruments. 

How does it do this? MPE gives the musician control over specific parameters of individual notes such as velocity, glide, aftertouch, and so on. It is these qualities that give music an analog, human-like feel, even if it was digitally created. 

When MPE first burst onto the scene with the brand Haken, it was unclear as to whether it would catch on. However, MPE has come a long way since then. It now spans a range of instruments from controllers to digital VSTs to full-fledged synths at more affordable prices. Read on for the breakdown. 

What Can MPE Do?

MPE can apply all the parameters when you play a non-synthesized instrument. This are things such as string bending, velocity, aftertouch, individual note loudness, and so on – to individual synthesized notes. 

In case you’re not sure why this is a big deal, at one point this was very difficult to do on a synth. If you wanted to pitch bend, for example, you could use a pitch bending wheel. However, this would apply the bend to all the notes. So, if you were playing a chord, every note would be bent. This led to synthesized music being obviously that – and could sometimes be clunky compared to playing an actual instrument. 

No more. MPE brought in the intuitiveness of playing a physical instrument, to synthesis. Now these minute details and expressiveness could apply to individual notes, bringing the warmth and human character to synthesis that some might have felt it was lacking. 

Why might you want to use it? 

At first, some musicians thought midi polyphonic expression might just be a gimmick. However, as time wore on, it has become a relatively embedded part of playing. It enables you to play synths like you would a stringed instrument or piano, which is no small feat. The differences between MPE and non-MPE might not seem easy to hear at first, but in the end, there is an expressiveness lacking from tracks that don’t have it – and some of the weird sounds, layers, and textures you can get from midi polyphonic expression enable you to take synthesis to new territory. 

In short, MPE is great for: 

  • Creating solo lines that sound like a guitar or violin 
  • Experimental music
  • Layering sound and creating texture 
  • Blending with real instruments 
  • Making synthesis sound more human

The Story of MPE and Equipment Guide

You may also find yourself wondering about mpe equipment, or ‘what is mpe ableton’ and if it is the same. Likewise, if you want mpe explained, it helps to know this process operates across VSTs, hardware instruments, AND specific controllers.

MPE in Ableton does refer to the same technique. It merely shows the popular DAW is mpe compatible, especially with mpe controllers. These are ways of adding midi polyphonic expression to your tracks and to instruments that don’t have a built-in expressive keyboard.

At the most basic level, MPE controls are quite fiddly and expensive for synth manufacturers to build into their machines. This is doubly difficult if you don’t have a keyboard on your machine, as is the case with many desktop synths. 

Here comes the MPE controller. You may have heard of machines like the ROLI Seabord series or Linnstrument, but what do these controllers actually do? Simply put they are keyboards (in the broadest sense, for not all of them follow the black and white keyed layout of a classic midi keyboard) that you can hook up to your computer. In this way you are able to control a VST synth, or hook up to a hardware synth to control it that way. 

Beyond the ubiquitous controller, some synths have built-in MPE capacity to some extent. This is regardless of whether it applies only to aftertouch, or they have a few glide wheels thrown in. One of the biggest, however (made in tandem with Haken Audio) is the Expressive E Osmose. The Osmose has unique keys that can control midi polyphonic expression through wiggling or gliding them. This allows ultimate fulfillment of parameters with the granular detail of being able to apply them to individual notes. 

What Are Some of the Best MPE Instruments?

The ‘best’ MPE instrument is a hard choice, but we’ve made this short and handy table to demonstrate the different categories. Our criteria involved creativity but also intuitiveness and how good the gear is as a gateway into MPE. 

SynthsControllersVSTs
Sequential OB-6LinnstrumentSurge XT
Expressive E OsmoseHaken SLIM ContinuumArturia Prophet 5
Ableton Push 3ROLI Seabord SeriesAbleton Drift
Haken Audio Eagan Matrix ModelROLI Block MMoog Animoog and Moog Model 15
Sequential Prophet 6UVI Falcon
Modal Electronics SKULPTXFER Records Serum
Ashun Sound Machines Hydrasynth SeriesNative Instruments Reaktor

Of course, this is no means an exhaustive chart of the MPE-compatible gear that is out there. However, these are some of the most well-known and popular that are worth further research if you want to get started.

MPE Parameter Guide

So now you have an overview of MPE, what is this technology actually like to use? We have briefly summarised some of the main musical features that midi polyphonic expression can provide you with, and how it does this in a way that surpasses what you could do with an ordinary synth…

Vibrato

Vibrato is exactly what it sounds like – the means by which musicians playing a stringed instrument would subtly vibrate the string for extra emotion. What’s more, vibrato is common for vocalists, guitarists, and violinists, but it’s hard to achieve on a keyed instrument like a synth and even harder to achieve on a single-note basis.

Depending on the model of synth you have, you may have a feature called something like ‘wobble’ to indicate vibrato. Simply said, on a fingerboard or other controller, wobbling your finger side to side can create a fantastic individual note vibrato that sounds just like you were on a real guitar – yet with whatever sound or waveform you desire.

Velocity

Velocity is a term you might be familiar with from synthesis. It broadly refers to the strength and intensity with which a note comes in. It’s easy to do on a synth but hard to control on a note-by-note basis before the introduction of MPE.

Aftertouch

Aftertouch refers to the subtle changes in sound as you lift your finger from a note. This is a feature that gives your playing much of a human element. It’s also why synthesis can sometimes sound mechanical or robotic. Aftertouch is not confined to mpe and is a bonus feature of many well-created synth keyboards.

Glissando

Lastly, glissando is another term for glide – similar to pitch bending, gliding from one note to another. This was hard to recreate on a note-by-note basis but with midi polyphonic expression, you can now experiment with in all its glory. It was previously hard to replicate on synths but with mpe has become much easier.

Pitch Bending

Pitch bending is also exactly what it says. It refers to how on an instrument like guitar you would bend a pitch up towards your desired note. Thus, you are creating a smooth and melodic sound that encompasses half tones and microtones too.

Controlling this on a note-by-note basis is again one of the great features of midi polyphonic expression, allowing for never-seen-before layering of sound that can create fantastic atmospheric backdrops or leads.

Final Thoughts

This is just a brief rundown on the history and development of MPE, and its modern manifestations. The field is still relatively young, in synthesis terms – so it’s likely we may see it catch on more until it becomes an expected staple. Furthermore, it’s ripe for new developments, and the pioneering minds behind modern synths are making sure to include MPE more and more. 

If you liked this article, we have more on the specifics of MPE, such as the best MPE-compatible VSTs, as well as MPE synths compared with our guides to everything you need to get started with in MPE. 

The Haunting of Halls: Avoiding Common Pitfalls in Reverb Plugin Use

As any music producer knows, reverb plugins add depth and space to your recording and are one of the most powerful effects in the mixing toolbox. But that doesn’t mean it’s the easiest to master. It can be tricky, and there are quite a few common pitfalls that sideline many producers.

That’s why we’re going to help you fine-tune your knowledge of reverb plugins so that you can get those sound waves going where you want them.

Clashing Tails

Using many reverbs on a single track can result in a beautiful sound, but be careful not to create problems for yourself by allowing reverb tails to overlap unpleasantly. The overlapping itself isn’t an issue, but it can cause confusion in your mix when the tails don’t match.

Pay attention to your reverb’s decay speed and diffusion, as well as the different types you’re using.

CPU Overload: Employing Many Units When Only One Will Do

Sometimes, stacking reverbs can be an excellent idea, but you don’t need many instances of the same reverb on a range of channels. Create a Send channel instead, apply reverb to it, and send all the channels that you want affected to it.

You’ll be able to set how much of each channel gets sent, so you can accentuate the reverb effect of one channel, like a bass drum, while allowing the same effect to be more subtle on others. This greatly reduces the load on your CPU and means you’ll avoid the risk of having to phase between nearly identical reverb tails.

Inadequate Reverb Use

Most sounds we come across in our lives arrive within a natural ambience. They’re organic reflections that express the sound we’re hearing with reverb. In fact, reverb is so common to our understanding of the world that when we hear sounds without it, we’ll immediately notice.

They’ll sound alien and sterile, and they will stand out a mile. You might think that being this noticeable is not all bad, and you’re right. There are certainly times when using no reverb on a sound makes it lift out of the mix without obscuring the track’s other elements.

But more often than not, you’ll find that a total absence of reverb is more of a problem than it is an advantage. Most listeners won’t be able to see the beauty of sterile, cold sounds, and we need a little ambient reverb to ensure we enjoy them.

So, while there’s a danger of overusing reverb and seeing it turn your song into a sound soup, under-using it can be just as much of an issue.

Subpar EQing

Poor EQing is another very common mistake producers make with reverb.

Reverb gives your sound an entirely new level of density, and this can sometimes emphasize unpleasant frequencies. It can also extend the presence of mid- and low-frequencies and, thus, cause muddiness. You can remedy this with a good EQ session.

Whatever the channel’s EQ settings are, place an EQ directly after your reverb and then sculpt the tone to the point where it’s pleasant to the ear.

Tails Clashing With Other Track Elements

This mistake usually occurs with drums. If the reverb on your snare lasts longer than the next hit on the snare, it can cause cumulative reverb to build up, ruining the tone you’ve so carefully sculpted. It’s the same case with other sounds, too, but not just drums. If the reverb lasts so long that it’s still unfolding as the next musical phrase begins, you’ve likely run into the mistake of your tail coming into conflict with other elements of your track.

Drums best demonstrate this issue because they’re short sounds. When the reverb tails are clashing, you’ll notice it instantly. But this logic also applies to all other instruments: if the reverb tails clash, especially in the lower frequencies, your mix is going to start sounding muddy. Overlong reverb decays on hats and snares create chaos in the mix.

You could use this as a useful effect for a short period of time if you’re introducing a new section or as part of a solo, for instance, but it’s going to clutter up the regular, full mixdown.

Uncertainty Regarding Insert or Send

The only word to describe how reverbs behave in a Send or Insert channel is pivotal. When it’s placed on a Send channel, you can control the amount of reverb being used incrementally and subtly administer less or more depending on what that channel needs.

When applied directly as an Insert, the effect will become more pronounced. You’ll be able to mitigate this by reducing the wet amount, but then why not just use a Send channel and save your CPU?

Insert reverbs should be used when you want to create a massive effect, like one you would use for epic breakdowns, sound design, etc.

The Use of Reverb Rather Than Delay

Reverb can be described as a delay or echo with a shorter reflection time. So, it should stand to reason that when you’re mixing music, using a very short delay or echo would emulate a reverb. But this isn’t the case, and the belief that it is makes for one of the most common reverb mistakes.

The effect may be similar, but delays don’t build up as much harmonic density as reverb does. Low frequencies travel slower through a unit or reverb than high ones do. This is how the tone and harmonic density of a reverb are shaped and contoured.

In contrast, delays are simply carbon copies of the source audio. There’s no difference in tonal reflection. This means that while it’s cleaner and less cluttering, it’s also less characterful.

Less Can Always Be More

Whether you’re using a free reverb plugin or you’ve shelled out cash, there’s one rule you can always follow. When you’re in any kind of doubt, dial things down. It’s very easy to become so used to how much reverb there is in your track that you lose sight, or sound, of how it’s really affecting it.

Turn that reverb right down, take the decay length to zero, and then start building up again, referencing all the time. Try different types of reverb and really think about how they’re affecting the character and tone. Try to have an idea in your head of what reverb you want to hear and work towards that.

Final Thoughts

Reverb is one of the most basic effects we use in music production, and it’s also one of the oldest. Advancing technology has ensured that reverb plugins have become a crucial part of today’s recording process because they help to digitally create a more realistic atmosphere and rich, layered sound. If you avoid the pitfalls we’ve outlined here, using these plugins will result in a smoother, more polished song.

Using Modes in Your Guitar Playing – a Beginner Guide

 In guitar music theory, modes carry a reputation for being hard. However, once you know their basic patterns, they can be a simple way of spicing up your guitar playing. Essentially, modes are a set of seven kinds of scale. Yet, they actually can all be grouped based on the Ionian, or major scale. 

What are the Modes in Guitar Music Theory?

The names of the modes come from seven cities in Ancient Greece, and in fact, modes have been with us since ancient times. Also known as church modes, they were traditionally used in church services to create a certain mood. Read on for how you can use them in modern guitar – and how to break down the theory behind them.

1. Learn the Modes As Separate Scales

You may have heard modes described as all variations of the same scale – the Ionian mode, or major scale. To an extent, this is true in terms of music theory. However, it doesn’t help beginner guitarists who want to get into playing with modes as the reality is much more complex. 

Are Guitar Modes and Scales the Same?

It can be hard to think of modes in terms of a single scale due to the nature of the fretboard. Instead, it’s more helpful to learn the modes as separate scales in their own right. This way you can also use the major and minor scales (Ionian and Aeolian modes) as a comparison to help memorize modes.

To learn modes as a scale, they can be divided into whole and half steps. These form the particular sequence that makes up that particular scale – just like with any scale.

What Notes Do Modes Start On?

Modes can start on any note, depending on which mode you are playing. Instead, it is easier to learn the sequence of whole and half steps in a mode, so you can apply them to any key. The sequences for each of the seven church modes are as follows: 

Lydian: W W W H W W H

Ionian: W W H W W W H

Mixolydian: W W H W W H W

Dorian: W H W W W H W

Aeolian: W H W W H W W

Phyrigian: H W W W H W W

Locrian: H W W H W W W

2. Learn Which Chords Go With Which Modes

It goes without saying, but if you want real freedom of composition and to move around the fretboard, it’s best to learn which scales go with which modes. By doing so, it also means you can use modes more consistently in your composition and arrangement and production. For example, if the chorus of a song is in Ionian mode, and the melody then changes into Dorian mode during the middle eight, naturally there’s going to be a change in the chord progression as well.

How Do Chords Relate to Modes in Guitar Music Theory?

Learning the chords that go with modes can actually help you figure out chord progressions. Alternatively, they can serve as a source of inspiration in composition as you can play with certain modes. These can go over certain parts of an existing chord progression to make a vocal line or guitar riff. 

What Modes Work Over What Chords?

Or, alternatively, what chords go best with what modes? The chords that tend to go with each mode are as follows: 

Lydian: major, maj7, maj9

Ionian: major, major 7th

Mixolydian: major, dom7 dom9

Dorian: minor, minor 7th

Aeolian: minor, minor 7th, minor 9th, minor 11th

Phyrigian: minor, minor 7th,

Locrian: m7b5 chords, dim chords

3. Learn The Circle of Fifths to Master Modes in Guitar Music Theory

What does the circle of fifths have to do with modes? It turns out, quite a lot.

Music is full of patterns, and the circle of fifths, a way of arranging the note used in Western music, also provides a tool to figure out modes.

Simply put, the circle of fifths is an arrangement of notes where each note is a fifth above the last one. Already familiar with the whole and half-step sequences that form the basic modal scale patterns? You can use the circle of fifths to find out the notes of any modal scale.

How Do Guitar Music Theory Modes Relate to the Circle of Fifths?

If you follow the circle of fifths in a clockwise direction, you can then change the notes that correspond to the flattened or sharpened scale degrees in each mode. In this way, you can figure out the exact notes your need. This topic is too detailed to fully explore here, but knowing the circle of fifths is a valuable tool that also applies to modes, means they become way less daunting to use in your own music.

4. Learn the Emotional Order of the Modes

Sometimes, the way some forms of music theory explain modes takes them out of context. Ionian mode, or the major scale, is one of the most used in pop and rock music. Thus it tends to be the one guitarists start learning. But the world of guitar is much bigger and more varied than that.

What is the Order of Modes in Guitar Theory?

Often, guitarists learn modes in an order based on the notes of the Ionian, or major scale. However, did you know you can also arrange modes in order of the ‘lightest’ sounding to the ‘darkest’ sounding? Genres such as jazz guitar rely heavily on the Dorian mode, whereas many subgenres of metal like to experiment with Phrygian and Locrian modes. 

Therefore it helps to know the emotions of the modes to figure out which is best to use. Once you’ve learned this, practicing them in this order can help you not only compare them and understand how each developed to create a certain atmosphere, but see the note changes that are responsible for their particular qualities. 

What is the Emotional Order of Modes?

In short, the emotional order of modes arranges the modes from ‘lightest’ to ‘darkest’.

Lydian, Ionian, Mixolydian, Dorian, Aeolian, Phyrigian, Locrian

However, just like the political horseshoe, Lydian mode, and Locrian mode are closer to each other than you might imagine. In fact, using the circle of fifths, Lydian becomes Locrian by transposing every tone (except the root) down a single half-step.

5. How Do Guitar Music Theory Modes Fit Into the Guitar Fretboard?

Of course, there’s no use learning the modes if you can’t use them to play solos or write songs. Learning how modes fit together on the guitar fretboard means you’ll have the confidence to actually manipulate them. This allows you to create compositions from more different elements. 

How Do You Connect Guitar Modes?

At the heart of modal theory, there are two basic ways that you can fit modes into the guitar fretboard. The first way keeps the same scale pattern and uses the emotional order of modes (Lydian to Locrian) which alters only one note at a time. Therefore, it’s really, really easy to learn how one mode goes to the other. 

How to Play Guitar Modes All Over the Fretboard

However, you can also learn to play a single mode all over the fretboard. This is because all of the modes have their own scale pattern. Yet, when put in the context of the same root note, they actually all make the same mode. This way, by learning the fretboard patterns for each mode, you can translate any mode all over the fretboard. In fact, this works in the same way as the more familiar CAGED system.

You can play the same mode all over the fretboard by learning and using the set shapes that correspond to the names of each mode. Don’t let the confusing naming put you off! All shapes can be used for all modes. In fact, if you have learned the CAGED positions, this method uses the same pattern recognition skills.

Final Thoughts

Learning modes is a different process for every guitarist. Sometimes, the most confusing thing about them is how they all relate back to a single scale. This can make them seem paradoxical at first. Yet, after experimenting, you realize they can be thought of both ways depending on what you find most useful. In this way, they are a valuable Swiss army knife whenever you feel like compositions or arrangements are lacking something. 

If you like tutorials, we have a whole section where we dig into different ways of thinking about music here.

5 Killer Tips to Use Jazz Chords in Your Guitar Playing

In guitar music theory, chords are the backbone of any song. And jazz chords are a great way to spice up your progressions, regardless of whether or not you are a jazz guitarist.

Beyond classic sounds we associate with jazz, jazz chords can make your playing more interesting overall. One example is how they can add variety to a bridge or middle eight. Read on for a guide as to how to get started.

1. Learn Modes and How They Work With Jazz Chords

You may hear musicians refer to modes as ‘church modes’. This is due to their history of being used in Gregorian plainchant. However, they have many other uses! In fact, one of the 7 modes of Western music, Dorian, is actually frequently used in jazz. Modes show up everywhere, from adjacent genres, like flamenco, to places like alternative rock.

The reason learning modes can help you use jazz chords is that each mode has a set of chords that works well over it. Many of these are jazz chords, and this gives you a ready-made set of notes to write melodies or solos over more complex chords like dom6 chords. 

Jazz Guitar Music Theory Chords that Go With Modes

Many jazz chords are derived from modes. For example, the dominant seventh chord, often the first jazz chord beginners learn, actually comes from Mixolydian mode. Likewise, Dorian mode commonly shows up in jazz. A classic combination is to play Dorian melodies over a minor 7th chord.

Both jazz chords and modes have a reputation for being tough, but actually, they’re just different. They go together well enough that learning them in tandem can actually make each of them easier to understand. Depending on how you learn, this can fill in the missing pieces of information, translating theory into actual sounds on your guitar.

2. Learn How Jazz Scales Relate to Chords and How to Use Them

What are jazz scales? At their broadest, jazz scales are any scales that are used in jazz playing. However, some of them are more associated with jazz than others, like the Dorian mode or the melodic minor scale.

What Are the Most Important Jazz Scales?

In truth, there are loads of jazz scales, and not all of them will be relevant unless you’re planning on fully immersing yourself in jazz guitar. However, there are some that are great if you want to figure out melodies to use over progressions that contain jazz chords. One significant one is the melodic minor. The other additional scale that isn’t commonly found in pop and rock music is the diminished scale.

Even if you don’t know these scales, they can still help you build chords and, especially, chord progressions. For example, why not learn? the chords that are built off each note of the melodic minor scale? This can help you come up with new progressions that take your playing in a new direction. You don’t have to be a jazz guitarist – even artists like the Beatles and REM have used jazz scales!

What Scales Go With What Chords Jazz?

Often, guitarists approach this question the wrong way. A better question to ask is ‘what chords go with what scales?’ This allows you to learn the general pattern of chrds for a scale, so you can learn it in ANY key. For example, the melodic minor scale corresponds to the following chords – but with this general pattern, anything can be the root note:

I min – ii m – III aug – IV maj – V maj – vi dim – vii dim

Or

I min – ii min7 – IIImaj7#5 – IV 7 – V 7 – vi min7b5 – vii min7b5

As you can see, simply by learning the scale, you have a whole new set of chords to work with that you know will go together – and knowing which jazz chords will fit is generally the hardest part!

3. Tension and Release – The Basic Principles

You may have practiced a handful of jazz chords and learnt how to construct them, but this alone doesn’t show you the right places to use them in your music. If you’re used to major and minor chords, jazz chords might be novel. These chords tend to be tense, richer, and more complex than chords used in basic pop progressions. Jazz chords tend to have this ‘tenser’ sound because they have more notes that are closer together, which cover up the sound of the perfect fifth – the interval considered to be most harmonious to our ears. 

How to Use Jazz Chords in Progressions

With their tenser and more complex sound, how do you use jazz chords? Jazz chords are great for places where you want more emotional tension in your music, especially if tension is followed by release. A classic place is at the end of a bridge that leads into a chorus, where adding a major or minor 7th chord makes things darker sounding before and can make a wide, open chorus melody stand out more. 

Some of the best chords to use for these purposes are maj7, min7 and D7 chords. Dominant sevenths especially can create plenty of tension that ten opens up to resolve on the root note. 

4. Guitar Music Theory – Chords and How To Build Them From Scales

What Guitar Chords Are Used in Jazz?

One thing that can be offputting about jazz chords is the daunting combinations of numbers and letters in the name. For a beginner, it’s quite hard to figure out what a chord like m7b5 is quickly enough to know how to solo over it. 

How to Build Jazz Chords from Scales

It’s possible to reverse engineer this process and learn how chords are built from scales. The key is to think of jazz chords as just extensions of the major and minor chords you are familiar with. It also helps to know that major and minor chords develop around the same interval.

Both major and minor chords use the perfect fifth. The only difference is the triad – the middle note – is alternately one semitone higher or lower. This sets the major or minor quality of the chord. In a minor chord, the third degree of the scale is flat. Whereas, in a major scale, it remains unchanged. 

Chord Theory Basics: The Theory Behind Jazz Chords Made SIMPLE

The numbers that you see at the end indicate which additional degrees of the scale he chord also includes. For example, dm6 has the additional sixth degree of the scale added to it. In this case that’s B. However, as this is a minor 6th chord, it also contains the b7.

How Do You Make Jazz Chords?

To figure out any chord, you can break it down into the following things:

  • the root note
  • the quality (major, minor, dominant, augmented, diminished)
  • any additional scale degrees

For example, Emaj7b5 has E as the root, a major tonal quality, the seventh degree of the scale added, and the b5 indicated the additional information that the fifth is a semitone down. By breaking down chord names, they become much simpler to read, which is handy if you’re working off a chord chart you’re unfamiliar with or improvising over a progression.

5. Guitar Music Theory Chords: What Makes a Good Jazz Progression?

There are common progressions show up in every genre of music and jazz is no different. Like pop and rock have the I – IV – V progression, jazz has the ii V I progression. By starting on a chord other than that which corresponds to the root note of the scale, it has an interesting, complex flavor. 

Is Jazz Just 7th Chords?

Definitely not! In fact, jazz is all about variety. What makes this and any other good chord progressions work is that they find the correct balance. As jazz chords are more complex, sometimes it can be hard to move between them not only for the guitarist but also for the listener. In the key of E major, for example, a jump from B major (the fifth) to C sharp minor flat 5 (a common jazz chord) might be too much, but adding a B7 in the middle can make the progression flow more smoothly.

What Makes a Jazz Progression?

A good progression that uses jazz chords – whatever your genre- uses harmony and appreciates the yin and yang of balance to achieve ups and downs in the listener’s mood. This means a combination of both simple and extended chords, as well as the tension and release we talk about earlier.

Once you’re comfortable playing extended, more complex chords, it can be tempting to use them a bit too much. Remember that less is more – and the right chord in the right place can make all the difference.

Final Thoughts

Learning how to use jazz chords in your playing doesn’t require you to be a jazz master. Great jazz guitar takes years of practice. On the other hand, it’s simple to understand how you can add more complex chords to a progression. Not only does this free you up to use a greater variety of sounds, it can be fun and challenging in the process.

Are you a beginner or intermediate guitarist looking to learn more about music theory? For more theory tutorials from a guitarist’s point of view, check out our section here.

7 Tested Ways for Sampling Great Sounding Guitar

Guitar sampling is great for inspiring any guitarist, but did you know you can use it in more ways than one to spice up your production? Likewise, as a producer or electronic musician, lush guitar samples can make or break a track if used in the correct way. 

However, without knowledge of the other side, you may end up falling back on VST instruments and pre-made loops. This article is for if you want to go beyond the basics and learn some creative ways to incorporate guitar samples into tracks from pop to rock, indie, alternative, industrial, and beyond. 

1. Experiment With Handheld Recorders for Guitar Sampling

Handheld sampling is exactly what it says. Generally, it’s using a handheld recorder held near your source of sound. This creates a more rough and ready sample that you can modify depending on how slickly produced your track is. However, it creates a fantastic sound for alternative pop, rock, and indie music. 

What Is The Best Portable Audio Recorder for Guitar Sampling?

To start off with this, we would recommend a handheld sampler like the Tascam DR – 0X7. This one samples in stereo and provides great clear sound yet is also easy to work with and portable. Click here to see listings available on reverb.com

Best for: When you need a relatively low-key and organic sample that you can be flexible with. 

3. Get the Most Out of Hardware Samplers

Why might you want to use a hardware sampler for guitar? Adding some elements that cross lines between guitar and synthesis can take your production to the next level. It can really get you thinking about the sound of guitar like a synth player – and what builds it from the bottom up. 

Hardware samplers mean you can combine your guitar samples with other FX, bring them together with a sequencer, and much more.

What is the Best Portable Handheld Sampler?

We recommend a great affordable handheld sampler like Teenage Engineering’s PO-33 for this. However, classic brands like Roland also have their own options with the Sp-404-SX at a higher budget.

How to Use Hardware Samplers for Guitar Sampling

Most hardware samplers have plenty of FX. Therefore, combining guitar sampling with a hardware sampler is an excellent way of using guitar samples in your live shows. A bigger budget hardware sampler like some of those by Arturia or Elektron (such as the model:samples) can give your samples a great live sound. Plus, they have all the benefits of a physical instrument that tend to suit guitarists best.

Best for: modifying the sound of your original sample and combining analog synthesis with guitar-based music. 

3. Don’t Discount the Room Mics

How can you use room mics for guitar sampling? Depending on the type of mic you’re using (more on this later!) they can actually be a great source of samples. In fact, you can modify them to give you sounds slightly different from just plain guitar recordings.

Using Room Mics in Guitar Sampling and Recording

Even when you do this, the quality of your original sample is still important. It also still has an effect on your end result. However, this can be a great tip for when a sample doesn’t end up how you like it. Turning it into an atmospheric background means you can still use it even if it didn’t end up how you wanted. 

Best for: atmosphere, especially for creating weird samples that are originally guitar based but which don’t end up sounding like guitar.

4. Choose the Right FX to Add

It’s easy to debate whether taking great samples in the first place with great playing is more important, or whether you can save bad samples with decent FX processing. In truth, there’s a bit of both involved. No amount of good recording equipment will fix a bad guitarist. Likewise, no matter how well you process it, you can’t always cover up a bad sample. 

Why Use FX Processing on Your Guitar Samples?

Despite commitments to authentic sound, FX processing is still a really important part. This is what can get you a granular sound in terms of genre. A basic electric guitar sample can be warped beyond recognition for industrial or kept low-key for an indie-pop track.

Best for: Adding extra emotions or atmosphere to samples and defining your sound

5. Touch Up Guitar Sampling With Envelope Modification

You can use envelope modification to touch up guitar samples in many ways. One of the difficulties guitarists might encounter is there can be simply too much extra noise. Adjusting the decay and sustain can reduce this and make guitar samples sound crisper and cleaner. 

Likewise, if your original samples are not very punchy, adding more attack can ensure that they hit hard enough. 

How to Find the Perfect Sound for Guitar Sampling with ASDR Envelopes

The one thing to bear in mind is for an analog instrument like a guitar, there is a limit to what an envelope can fix. There’s no point in adjusting tons of envelope parameters if your original sample isn’t any good. But consider using the envelope creatively to warp samples and in the same way as you can use FX. Try giving your samples some really long decay, for example, for really weird-sounding guitar that you can then save to a pad…

Best for: Touching up samples after you’ve taken them

6. Choose the Right Mic

Mic choice is always important when taking great guitar samples. When using a handheld sampler, the reality is you don’t have much control over mic choice. Yet, you can add FX and touch ups later on during the processing stage. 

How To Choose the Right Mic for Guitar Sampling

However, if you’re taking samples via recording, it helps to know which mic is which. Dynamic mics are high quality, crisp, and clear, but are less warm than condenser mics. They are great for amplified instruments like guitars and you can use them to sample guitar amps. Meanwhile, you can use condenser mics for guitar, even though producers generally tend to apply them to vocals. Lastly, super-sensitive ribbon mics can function as overheads and work well for taking atmospheric samples. You can then turn these into an instrument or pad in their own right. 

What is the Best Mic Shape for Recording Guitar Samples?

There is no one best mic shape – as with anything, this is an art, not a science, and it’s not set in stone. Mic shape depends, in fact, on your preferences. Cardioid or super-cardioid mics can offer the precision you need for capturing super-clear samples. Likewise, angling the mic correctly ensures you get exactly what you’re looking for. 

Best for: Getting the kind of samples you want in the first place

7. Take Advantage of Direct Input

Lastly, direct input is often overlooked as a way to create crisp, clear samples. Sometimes it may feel like cheating, but ultimately, there are no rules in music. 

Direct input can be great for bedroom producers who want real guitar samples but don’t have the space to record amplified guitars. It also means your sound will be super clear with no room noise, ready for FX processing.

When Should I Use Direct Input for Sampling Guitar?

This can either be good if you want to start with a blank slate sonically. Or, it can work if you are planning on adding plenty of FX for artistic value and don’t want something with too many different layers of sound to start off with. This can, in fact, prevent your mix from becoming cluttered or muddy. 

Best for: Starting with a blank slate

Final Thoughts

Sampling guitar might sound like a simple task just dependent on recording skills, the right mics, and good playing. Yet, doing it creatively depends on bringing in different techniques from all areas of music and leaving nothing out of bounds. Whether heavy, acoustic, indie rock or blended with synths in genres like industrial or new wave, sampling guitar can make you look at your instrument totally differently. And, you can come up with some of your most creative ideas. 

Liked this? We have more tutorials in our dedicated section here, as well as lots of great reviews of music hardware and music software. Check them out to find the best FX, plugins, synths and samplers to add to your guitar playing.

How to Do Online Music Mastering With CloudBounce

There so many options for online music mastering now that many musicians feel spoilt for choice. As AI develops, more and more producers are opting to use automatic audio mastering platforms. We look at what is good and bad about the online music mastering service CloudBounce in our comparison with two of its major competitors here. Already decided to opt for this stripped-back audio mastering software? This guide breaks down not just how to use it but what quirks about it can give you an edge.

What is CloudBounce online music mastering?

CloudBounce is an AI-based audio mastering service that uses machine learning technology to professionally master your track. However, just because the service is automated doesn’t mean you can’t use it in a creative manner. CloudBounce isn’t just great for a straightforward pro-quality master. It also offers an in-depth selection of genre and mastering controls, ways to improve your own skills, and develop reference tracks with it.

How to use CloudBounce for professional audio mastering

There are lots of great tricks you can use with CloudBounce. First, however, a basic rundown of how the platform operates will show you what’s needed. You first need to go to their website by clicking here. Disclosure: if you use that link and register for their paid service, we get a small kickback so you will be supporting us.

The only thing you need to start off with is your mixed track. Users of CDBaby and Soundrop actually get two free masters with CloudBounce. So if you want to test the platform this is a great way. However otherwise, you can purchase a single master for 10.90 USD or opt for one of the infinity plans. If you’re having trouble choosing, this is something we go into later on in this article.

Next, there is the option to upload or drop a file. CloudBounce supports all major file types. However, the key point is you should be completely satisfied with your mix to start off with. Otherwise, it’s harder to know whether you’re happy with the master.

Cloudbounce has a desktop app!

The CloudBounce download process for the new desktop app is pretty simple and just requires you to create an account. Once you’ve got past this you’ll need to choose your genre. You also get the chance to choose mastering options if you already know them. These are parameters like warmth, dip, bass, boost, and brightness. You can actually change these in the post-mastering stage too.

Then, click ‘master my track’! This process is very fast (within minutes) and offers you the option to keep or discard afterwards based on whether you like the master.

How to make your tracks sound louder with CloudBounce

The loudness wars are the infamous phenomenon by which tracks are being mastered to sound louder and louder. Though controversial, it’s a given that you need to have the right level if uploading a track to Spotify or Soundcloud. In fact, Spotify actually alters it for you so all masters on the platform sound roughly the same. For many producers, CloudBounce is an easy way to reach the right level yourself and maintain your track’s desired sound.

Using CloudBounce to master your track for Spotify and SoundCloud

Both Spotify and Soundcloud have different loudness requirements they apply to your track to let it get heard. Fortunately, it’s simple to use the inbuilt limiter on CloudBounce to set your target loudness level and match this. This goes up and down in 0.5 LUFS steps and lets you manually reach the loudness levels for different platforms. Platforms like Spotify actually alter all tracks’ loudness to -14db LUFS. So if you master to this level with CloudBounce you know your track will sound as you expect it when uploaded to streaming services.

The good news is CloudBounce is creative enough that you can do this without losing too much of your sound. And, if in doubt provides a guarantee that your track has the professional quality needed.

Online mastering for rock music, hip hop, and more: how to use CloudBounce for genre-specific mastering

if you’re wondering how to use CloudBounce, we’ve previously covered how the sheer number of different combinations between genre options and mastering option. Together, these give CloudBounce the most flexible and high-quality results sonically.

To really dig deep into these, one way that works is to find your rough genre. Then alter the mastering options as a way to warp it. This allows you to zero in on the sound quality you want. For example, if your genre is hip-hop but the AI master is too commercial for you, simply adjust qualities like loudness, brightness, and warmth until you hit what you want.

Is it the best online mastering out there?

Ultimately, there are lots of options and competitors. however, one thing that makes CloudBounce stand out is that it realizes there’s more to music than just technology. Whether it’s musicians asking ‘do online mastering services work?’ or knowing that many users are still looking for free online music mastering, CloudBounce is usable because the developers understand it’s not going to replace real musicians.

CloudBounce founder Anssi Uimonen actually claims this kind of AI is still in its infancy and has a long way to go. With CloudBounce what’s great is you can approach the platform as another tool to use. It’s not about perfectly predicting what you want from a master. Instead, you can use it to compare options and sounds until you find a sweet spot. The big bonus is this builds your own skills along the way.

Using CloudBounce for mastering with reference tracks

Cloudbounce allows you to upload your own reference tracks or use ones that are pre-included. However another creative way you can use the platform is to master a track digitally and then use that master as a reference for making your own. That way, using online music mastering can actually help you develop your own mastering skills.

Is CloudBounce worth it? How to pick an online music mastering plan

CloudBounce has either 3 or 4 different options depending on how your look at it. The fourth of these actually lets you work with a human mastering engineer from London’s iconic Abbey Road Studios. The other three are one-off mastering purchases, its infinity monthly plan, or its annual infinity plan. Ultimately it comes down to how productive you are as a musician. Do you intend to graduate from CloudBounce to mastering your own tracks? If you plan to use the platform for a longer while, the yearly infinity plan is best, especially if you’re planning on releasing lots of singles or albums.

CloudBounce Pricing:

Cloudbounce offers one off track masters for 10.90 USD, a 21.90 USD Infinity monthly plan, and a 219.00 USD infinity yearly plan.

Not a CDBaby or Soundrop customer? At this time of writing, they have YouTube content that offers a free master in return for a share on Facebook or Twitter.

You can check the current offer by clicking here.

What else can you do with CloudBounce?

The last thing CloudBounce is good for is comparing variations of a master. With one of the infinity plans, you can make subtle variations on the same track. You can do this with altered mastering options or even based on two different genre references.

This feature is part of why CloudBounce’s many options to do with genre are so great. It allows you to compare versions of what you want the finished master to sound like. You can download these and play with post-mastering in your DAW. Therefore, if you’re indecisive about this, want to play around with genre, or don’t feel your track fits neatly into one box (we’ve all been there!) it’s an absolute life-saver. Overall, CloudBounce is one of the best online mastering options for this due to its number of combinations.

Final Thoughts

Ultimately CloudBounce is a strong competitor for Landr, Emastered, and Ozone. Yet it’s when you get to its different choices that you find you can also use it creatively to improve your own mastering, help make creative choices for albums and singles, and much, much more.

Love checking out the best software for music production? We have an entire section here. Likewise, our reviews section gives you more in-depth coverage of the best gear for musicians out there, both software and hardware.

Elektron Digitakt Loopcloud Integration – How This Update Promises to HACK Your Studio Workflow

Earlier this month news broke about Elektron’s Digitakt Loopcloud integration in the OS 1.50 update. This essentially allows you to drag and drop loops from the platform directly to your Digitakt. Yet, this is just the start of what this new update promises to have in store. We break down below the features that make this integration so exciting.

Elecktron Digitakt Loopcloud review – why integration of the two can change your production game

The Elektron Digitakt is one of the industry’s leading drum machines. We’ve covered just why this is before when it made our top 5 options for music production hardware 2023.

Yet, now the Digitakt OS 1.50 update lets you connect directly to Loopcloud, the world’s largest sample library. Whichever position you’re starting from, this upgrade is exciting as it can introduce users of Digitakt to Loopcloud and vice versa.

If you’re starting from Loopcloud, the upgrade means that if you’ve been considering getting a Digitakt, there’s all the more reason. And if you’re starting with a Digitakt but have been on the fence about the world’s largest sample library, Loopcloud gives you access to tools like Loopcloud Drum and Loopcloud Play that you can integrate with hardware.

Pairing Digitakt with Loopcloud vs Splice – why Elektron’s decision works so well

If you’ve also been wondering about the various benefits of Loopcloud vs Splice or other sample libraries, there’s a good reason Elektron opted for Loopcloud. It’s simply got more flexibility and creativity in terms of altering samples. So, if you’ve been wondering which of the two is better and are currently in possession of a Digitakt, the update unlocks Loopcloud in a whole new way that regular users can’t access.

Loopcloud is the perfect match for the Digitakt, partly due to its focus on the little things that make or break a piece of music. That means you can search for sounds via incredibly specific parameters, such as level of swing, or bassiness. By focusing on less obvious things, Loopcloud helps producers sift through a realm of samples, easily, to find options that work with the kinds of creative and slick sounds you can make with the Digitakt.

To put it simply: both the Digitakt and Loopcloud are varied enough that you’ll never get bored of either. Loopcloud loops are royalty-free, and Loopcloud can actually connect to FL studio via a VST plugin, so this added interconnectivity can boost your production too. Either way, for an uninterrupted workflow, the two are a match made in heaven, simplifying massive amounts of sonic potential.

How does the update make your workflow easier?

  • The first thing is that Loopcloud has its own 8-track editor and pattern creator. You may have everything you need with the Digitakt. However, integration means you can create parts of tracks, beats, or samples on Loopcloud first – and then transfer them for further modification. Plus, Loopcloud helps you keep the tools needed all in one place. 
  • Loopcloud offers a whole new selection of routes to work with your Digitakt. In fact, you can control your Digitakt through Loopcloud from your computer. This feature is particularly great for naming files, streamlining, and organizing, without you having to spend tons of time on this.
  • The integration has been created with the musician in mind. Why? The connection between Loopcloud and your Digitakt allows you to store Loopcloud loops for live performance. This is great if you can’t access your computer – or want the portability of the Digitakt with the variety available on Loopcloud. 
  • Intelligent technology picks up Digitakt tempo and time-stretches it. This means that Loopcloud will provide options that are ALREADY tempo-matched to the project you are working on. In short, yet another way the integration allows your Digitakt to seamlessly communicate with the world’s largest loop and sample library. 
  • Create whole new patterns by using Loopcloud as a shortcut. Loopcloud allows you to multiply and divide sample tempo, change pitch, and export the results to your Digitakt. Want easy ways to sculpt and modify sound and then use these new creations as samples themselves? Simply do a mixdown on Loopcloud and send results to your Digitakt!

Song mode – how the Digitakt Loopcloud integration could revolutionize this feature

Digitakt’s song mode is a feature that allows you to combine multiple beats, loops, and sequences as a single track. It’s perfect, for example, if you need a backing track to improvise over or even for creating soundtracks. Here, the massive range of sounds from Loopcloud lets you make whole, fully functional sonic layouts with the Digitakt. Plus, dragging and dropping mixed and mastered samples to your Digitakt on Loopcloud too. In this way, you can prep the individual parts of a track on your computer before piecing them all together on your drum machine.

Loopcloud’s online sound and sample editor

Ok, so we’ve gone over the good points about Loopcloud, especially in terms of Loopcloud vs Splice, Arcade, and its other competitors. But let’s look a bit more at how the two work together. Digitakt Loopcloud integration ultimately lets you work however suits you best. For example, if you prefer to work mainly with a DAW or with Loopcloud’s time-stretching capacities, you can. However, if you’d rather not lay a finger on your computer, samples, sequences, and more can be edited directly in Digitakt. 

Loopcloud

Plus, the integration between Digitakt and Loopcloud means there are multiple stages of creative sound warping to play with. It’s not one of the other – for example, you can start off getting a beat sounding great in Loopcloud. Or, you could time stretch it, transfer it to Digitakt, and add some lush reverb or gritty distortion for an additional layer of sonic manipulation. 

Elektron Digitakt

Is Loopcloud worth it? More reasons Digitakt integration will upgrade your production either way

With this many choices, it’s possible to take sounds far away from their original forms. In this way, the only creative constraints are down to your imagination. The Digitakt Loopcloud combo is also great for those with a minimal studio setup without many other options. There are SO many possibilities here, in such a compact form, this combo could serve as all you need for creative music making on the go. If you’re still on the fence, the upgrade and integration comes with the following:

  • Comes with two months of free access to Loopcloud if you own an Elektron Digitakt. 
  • From then on loopcloud is affordable at only 6.99 EUR/month (5.99 GBP or 7.99 USD). However, the full range of Loopcloud subscription options includes a free option (though with minimal credits for sounds)
  • ability to drag-and-drop samples makes your workflow significantly more efficient

Final Thoughts

Loopcloud is already great by itself, as is the Digitakt. However, this integration is just another way that Elektron has thought through every inch of the process of work for both musicians in the studio and on the go. It’s this that made the Digitakt such an industry leader in the first place – and why the Loopcloud integration will just add an extra level of creative potential, and we’re very excited to see what this update leads to in future…

If you love the latest music production and sound design news, we have a whole section here. Plus, for gear reviews and breakdowns, we look at some more of the most exciting products here.

Training Your Ears for Electronic Music Mixing

Often, music mixing ear training is a process many musicians have to go through without formal training. Yet here, we look at one of the best bits of software for guiding you through this process.

Dream studios of tons of gear can make our music sound better. Yet it never hurts to practice getting your ear in tune with the basic building blocks of sound. That way, you can make ANY equipment sound amazing. We’ve reviewed Train Your Ears before, but this time we look at how it can help electronic musicians in particular, so read on.

What is Train Your Ears? Why does it stand out for music mixing ear training?

Martial artist Bruce Lee said ‘I fear not the man who has practiced 10,000 kicks once, but the man who has practiced 1 kick 10,000 times’. Train Your Ears EQ Edition is an app that focuses on ONE SINGLE yet VITAL part of the mixing process – EQ.

It shows you how to differentiate bandwidths and other EQ processed, plus, how to use this knowledge. By perfecting your ability to use EQ, you will likewise be able to perfect your tracks so they go from amateur to pro.

With Train Your Ears, you’re essentially fast-tracking the process of immersion within the sound that a professional mix engineer experiences in the studio. This immersion is why pros have the ability to intuitively know what to change in a mix. They’ve been surrounded by sound day in and day out and got used to changing the subtlest of parameters by instinct. This happens by zeroing in on one of the core processes of mixing and using it as a perfect training ground to increase your sensitivity to sound in general. Depending on how you use it, TrainYourEars can give you that same in-depth knowledge, in miniature.

The basics: what does train your ears involve?

The train your ears app is available for both iOS and Windows. The best part is it is applicable to a wide variety of genres of music. 

It consists of a set of exercises that are designed to be used alongside a live music player. With this, you can route the signal of your computer’s sound card. Consequently, you can practice with tracks from your iTunes library or recordings from your latest projects. This kind of practice in context makes Train Your Ears stand head and shoulders above other similar apps. Ultimately, it allows all musicians to adapt the practice to what’s relevant to them at the time.

Train Your Ears is a piece of cake to set up. It allows you to use practically any audio source you like, We cover this more in our other article here. 

The real goldmine is the ‘exercise designer’ section. Once you have a piece of music up and running, you can get stuck in with breaking down sound.

The exercise designer includes the ability to: 

  • learn to recognize octaves with a bandpass filter
  • practice with low and high cut and shelf filters 
  • 4 and 7 band EQ emulators (so you can connect what you’re hearing to what you’re seeing) 
  • Q factor exercises 
  • practice distinguishing which bands have been boosted and/or cut 

How does Train Your Ears help with electronic music mixing?

Being able to tell the difference between frequencies is particularly important in electronic music. In some ways, your mistakes are all the more visible. Here are some ways the program helps electronic musicians specifically.

One tip is to keep TrainYourEars open whilst you mix. When the mix is feeling stagnant, practicing with similar songs on the program is a great source of inspiration. It can also help you identify what you do or don’t like about them. Likewise, because it shows you what has been altered, you can work out how to apply a similar sound to your own mix. 

How to use it with synthesis:

Sometimes, you’re not able to fully pinpoint what may be wrong with a mix. This can even be the case with synth patches you may have created. This can very often be an EQ difficulty. It’s hard to tell if an instrument needs more low-end or high-end unless you have a finely tuned ear. TrainYourEars is perfect for helping develop this.

Having a way to break down EQ can also help design your dream sound. As we said in the introduction, you may not have the studio you wish. Nevertheless, you can add richness and tone to your instruments with clever EQ. TrainYourEars is one of the most simple and comprehensive ways to get to the stage.

What else can I use it for? (Electronic Music!)

One thing which can be hard when sculpting sound from scratch is actually deciding on when things sound ‘perfect’. This can be the case with both synthesis of all kinds, and sampling. It can be really easy to get caught up in making small changes.

This is where you can use TrainYourEars to compare multiple different EQ options across different creative ideas. And, this is without having to actually apply these parameters to the track you’re currently working on. How? Reference tracks!

By adding your reference tracks to TrainYourEars, you can hear better predict how changes in EQ will affect the sound you’re going for, without having to tamper with your actual project. This can be life-saving if you want to avoid messing up your mix. Plus, the program can also help you get more in tune with the specific track you are working on. 

A routine for music mixing ear training with Train Your Ears

  • Reference tracks. If you have a current project, add one of your reference tracks to the program and see how EQ changes affect it. Then, you can compare this with your own project to see what bits you need to change.
  • Working through the exercises. It goes without saying, but the program has already done most of the work for you.
  • Working with undertones and overtones. TrainYourEars helps you figure out what bandwidths add richness or remove muddiness. This can help craft your sound from scratch, especially if you’re starting with a pure tone, as with synthesis.
  • Learning the difference between different kinds of EQ. For example, what does a high pass filter sound like when compared to simply cutting lower frequencies? These differences can have huge effects on your mix.

Final Thoughts

We’ve gone on about how great Train Your Ears is, firstly in this review we did last year as well as in our article focussing on how to use it with guitar. One of the things which makes it such a valuable app to keep open alongside your DAW is how it lets you take charge of your learning and do things in the context of where you are NOW in the mixing process and your current projects. However, what makes it especially useful for electronic musicians is it offers you a shortcut through the difficult process of working out the sonic nuance which takes electronic music from good to great.

Train Your Ears is available from their website and is currently on offer for 49 EUR. You can get it by clicking here (takes you to the official website and if you buy using this link we would get a small kickback. Thanks!)

If you love reviews, we have an entire section of them right here.

Train Your Ears for Guitar – Why This Ear Training Software Actually WORKS

For guitar, music ear training apps can be of varying quality. Yet here, we review the best and simplest which shines because it includes the MOST relevant and easy-to-understand parts of the mixing process.

This is Train Your Ears EQ Edition. As a guitarist who tried to learn EQ from tutorials online, I found the immersive experience of Train Your Ears was the missing link I needed. We’ve reviewed it in general before, plus we’re also covering how it worked for electronic musicians this month – but here, read on for why it’s so great when adapted to guitar.

OK, why is Train Your Ears so great for guitar music ear training?

This involves two things that make it stand out. The first is it looks at patterns, not learning by rote. The second is that it’s adaptable to however you want to use it.

When we say Train Your Ears teaches you patterns, this means that the developers have looked at the crucial building blocks of understanding EQ and focused on showing how you can use them and apply them to anything. This links to how it’s adaptable. Train Your Ears doesn’t teach you in a fixed context. It simply gives you the independent ability to apply your knowledge to whatever tracks you like.

As guitarists, who are often more used to doing things by ear, this can work amazingly.

Is Train Your Ears easy to use?

I personally found the setup for Train Your Ears to be really intuitive as they basically do everything for you on the website. After downloading the app, you drag it to the folder you desire on your laptop as usual and you’re presented with a page of options when you first start it up, one of which is ‘play some music’.

To do this you can use any track, whether one of your own or something from your favorite bands. I used a track from the modern UK grunge band Dirty Modal Souls, so there was plenty of delicious crunchy guitar to practice ear training with. However, you’ve first got to get the track to play in the app. 

This is a simple drag and drop to the audio player, so you can add the track as an m4a file from your iTunes library or as an mp3 file or WAV file – the choice is yours and sometimes it can help to use a variety so you can hear the difference between compressed and uncompressed audio. 

Using the app this way makes it fun to practice as you are listening to your favorite music at the same time. 

How can I use Train Your Ears when practicing?

You can actually get the app to play tracks directly from your iTunes library, as in order to do the exercises you need the track to play live. You can do this by routing the audio of your computer so that train your ears receives audio input internally direct from your laptop. 

If you’re using iOS, you need to download BlackHole which fortunately you can do from the train your ears website live player page here. However, when you have the app open it also gives you simple instructions. If on Windows, you can likewise use the program VB cable which you can also get from the website we’ve linked above. 

After running the installer and following the instructions on the train your ears website to route your internal audio correctly, you’re all set and can play from iTunes and other places on your computer. 

Likewise, you can use your audio interface to route external audio such as from an iPod or other music player. 

Best guitar music ear training tips: how to get the MOST out of this software

  • Ensure you’ve got the right song for the exercise 

It goes without saying, but make sure you pick the right song for the exercise. If you’ve always struggled with separating bandwidths in big walls of sound, pick a song that has this and hop on board with the first exercise, recommended by Train Your Ears, which is on guessing which bandwidths have been modified. 

As a beginner exercise, this is simple and easily helps you understand the quirks and nuances of different bandwidths and what they sound like. This ranges from the echoing, booming sounds that come from giving the middle a boost or the way cutting lower frequencies can make your track sound toppy or thin. 

However, the exercises do get harder. 

  • Use multiple tracks in the same genre as reference points 

Another way to get the most out of Train Your Ears is to use multiple tracks so you’re not just practicing within one environment. Using multiple tracks helps you spot the patterns of sound between tracks and genres. You’ll end up knowing what compression or different bandwidth cuts sound like despite what’s going on with the rest of the instruments. 

Ultimately by learning the patterns and processes behind mixing audio, you will end up with an aural skillset that can help you adapt to any track. 

As a guitarist, to vary things it helps to practice on a couple of slow tracks with less guitar (such as ballads) as well as with a couple where there’s more going on, such as anything with double-tracked guitar or layers of sound. Focusing on guitar solos is also a separate area as here you’ll gain experience with frequencies up at the high end of the spectrum and how they change based on other instruments.

So, why does Train Your Ears work so well for guitar music ear training?

The takeaway is, nothing exists in isolation. Although Train Your Ears is deceptively simple at first, it provides a really comprehensive set of exercises that offer you new challenges in new contexts based on the tracks you choose to use, so keep challenging yourself, and it will likewise keep challenging you – and pay off, as well, 

It doesn’t try to teach you – it lets you teach yourself (and it’s easy to set up!) 

Train your ears allows you to adapt the exercises to whatever your preferred genre is. This makes it consistently relevant to your playing, even down to what you may be working on RIGHT NOW> By doing away with orthodoxy, set teaching programs, and conventional ways of doing things, it works with how many guitarists learn in the first play. 

Final Thoughts

Ultimately I found Train Your Ears works because it reminded me of learning to play guitar in the first place – I was teaching myself and learning about how the fretboard worked in the context of my favorite songs. Train Your Ears does just that with the EQ spectrum and more. It covers pairs of contrasts such as high cut and low shelf filters as well as challenging you from new angles such as with exercises that ask you to find bandwidths. Ultimately it’s a program you can keep returning to, because it stays consistently relevant to whatever you’re currently working on. Plus, it doesn’t become too easy, because of the sheer variety of ways in which you can use it.

Train Your Ears is available from their website and is currently reduced to 49 EUR. You can check the Train Your Ears website by clicking here. We are affiliated so if you click on our link and buy the product, we get a small payment which supports the work we do here at idesignsound.com.

If you love reviews, we have more of them in our reviews section where we break down other fantastic software for guitar and more!