Category Archives: Tutorials

A Guitarist’s Guide to Synths – FM, Analogue, Guitar Synths, and How to Use Them in Your Music

From guitar synths to analogue, additive, to wavetable, the world of synths is like learning a new language, especially if you come from a background playing guitar or bass. This handy guide will break down what’s out there and how to use them.

Additive vs Subtractive Synthesis: What’s the Difference?

Synthesisers can sculpt sound waves in two ways, either by adding new frequencies and harmonics to the original wave (additive synthesis), or by taking them away as needed (subtractive synthesis).

The vast majority of analogue synths are subtractive. Digital and FM synthesis nowadays also tends to be subtractive too.  However, additive synths are very popular and can be one of the best for beginners as they tend to be simpler.

Guide to Synths for Guitar Players: Analogue Synthesis

Analogue synthesis made up all synthesis in the 1970s and early 1980s, and creates sound mechanically, as opposed to digitally with a computer. It’s famous for generating lush, warm tones.

Example Analogue Synths: 
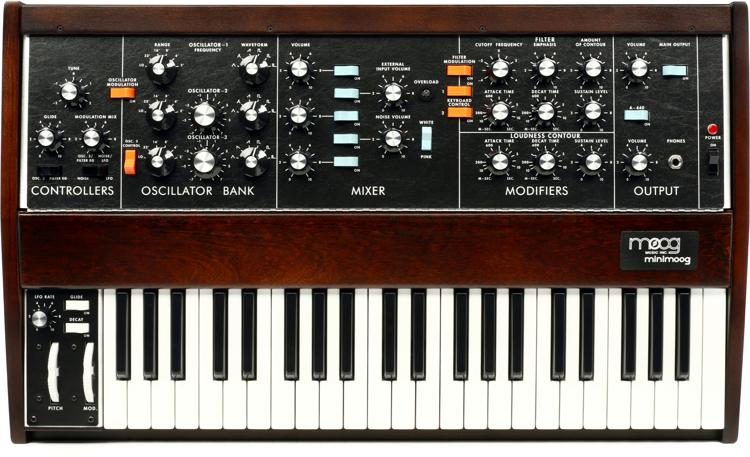
  • Moog Minimoog
  • Arturia Minibrute 
  • Korg MS 20 
Moog Minimoog Model D

What it sounds like and how you can use it: 

Analogue is easy to recognise and includes legendary brands like Moog as well as newcomers like Arturia. Ultimately if you want thick, fat sounds, you can’t go wrong with analogue. It’s favoured by classic rock but can also work for genres from industrial rock and metal, to pop rock, soul, and RnB.

FM Synthesis and the Sound of the ’80s

FM stands for frequency modulation and was made famous by Yamaha with the Dx7 in the 80s. What makes it stand out is like additive, subtractive, and wavetable synthesis, it’s one of the fundamental ways of generating sound in the first place.

One thing which sets FM synthesis apart is just how many combinations of parameters there are, but once you get the hang of it, it’s not as hard as expected.

Example FM Synths; 

  • Yamaha DX7 
  • Arturia DX7 V (an emulation of the classic DX7)
  • Korg Volca FM 2

What it sounds like and how you can use it: 

In some ways, FM summed up the sound of the 80s. It’s great to use in New Wave and featured in the work of bands like A-ha. It also works well for modern genres like indie pop when paired with clean guitars.

Ring Modulation: The Secret to Super Thick, Layered Sounds

Not a type of synth per se but a module in the signal chain. Ring Modulators take into account negative frequencies, and blend them via multiplication with the positive. This leads to creative permutations where waves cancel each other out to make futuristic and technological sounds, earning it a mention here for its totally different way of operating.

What is sounds like and how to use it:

Ring modulation is great for robotic noises or the sounds of glitching. However, with ring modulation, every time you use a waveform other than a pure sine wave, you multiply layers of frequencies, undertones, and overtones. This means it’s amazing for making super lush, creamy sounds, so use it whenever you feel something needs a little extra richness.

Guitar Synths: A Must Know for Any Guitarist Interested in Synthesis

The term ‘guitar synths’ can be confusing. These aren’t just regular synths which can emulate the noise of a guitar. Instead, after the invention of MIDI allowed instruments to share a common language, guitar players were then able to control synths from their guitar.

This requires a hexaphonic pickup, which goes between the guitar bridge and bridge pickup. From here, it sends the sound of each string separately to your machine of choice. Ultimately, this is what lets you ‘play’ a synth from your guitar.

Guitar synths have gained a reputation for being a bit ‘cheesy’ or ‘weird’. However, many classic bands used them, including Led Zeppelin, King Crimson, and, controversially, Iron Maiden on their 1988 release Seventh Son of a Seventh Son. Sound varies depending on the individual synth, but a few of the best choices include:

  • The Boss SY-200 and Boss SY-300
  • The Analogue Guitar Microsynth and the Mono Synth, both from Electro-Harmonix
  • Keeley Synth-1 Wave Generator

One thing to bear in mind is you will have to buy the hexaphonic pickup separately. Otherwise, guitar synths are a great introduction to using synth sounds for guitarists whenever you need extra inspiration.

Granular Synthesis – Where Sampling and Synthesis Meet

Granular synthesis didn’t get its lucky break until the 1980s, with Canadian composer Barry Truax. However, even today granular synthesis doesn’t tend to feature as much as other kinds. 

Granular synthesis is all about the samples. It’s generally digital, and splits up the sound into particles called microsounds before recombining them, leading to ultra unusual sounds. If it’s space age, avante-garde, or outside of the box you want, granular is a great option and we break down how it works further here.

Famous Examples of Granular Synthesis: 

Despite being less well known, granular synthesis has become a highlight for many great creative new brands like these below:

  • Bastl music GrandPA and MicroGranny (some of the best recent contenders)
  • 1010 music’s Lemondrop Synth
  • Portal Granular synth plugin, which we cover here
  • Mutable instruments Clouds (one of the most popular!)

What it sounds like and how you can use it: 

One of the quirks of granular synthesis is that it gives you very different results depending on tempo. For low tempos you can create lush dreamscapes. Alternatively, speed things up for more clean cut notes with out of this world timbres and textures. It can work for anything gritty and industrial or retro-futuristic, and you can use it for electronic or video-game inspired music. In fact, it’s a favourite for niche subgenres of EDM beatmaking, and in game and soundtrack composition for it’s glitchy noises. 

Synths for Guitar Players – What is Modular Synthesis?

Modular synths, like FM synths, have a reputation for being difficult but is actually simple when broken down. A modular synth is made of different modules which function as separate component parts, giving you huge scope to alter the signal chain. These modules may be VCFs, VCOs, or envelope generators. They can also include more unusual offerings such as sample and hold modules.

Famous Modular Synths: 

  • Moog Mother 
  • Buchla modular Electronic Music System 
  • Roland System 100

What Does it Sound Like? 

Modular synthesis doesn’t have just one sound as each synth is unique. Modular synths can be analogue or digital, the only difference being the way each individual module generates noise. In fact, this means that you can also get semi modular synths with both digital and analogue modules. 

How to Use it With Guitar: 

As modular synths can be so varied, it can work in many different genres. Therefore, how you use it depends on what exactly you’ve got…

Wavetable Synthesis

The first wavetable was the PPG wave, which came onto the scene in the 1980s, making Wavetable a relative newcomer to the world of synthesis.

Wavetable accomplishes with digital things which analogue can’t do. It captures the cycle of a single sound wave and sculpts it into different sounds by storing the different waveforms as a file where a traditional VCO would be. If you want to try it, there are great options for both hardware and VSTs.

Popular Examples of Wavetable Synthesis: 

  • PPG Wave 
  • Arturia Pigments 3 
  • Xfer Serum (VST)
  • Waldorf M 

What it Sounds like and How to Use It: 

Despite its 80s roots, wavetable features heavily in modern electronic music, EDM, pop, and more. However, that doesn’t mean you can’t use it with guitar! It can work great in electro pop when paired with backing guitar but equally in industrial music. 

Final Thoughts

This is just the tip of the iceberg when exploring different kinds of synths. However, for guitarists who want to branch out or even beginner musicians, this is a rough guide to knowing your analogue from guitar synths, ring modulation, and more.

Like more tutorials, cheatsheets, and rough guides? Check out our tutorials section here.

How to Sound Like Seattle Grunge Bands- Tips for Guitarists

The 90s grunge scene of Seattle originally became popular amongst those who felt misunderstood and hard done by. These same qualities mean it has continued to resonate worldwide from South America to the UK. Read on to find out how to achieve the iconic sounds of this musical era.

Double Tracking: At the Heart of the Seattle Grunge Sound

One of the best ways to get that heavy sound of Seattle grunge scene is to double-track your guitar parts. What may surprise you, however, is how some tracks have as many as four different guitars. These overlap each other to create a whole new sound. 

One example is Nirvana’s Smells Like Teen Spirit. In this record, legendary producer Butch Vig panned the two heaviest tracks to the left and right. He then topped these with other tracks with varying levels of FX. Legend has it Kurt Cobain took a lot of convincing to accept double tracking – he claimed it messed with the band’s underground sound.

What this style of double tracking does is blend sound like mixing paint. In this way, you can achieve sounds different to just your basic amp settings. You might not have access to the same FX as Vig. However, by using what you do have creatively, you can achieve a similar complexity to your heavy guitar parts.

Power Chords: How to Get as Heavy as You Like

One feature of grunge which also became used by punk, pop punk and post-punk, is the power chord. The power chord is neither major nor minor. It omits the third note of the scale, leaving only the first and the fifth. This neither major nor minor quality allows grunge to maintain that haunting, eerie sound. It also allows it to sit in a nice in-between spot as a genre. It carries a lot of sadness, but was also intended to be energetic, encouraging fans to mosh and headbang.

However, using power chords won’t immediately make you sound grunge. In fact, there are many grunge tracks which don’t use them, and plenty of punk, rock, and post-punk tracks which do. However, if you’re unsure where to start, sticking to power chords can help. Play at the low end of the guitar neck, add some gritty distortion, and you can get a great sound to start. For a real grunge sound, try syncopating them. By muting some of your strums, you can write riffs similar to ’Smells Like Teen Spirit’, ‘Fell on Black Days’ by Soundgarden, or any track by Alice in Chains. 

The Seattle Grunge Sound’s Secret Weapon: Be Messy

Grunge never tried to be perfect. As an underground genre, it shied away from the polish of large studios and the mainstream industry. In fact, Kurt Cobain actually asked producer Steve Albini to help him make the sound of In Utero, the band’s third album, dirtier, messier, and less commercial. You can notice this especially on tracks like Serve the Servants, which used seventh chords layered with tons of distortion. Occasionally, choosing more complex chords which don’t sound nice under distortion can give your playing a dirtier, grungier sound.

Alice in Chains were also masters of messy riffs and production. When they and other bands went unplugged, this ramshackle approach saw grunge become closer to folk. Whether electric or acoustic, embracing your natural messiness as a guitarist brings an underground authenticity to your playing. Just remember that moderation is also key!

Grunge Tip Number 4: Avoid Too Many FX

Because grunge was underground, bands didn’t always have huge pedalboards. Grunge bands tended not to use fuzz, wah, flanger, or other effects as much as some other genres.. Doing less with more is a key hallmark of grunge.

To achieve this, try limiting yourself to just a couple of distortion or overdrive pedals and your amp. Don’t be concerned with sounding pretty, but instead focus on expression and atmosphere. Contrast and dynamics, as explained in the next point, also help you do less with more.

Loud-Quiet Dynamics – the Key to Distinctive Seattle Grunge Inspiration

The original Seattle grunge bands often switched from loud to very quiet and vice versa. This meant when the chorus kicked in, it was most impactful. This technique was chiefly utilised by Nirvana. However, it also features in the music of Soundgarden, Mudhoney, Alice in Chains, as well as the Foo Fighters, although they came after the main scene. 

To achieve this, it’s not enough to just turn down the volume or lessen the FX when producing. It all starts in the writing process. Use a sparse, minimal riff in the verse sections with clean or almost clean guitar. Meanwhile, crank the distortion up to eleven in the choruses. This will provide you with the contrast you need to grab your listeners’ attention.

Shake Up Your Music Theory: How to Have a Truly Underground Sound

One lesser-known way of getting that grunge “Seattle sound” is by changing the way you write. Due to its underground values, grunge music really didn’t care much for proper music theory. One favourite technique of Kurt Cobain was to change the second chord of the key. This chord normally should be minor, but Nirvana often made it major. This is unexpected, and not what listeners expect to hear. Therefore, it is responsible for the slightly tense, haunting quality of tracks off Nevermind and In Utero. 

Other bands such as Alice in Chains also avoided theory conventions. For example, many bands kept the fifth chord out of the chorus. This prevented the songs from sounding too happy or like they ever reached a climax. Using these conventions can help prevent your sound becoming too mainstream.

Final Thoughts

These are just some of the ways you can achieve the Seattle Sound or something close to it. Remember that grunge was an underground, do-it-yourself genre with a reputation for going against convention, so there are no rules. However, these tips should help you narrow down your techniques to achieve the sound you’re looking for.

Liked this article? For more ways to think about music differently, check out the rest of our tutorials section here.

Using Busses to Mix Guitar: Double Tracking, FX, and Making Your Sound BIGGER

Using busses to mix guitar is the holy grail of blues, rock, punk, and metal production. This is about fat, punchy sounds which boost the intensity of your tracks and make your choruses pop out. There are several ways to achieve this, and you can always get creative with the multitude of effects out there. However, to start with, here are the basics which you NEED if you want to include this in your production. These are the combination of double-tracking, and busses. Read on to find out more.

Using Busses to Mix Guitar: When and Why You May Need to make Your Sound Bigger

To start off with, it’s good to know where and why you want to make your sound bigger. Many bands, including pop punk, punk, and 90s alternative, used copious amounts of double tracking. This became a technique to make their choruses really stand out from their verses. For upbeat genres, this contrast made tracks have distinctive ups and downs which defined the decade – think of Song 2 by Blur or practically any pop-punk track. However, it’s also used to create fat, crunchy metal and rock riffs. It can extend to less obvious styles, too, such as pop, fusion guitar or even jazz and blues. In short, double tracking and the use of busses is an essential skill for all guitarists. This is especially true if you are serious about producing your work. Although this article mostly covers how you might double-track for rock, pop-punk, or indie, the technical process is more or less the same if you want to use it for other genres too.

Double Tracking: Why You Need It For Choruses and How to Use It

What is double-tracking? It’s the process of layering two tracks of guitar on top of each other. However, you can’t do this by simply duplicating one of the tracks. Instead, when double-tracking, guitarists record each track separately. The two takes must be sonically very close to each other. The similarities make the tracks sound like one, fatter track. Simultaneously, the minute differences stop the sound waves from cancelling each other out.

Double tracking is an invaluable production skill if you don’t have your dream gear. For example, if you can’t get a big enough sound with your current amp, double tracking can fill things out. Additionally, your track arrangement might mean you add more instruments into the chorus, or vocals become higher. In many genres, a great chorus part needs the overall energy to increase. In these sections, double tracking is a great way to do this and increase heaviness and intensity along the way.

To double track, create a new track and label it the same as the track you want to double. If you’ve already recorded the part, simply record the same part onto the second track. You now have two tracks with the exact same guitar part on them. If you haven’t, just record the same part separately onto each separate track. Here, it’s important that you don’t just copy and paste the waveform! This will lead to sounds cancelling each other out, and you simply won’t get the same fat sounds you’re after. Instead, the minute differences between the two separate recordings are responsible for making everything sound much bigger. You now have two separate tracks with the same part recorded onto each in separate takes.

Beginners’ Guide to Mixing Guitar With Buses: How to Organise Your Tracks

With these duplicate tracks, it’s important to organise them. This is where busses come in. A bus is a track to which two or more other tracks direct their signal. This way, you can add effects to all of the tracks which connect to one bus, simply by adding them to the bus itself. This means you can apply reverb, delay, and so on to multiple tracks at the same time.

How do you do this? It varies from DAW to DAW, but look for an option labelled I/O or inputs/outputs. This allows you to control the sends and receives of a track. These are essentially what signal is going to the track, and what signal is travelling from the track. To route your tracks of choice to a bus, make sure you name the bus something clear. Then, when you go through the options for sends, you should be able to find it as an option. Do this to the same bus for both your tracks and you can now add FX to the bus which will affect both the original tracks.

Using Busses to Mix Guitar: Precision FX and Tone

In addition, double tracking is also fantastic for blending in small levels of FX. This is especially true if you don’t want to overpower the original sound. For example, you can blend a plate reverb, which tends to be quite distinctive, into your lead guitar line. Here, you can add it on only one track and create a double track of that part without the reverb. Just remember to record them both separately! Then, you get the effect but the original sound is still intact.

In short, double tracking is the Swiss army knife of production skills. It’s extremely powerful because it allows you such precise control over your sound. Building tone by blending in small amounts of other sounds will set you apart from the rest, taking your work away from just production into sound design and experimentation.

Final Thoughts:

Using busses to mix guitar is a topic you can keep coming back to. It’s so useful for every part of the mixing process. We can’t go into everything but think of this article as a rough guide to start off with. That way, you get an overview of what goes on and you can make it increasingly more complex as you develop your skills. Busses and double tracking can open up entirely new worlds of music production – and these basic skills serve as the building blocks to creating cohesive tracks which really work together.

Like this article? We have more beginners’ guides in our tutorials section HERE, plus upcoming articles for more serious producers and sound designers.

5 Ways to Get the Most Out of Your Amp

To get the most out of your amp, it’s good to understand it as a whole. Knowing how to think about music and about your sound is the most important part of working fluidly with your gear. While many musicians want better gear, here are a few hacks, fresh perspectives, and tips which will help you think about your amp differently – meaning you can make do with whatever you have and still have it sound amazing.

Get the Most From Your Amp: Know Your Tone

Every amp is unique. In fact, even with two different models, the condition in which the amp is kept plus other factors such as its age will affect the sound. Therefore, working out what the average tone of your amp is can be a lifesaver. Is it a rich valve amp? Does it tend to be heavy on the top end? If you get your knowledge of these parts worked out, knowing what to change when you dislike a sound becomes really easy.

Things to try: List five things you don’t like about your tone. Then, spend an afternoon or so playing around with your amp to see how and when these quirks vanish. It might be that you hit on the perfect combinations of settings to get rid of that annoying top end which has always bothered you.

Phase 2: Know the Rest of Your Gear

You might just be jamming, but things get complicated when you start adding pedals. Get to know all your gear inside and out. This isn’t just about being good with your gear. It’s about really knowing the ins and outs of everything plus how it connects. That way, you can separate what piece of kit is affecting which aspects of your sound. Ultimately, it also takes into account parts of your guitar such as the pickup switch and tone knobs. These can really affect the sound coming out of your amp. There’s actually a lot the guitarist needs to take into account to influence the ultimate sound. Being able to separate each piece of kit is key in order to craft the sound you want. 

Things to try: Think of every aspect of your gear, from your pickups to any pedals you have. Then, try improvising a guitar solo while varying each aspect and notice how the sound changes. This can help you tune your ear to all the nuances.

Understand Your Options – And How they Effect Each Other

This gets more into the nitty gritty of your amp itself. Most amps have a couple of tone knobs and a dial for distortion. Some brands such as Marshall geared more towards certain genres of music. Realise that distortion on one amp will sound very different to distortion on another. This might sound obvious, but this is one mistake beginners tend to make before they have found their sound. This fallacy is to treat every amp like an average fender or orange amp. Some amps also have delay and reverb. These can come in handy depending on the room you’re in. A room with a lot of soft furnishings won’t have the natural echoes you might desire when recording.

No option on an amp works in isolation. Cranking up both the distortion and the reverb at the same time can be overwhelming. However, another common first-time habit is to simply keep adding more effects when your sound doesn’t satisfy you. Instead, learning how all dials on your amp affect each other means you can achieve the desired sound with precision.

Things to try: In the same way your DAW allows you to save presets, once you find the perfect combination of settings on your amp, take a photo for future reference. You might be surprised how much of a lifesaver knowing your sweet spot on your amp can be in the stress before a gig!

Get the Most From Your Amp in the Studio: Know How to Record

It goes without saying that recording as opposed to playing live or just jamming takes some specialist know-how. However, the settings you need will be very different to those you want live. As a result, the options you use will change if you’re going from a recording session to a live gig. Keeping track of this means eventually you will spot patterns. Therefore, transitioning from one to the other will be very easy. It also gives you the subconscious know-how to create news settings for certain sounds and places. 

Things to try: The studio can be daunting. Research some of the gear you’re using beforehand. Does it favour rich, analogue amps? Taking this into account, mess around with your amp to see how you could adapt your typical settings to the quirks of recording.

When Things Seem Tough: Work With What You’ve Got

You may dream of having a huge Marshall stack, but with your setup, it’s probably not realistic. However, it can be very satisfying to work with what you’ve got in terms of recreating sounds. You may not sound like Dave Grohl, but if you really get to know your amp, you can fake it. Copy your favourite artists, listen to their interviews, and learn what settings they use. Then, find the closest approximation on your own amp. This will also help show you the difference between your gear and other people’s. And with this kind of experimentation in context, you will develop a broad, holistic overview of how sound works. In the end, this is much more useful than a narrow set of skills for your studio only. 

Things to try: Try restricting yourself. After all, tone is in the fingers. If you only allowed yourself to use the gain knob without touching the rest of your amp, what creative possibilities might you be forced to unlock?

Final Thoughts

Whilst these aren’t hard and fast rules, these hacks can help you understand how to work with your gear as opposed to simply getting it to work for you. It sometimes can sound a bit unusual, but the best musicians treat their music like a parallel world where they can really get into creative flow. Understanding how every aspect affects the overall result is the first step to getting that world to really fit together. As a result, these tips are the first step to thinking differently about your playing.

Like tutorials? You can find more here.

How To Build A DJing Setup For Beginners

Being a DJ is one of the jobs that merges passion and work. Apart from enjoying a mix of music, professional DJs earn a decent amount of money. According to talent.com, professional DJs make GBP£15.38 an hour on average in the United Kingdom alone. Because of this, many music enthusiasts venture into this industry.

However, an excellent DJing setup is necessary for people who want to learn DJing and later thrive in this career. This setup is essential to develop the ear for rhythm and technical ability. Suppose you’re planning to begin a career in DJing or start it as a new hobby. In that case, continue reading this article to know how to build the DJing setup for beginners. 

1. Start With The Input Devices

The input device is one of the essential DJ equipment. You may browse right here for more ideas. Generally, these devices feed samples and songs to the DJ rig. Setting up at least two input devices is needed to put tunes together. For this purpose, beginner DJs may choose to install CD decks and turntables. They may also add cassette and media players for more and better mashup tracks.

If you’re after a signature scratch effect that DJs are known for, you may prefer buying a turntable. Apart from this, turntables can incorporate many classic tracks into your playlist. However, turntables can be bulky and expensive, requiring a bigger budget and space.

On the other hand, you may start with the inexpensive CD decks as they can still feed songs, albeit without the authentic scratch effect. Yet, if you’re still learning the fundamentals of mixing tunes, this will satisfy your need

2. Add A Mixer

The mixer is the heart of a DJ setup. It doesn’t just connect the multiple input devices and allows DJs to apply effects and perform various DJ tricks, such as creaming, blending, and beating. In addition, mixers assist DJs in transitioning music from tune to tune and managing different audio signals.

In choosing a mixer, you may prefer the type that offers beginner-friendly features. You can opt for mixers with a fader, a trim control, and pre-listen functions. Apart from this, you can choose between selecting a compact mixer that could work well for mobile setups or touchscreen-based types.

3. Select Top-Of-The-Line Headphones

The best DJ headphones feature top-notch sound quality, reliable noise cancellation, and durability. They should also be known for low-end accuracy, excellent isolation, and comfortably rotating ear cups so you can preview and cue tracks without hassle.

4. Choose The Controller

If you’ve decided not to use vinyl records, buying a controller is the only option you have to build a decent DJ setup. Today, professional DJs prefer a digital layout featuring a laptop and a controller with DJ software. In some cases, DJs tend to install a controller without a mixer as many models already feature what most mixers provide, such as track manipulation and crossfading.

For this option, you can opt for stand-alone controller stations with easy-to-use or analog controllers requiring manual connections and adjustments. The former helps you learn the DJing techniques fast, while the latter familiarises you with the actual functions and setup.

5. Install Studio Monitor Speakers

Because many beginning DJs are still developing their ears for rhythm and timing, using studio monitor speakers is an excellent approach to listening to the tracks accurately. In selecting a studio monitor, one should consider buying speakers with Aux input for gadgets and generic audio sources.

For a whole setup, beginning DJs may start with a pair of stereo speakers and a subwoofer with a decent bass sound. They may also add amplifiers for a collectively better sound to pump up the DJ experience.

6. Add Equipment And Accessories

If you’ve already known the basics of DJing and your ear for rhythm has grown sharp, you may add more equipment and accessories. You can add a subwoofer for better bass quality and media players that could amplify the sound better.

You may also try to use karaoke equipment if you’d still be DJing within the premises of your house. If you want to take your DJing skills up a notch, you may consider installing a PA system to mimic the dance club vibes.

7. Sound Check

Half of a DJ’s performance is credited to his skills, while the other half is to his equipment. Because of this, buying high-quality DJ equipment is vital if one desires a more-than-average DJ performance. So, if you’re a newbie DJ, you may consider purchasing high-quality DJ equipment even if you’re still starting, as you’d use it in the following years. Reading this article can be an excellent start if you’re into building your first-ever top-quality DJ setup.

Find the Perfect Guitar Tone: Using Sound Design to Find your Tone

How do you find the perfect guitar tone? Some say guitar tone is in the fingers. Some say the producer creates a lot of it and some say it’s all about having the right gear. In truth, there is no right or wrong way to achieve tone. What matters is you achieve the tone which is right for your own creative purposes. There might be many ways to do this. You might use multiple ways before you are satisfied with the result. However, this article will show you how to use sound design and plugins to find that perfect tone. It’s a process – even if you start off with something less than perfect.

Guitar Pedal Plugins: An Easy Way to Achieve the Perfect Tone

Most guitarists rightly spend plenty of time focussing on their mastery and command of their instruments. However, to find the perfect guitar tone, it is important to remember that sound design allows us opportunities beyond our analogue gear. You can reach tone beyond your average by using those guitar pedal plugins which come with every DAW. Don’t just experiment with them or use them in the context of a guitar solo. Try deep-diving and really getting to grips with them. This means using them slowly and using them subtly. You can also add them in the background to add tone as opposed to making them the central focus.

In addition, try turning your attention to lesser-used plugins such as soft saturation and multi-FX. You can repurpose pedals such as wah by applying them down low on a single half of a double-tracked riff. This can alter the perception of tone on both tracks. Using pedals as the building blocks of tone as opposed to the focal point can be game-changing. In this way, they can really make you think about how your guitar playing relates to sound design.

Basic FX: Reverb and Delay to Find the Perfect Guitar Tone

Reverb and delay are some of the most basic FX. These apply to either whole tracks or the guitar on its own. Tone doesn’t exist independently of these FX. However, they’re not the kind you can use in order to create tone itself. Instead, they are the kinds of FX which would alter your tone – or at least its perception.

So, how do you take reverb and delay into account when designing your tone? Every good mix has them. For starters, you could use them to emphasise the bits of your tone you want to stand out. You can add reverb to guitar bass notes, or subtle delay on the top end of a riff. This can affect timbre subtly and bring crystal clear highs and rich lows.

If you want to see some reverb products at fair prices, check out pluginboutique.com by clicking here. If you buy something, you really really support us because we get a small kickback. There is really no guitar-specific reverb, all product have their own little vibe and quirk, plus most of them have endless setting possibilities.

Also bear in mind too many FX can smother your tone. Reverb and delay make everything sound better, but often this is only superficial. The best thing is to make sure your guitar sounds great in the first place.

Below you will find the best guide for beginners, it is a long one, but it is comprehensive.

Bringing out the Best in Your Tone: Working With What You’ve Got Already

Ultimately two separate things make up tone. These are the way the musician plays, and then any additions to the timbre. These timbral additions can come from equipment and sound design. As a result, if you don’t know what you’re working with, it might be difficult to get that perfect match. Understanding tone as something you can achieve in multiple ways can help a lot.

The first step is to realise that too many cooks spoil the broth. Often with adding FX for tone, less is more. So how do you know what you need to add? The first step is to identify what you dislike. This could indicate what your natural tone, for whatever reason, is lacking. Does it sound too thin? Maybe you can use sound design to increase the bass frequencies. Does it sound too tinny? There may be some sound in the top end which you can take out with EQ. Changing your tone like this can make you look at the entire finished track in a totally different light. Do you feel like it’s lacking a certain grit, especially if you’re creating a blues or hard rock track?

If you’re recording in a full studio with mic-ed up amps, you might lose some of that perfect sound. This can happen simply due to the space’s natural acoustics. This is where sound design becomes an invaluable tool so that you can easily add in those bits you’ve lost. Overall, starting with a criticial ear allows you the freedom to use sound design as an addition to your natural tone.

How to Tie Everything Together: Tone in the Context of a Finished Track

It’s one thing to know what tone you’re starting with. However, if you really want to find the perfect guitar tone, you may have to modify things within the sound design process. Overall, keeping your tone in line with the rest of a track is something totally different. This is where the mixing and mastering process comes into its own and it really helps to know your gear. Having a good ear for what a mix needs is a huge part of this. If ear training, in general, is something you struggle with, you can check out our article this month. This breaks down the best ear training software on the market as well.

Looking Deeper to Find the Perfect Guitar Tone

You might have the best tone in the world. However, if it’s too overpowering, it won’t sound good within the track. The most important takeaway here is to know separate how your tone sounds when isolated. This helps you balance it with how it sounds within a track.

However, it’s important to distinguish what is and what isn’t what is a tonal issue. Something might be an issue on the master bus or one which requires you to alter a different instrument altogether. You can do this by isolating your track. The best thing is to strike a balance. Your tone should sound great on its own, but also not overpower any other instruments.

Looking to find more ways to improve your skills? Check out the rest of our tutorials over at https://www.idesignsound.com/tutorials/

Final Thoughts

Tone is an elusive quality and it is hard to pinpoint where exactly it comes from. However, finding the perfect guitar tone is not the mysterious alchemy people often make it out to be. Sound design is as much a part of tone as the initial guitar recording. For guitarists, it is crucial not to overlook what you can do in the sound design process. This will ensure your instrument sounds fantastic both on record and live.

How to Use the Major and Minor Musical Scale In Composition

A musical scale is a collection of notes that when played together sound “at home”, “normal” and “natural”. If you don’t consider scales and just compose by ear, your music will risk sounding “dissonant”, which basically means non-musical. The Major and Minor musical scales are the two most important scales in western music and are found everywhere from Christmas music to radio hits. They are some of the foundational building blocks of music theory and one of the first places many musicians begin with their theory knowledge. Generally, major scales sound ‘happy’ and ‘minor’ scales sound sad; nevertheless, a deeper look shows their musical makeup is inherently different. When used in compositions, it can sometimes be hard to tell them apart – chord progressions based off major scales can contain minor chords, and progressions based off minor scales can contain major chords. Breaking down the music theory can help you understand which is which and how to use them in composition.

How to Use the Major Musical Scale in Composition

The major scale is incredibly versatile and used in blues, rock, singer songwriter, RnB, folk, and much more. Like any scale, it is a sequence of intervals (gaps between notes) which creates a set of notes to be used to build chords and compose. It is identical to Ionian mode in modal music. Generally it has an upbeat, climactic, ‘happy’ feeling to it.

To use the major scale, it is easiest to focus on chord progressions. The most common chord progression in the major scale is the I – VI – V chord progression. Notes are numbered in order and each note has a particular chord attached to it These can be major or minor depending on which note in the scale the chord is based off, but the general pattern for the major scale uses Roman numerals to number the chords as follows, with lower case numerals indicating minor chords and upper case numerals indicating major.

I – ii (minor) – iii – IV – V – vi – VII(7)

The fully major I – IV – V progression is often followed by a minor vi chord which provides a sense of tension before the progression resolves to I again. This enables the chord progression to have a mixture of emotions which makes the composition more interesting and varied.

How to Use the Minor Musical Scale in Composition

The minor scale can be used similarly – by building chord progressions based on the notes of the scale. Like the major scale, each chord aligns to each note. However, the sequences of steps between the notes is different. Because the scale resolves (gives a feeling of completion) to a minor note, it is helpful to keep in mind that a composition generally needs major chords to lighten the atmosphere and ensure the song does not get too tense – except when deliberately trying to create a sense of sadness, but also of mystery, suspense, or eeriness.

The minor scale contains a diminished chord, also known as a tritone, which has a flattened fifth. This chord has a particularly tense and eerie feeling which is often used in horror movies or music like heavy metal. The chord numbering for the minor scale goes like this:

I – ii(diminished) – III – iv – v – VI – VII

Both major and minor scales can be used to create basslines in genres ranging from rock, indie, punk, or underground music set up. Knowing the scale means you can work out the related chord progressions which are possible – and from there identify the bass note of each chord.

These bass notes can be used to create a bassline which follows the chord progression tying together a composition in a way which is both satisfying and relatively simple to compose.

With a little bit of practice, the musical scales will come second nature to you!

Want to explore more music theory? Then come on down to our Musical Education category where we have prepared a lot of articles similar to this one – click here!

Is it Possible to Use Both Major and Minor Musical Scales in a Composition?

It is possible to switch from a major key (one based off a major scale) and a minor key in the same composition. This is done with a pivot chord which balances the different moods of the scales. It is a creative way of using the major and minor musical scale in composition, although it takes some music theory knowledge. There are many ways to learn theory in depth – but one of the most comprehensive and accessible courses on the internet can be found on Udemy. Jason Allen’s comprehensive music theory course, teaches theory at a college level, covering chord inversions, harmony, and even technical analysis of the building blocks of music, such as what it means to be in tune. Extremely satisfying for musical inspiration, it has racked up five-star reviews and been enjoyed by over 90,000 students so far.

Here is a representation of the major and minor scales on the piano keys

Variations on the Minor Scale

There are several variations on the minor scale, but two of the most common are harmonic minor and melodic minor. Harmonic minor has a tense sound which comes from raising the seventh note of the scale a half step upwards, making it sharp. The sound is often associated with Eastern scales such as the Persian scale – which uses these kinds of intervals – yet it is also found in Western music from the medieval era onwards.  

As well as the spooky sounding diminished chord, keys based off the harmonic minor scale also contain an augmented chord – with a raised, as opposed to flattened fifth. This creates a complex, jazzy sound which can be used to provide interest and relief – very different from the diminished chord.

This is the numbering of the chords for the harmonic minor scale:

I – ii(dim) – iii(aug) – iv – V – VI – vii (dim)

On the other hand, the melodic minor musical scale differs from the natural minor scale by raising the sixth and seventh notes up a half step when ascending. When descending, the scale becomes the same as the natural minor scale.

Ascending:

I – ii – III – IV – V – vi – vii

Descending:

VII – VI – v – iv – III – ii(dim) – I

Digital Music Theory Tools – Composing With Plugins

Music theory is a topic which, once explored, can be an endless source of fascination and inspiration. Sometimes, it can be hard to know where to stop, or what is and isn’t needed for composing a song. For those who wish to cut through the noise, some nifty plugins can help with doing so right alongside the composition. This does not mean that you don’t need to know music theory, it just means that there are tools to make your life a little easier when you try out different composition parts.

Scaler 2 by Plugin Boutique is fast, intuitive, and great for multitasking. You can get the plugin by clicking here! Reviewed in Beat Magazine and MusicTech, it has so far been given the thumbs up by over 30,000 musicians.

Pentatonic Scale: Music Theory to Create Tonal Quality in Composition

The pentatonic scale is a mainstays of American and Western music from folk, Appalachian ballads, and blues to roots rock and country and western. The minor pentatonic, with its deeper, darker sound, is more commonly used in blues and folk-rock, whilst the major pentatonic scale is more suited to country and western, with a twangier sound used in slide guitar playing and chicken picking techniques.

The major pentatonic scale is obtained by taking the normal (natural) major scale and removing two notes: the fourth note and the seventh note. All the notes that remain (five, or penta) create this scale, which is considered a very stable and strong scale, mostly fitted for bass or melodies where you are certain about the feelings that they transmit.

The minor pentatonic scale follows the natural minor but only has five notes instead of seven. Here, the second and flattened sixth notes are removed, giving a scale which sounds warm and pleasing, somewhere in between major and minor and neither eastern nor western. Also known as the blues scale, it has built modern pop music – pioneers of pop like the Beatles have taken inspiration from the blues and rock’n’roll tracks of their predecessors.

Both the major and minor pentatonic scale have a tonal quality. They do not have any semi tones in them – due to the notes which have been removed, they instead contain whole major third and minor third intervals respectively and this lends them a lilting quality like that found in Celtic music, taking them away from the conventions of classical composition.

If you are looking to deepen your knowledge of music theory, we have a whole category of articles, which can be accessed by clicking here.

How to use the theory of the major and minor pentatonic scale in composition:

Firstly, it depends on what genre you are composing. As above, certain genres lend themselves to certain scales more easily. Nevertheless, this doesn’t mean that they cannot be exchanged. The third interval in the scale can also be used in composition to provide a lift and drive the bassline and chord progression into the chorus.

Each note of the scale is linked to a chord which is either major or minor, although to preserve the tonal quality of the scales, power chords can also be used. These are chords where the third- whether major or minor – has been removed – meaning that they are completely neutral and can be used to pivot between different keys – or even from the major pentatonic scale to the minor pentatonic scale and vice versa, with the blues/country composition ‘Windy and Warm’ by Chet Atkins being a case in point.

The minor pentatonic scale is also the basis for twelve bar blues. This is a traditional progression of chords from the American South which can easily be soloed over on guitar or used as the building blocks for composition in multiple genres such as those mentioned above.

I – I – I – I

IV – IV – I – I

V – IV – I – V

This is just the start of music theory – even in themselves, the major and minor pentatonic scales are useful for so much more than just soloing and the twelve-bar blues. Find an in depth, completely comprehensive, engaging, and enjoyable , with Jason Allen – available in seven languages, it covers everything you need and more.

Another useful technological tool for musicians in the Plugin Boutique Scaler 2.

This plugin not only allows you to learn music theory alongside producing your own work, it’s intuitive, simple, and has everything you need to take your music into your hands without having to get into the nitty gritty details – perfect for those musicians who prefer to learn on the go. Of course, it also covers the pentatonic scale. Find it by clicking here!

Complete Beginners Guide to Music Production – VST plugin REVIEW

Hello and welcome to our review of the Producertech Complete Beginners Guide to Music Production VST plugin available on Pluginboutique.com!

Making music is incredibly rewarding, but it can also be extremely stressful – especially for beginners. DAWs, MIDI, chords, tempo – with so much to understand, where do you even start? Created by the pros at Producertech, The Complete Beginners Guide to Music Production from Producertech is a VST plugin composed of eight software programs, and eight courses with over twenty-five hours of tutorials to get you started making music. It also includes notes and quizzes to help strengthen and test your knowledge along the way. This is an extensive and comprehensive package, so what’s it comprised of? First, let’s touch on some of the courses.

And if you are interested in more on the topic of music theory, then head on down to our Music Education category by clicking right here, and then take a stroll through our Tutorials section.

Beginner’s Music Production Guide to Beats Production

This one starts beginners’ off with one of the fundamental elements of making music – making beats. It introduces MIDI and digital instruments for beginner musicians and gives users a basic understanding of musical concepts like rhythm and timing. It also explores more complex elements of composition like looping and how this works in a variety of DAWs.

Beginner’s Music Mixing Fundamentals

The Beginner’s Music Mixing Fundamentals provides beginner musicians with a good understanding of what mixing is and why it matters, covering fundamental topics such as level balancing, frequency and dynamics; and how changes to the shape and balance of different frequencies affect the overall mix. It also covers the use of effects, such as reverb.

The Art of Sampling

Starting from the very basics of what a sample is, beginners in music production will gain practical understanding of how samples are created and implemented. Generally, sample packs refer to collections of sounds music producers make. Their primary purpose is to help beginners in the music production industry produce new music. The music producer selects a sample from the packs and uses it to facilitate the music creation.  

Moreover, music producers use sample packs with MIDI packs or downloadable files that they convert into sound. They can be helpful when the music producer wants to create complex music arrangements, melodies, and drum parts with one click.  

If you’re in the process of sampling, you can check out some providers of sounds and tools online to buy samples and MIDI for your first music production. 

On the other hand, if you want to develop your own samples, this course provides understanding of a variety of topics including musical fundamentals like notes and pitch, to techniques which allow beginners to start creating and implementing their own samples in their music.

The Art of Filtering

From the basics of what filters do and why we use them, users are guided towards an understanding of how filters implicate the overall quality of the sound we create. Technically, filters can be a powerful tool for shaping a sound. They can help improve the frequencies to achieve the sound you want. 

So, if you’re in the process of filtering, you need to familiarize yourself with the different audio filters. For instance, a low-pass filter can be an excellent option to keep the fundamental frequency and eliminate harsh frequencies. Also, if you’re going to eliminate the rumble or any noise below the lowest frequency of a specific sound, a high-pass filter can help.  Aside from the ones mentioned above, you should know other essential things about filtering involved in a music production process.

This course also explores more advanced topics like modulation, and how envelopes and LFOs are used in music production.

What about the software?

The Complete Beginners Guide to Music Production VST Plugin also comes with eight software programs, which include: a free sample workstation, the Zampler//RX; a real-time spectrum analyzer, the Voxengo SPAN; a modern motion filter, the Filterstep by Audiomodern; and the WaveWarden Odin 2 – a 24 voice synth. It also includes Scaler 2 – great for beginners and advanced musicians alike.

The Complete Beginners Guide to Music Production VST Plugin: Scaler 2

This is a powerful VST plugin that can really expand the creativity of your composition – especially for beginners. Scaler 2 detects your audio and MIDI signals, determines the key and scale, and then suggests chords and notes to match. Even beginners who lack theoretical knowledge are quickly able to create melodies, chords, and baselines using this powerful software. Also included, The Producer’s Guide to Scaler 2, outlines the many ways this plugin can improve your compositions. For beginners who are not well versed in musical theory, Scaler 2 is a powerful tool to have in the toolbox.

What’s the takeaway?

If you are interested in making your own music, but lack the knowledge, theory, or confidence to get started, this course just might be the perfect solution for you. Available for purchase and download from Plugin Boutique, the courses and accompanying software really set new musicians on the path of success with a variety of tools and practical knowledge. With everything you need to get started, this program is exactly what it says it is – The Complete Beginners Guide to Music Production.

8 Effective Hacks That Will Help You Learn Jazz

In recent years, people have been captivated by the magic of jazz. People who love this music genre can’t get enough of it and want to learn as much about it as possible. It’s a beautiful style that is hard to reproduce, but easy to appreciate. Are you thinking about taking up jazz? Here are 8 effective hacks that will help you learn jazz in no time.

In recent years, people have been captivated by the magic of jazz. People who love this music genre can’t get enough of it and want to learn as much about it as possible. It’s a beautiful style that is hard to reproduce, but easy to appreciate. Are you thinking about taking up jazz? Here are 8 effective hacks that will help you learn jazz in no time.

1) Learn your major scales

While at first glance it may seem like you are learning the same scales as classical musicians, this is not the case. Jazz has its own set of rules that require special attention. Major scales are important for improvisation and understanding what chords go with which keys. For example, if you play a C major scale over an F7 chord, it will not sound good. Your scale will clash with the chord, which is how you know that it’s the wrong one to use. It’s important to learn your major scales in all 12 keys so that you can avoid this problem.

You may want to sit down and just run through these scales without an instrument, but practicing on an instrument is better. If you play a saxophone, practice your scales while playing that instrument. Use a piano or guitar to practice if that’s what you play. You will get faster at the scale and be able to go over it more efficiently by practicing with an instrument in hand.

2) Use a cheat sheet to learn jazz

If time is an issue, you might consider using a cheat sheet or fake book as it is also called to help you with learning jazz. It’s basically a simple document where you put all the chord changes and lyrics of your tune in there, and then print it out. Put this sheet on a stand right next to you as you practice the chords on your instrument(s). Eventually, you will know the tune by heart.  If you are just starting to learn jazz, then now is the time to get a new fake book to use in the middle of practicing chords. It helps you remember because it offers you a collection of jazz songs you can play in one handbook. Aside from that, the fake book can help you learn music more quickly without investing hours and hours trying to learn songs or recordings. However, all you need to do is to ensure that you get the right one because there are a lot of them in the market today.

3)  Listen to jazz often to learn jazz

This might seem counter-intuitive, but hear us out. The thing with jazz is that it’s an art form based on iteration and improvisation, which means you can’t really learn the  art of improvising by studying a bunch of examples in textbooks or notation alone. You have to practice doing it yourself, over and over again. And the best way to do that is by listening to jazz, which includes musicians improvising on real-time recordings. Listening helps you understand the art more, and gives you the inspiration to try out what you just heard. Honestly, there’s no other way to learn it.

4) Transcribe Music and Practice Your Transcriptions

When musicians are first learning jazz, they often rely heavily on using jazz language to improvise. Once you have a working vocabulary, however, it’s time to expand your knowledge by transcribing. Transcribing simply means listening to the recordings of great improvisers and writing their solos down by ear .

The goal is not necessarily to learn all of the notes, but to learn how great players construct solos. Learning the vocabulary is only the first step – learning how to create with that vocabulary is where things get interesting.

5) Learn your major and minor triads

To help you learn your major and minor triads, many musicians recommend singing the root of the chord followed by the type of chord (major or minor) while playing it on an instrument. This is a great way to get the sound in your head and into your ear. Once you can hear these chords in Major and Minor form separately, you will be able to hear when a jazz musician uses chords from the major or minor scale.

Learning the major and minor triads for every key in your instrument’s range can help you with improvisation, playing backup, and even writing jazz songs in any key.

6) Learning how to improvise to learn jazz

In the words of Bassist Matt Penman , “In order to really improvise well, you have to have a good command of the changes and be able to hear them in your head.” How can we apply this? Here are our recommendations for this one:

Record. A great way to really learn the changes is by recording yourself playing with them over and over again . You will be able to hear your progress, which helps you improve much more than simply playing in front of your mirror (which I am definitely guilty of). Write out solos. If soloing on recordings is not for you, try writing out your solos on paper. That’s right, write it out note for note.

This one is really great for those who are not as comfortable writing or improvising on the spot. If this is you, write down a tune and play it over and over again . Once you have become familiar with it, start to create solos of your own.

7) Learn Common Chord Progressions and Rhythms

Jazz is characterized by a certain chord and rhythmic pattern. If you know these patterns, it’s like learning the language of music. There are four common chords in Jazz: major 7th, dominant 7th, half-diminished seventh and minor 7th flat 5 (which is also known as a minor flatted 5th).

Learning these four chords will give you the ability to improvise with the most common chord progressions in Jazz.

8) Get Your Arpeggios Up to Shape

It’s important to know what arpeggios are and how they apply to jazz. An arpeggio is just a fancy way of saying that we’re going to learn each chord as a separate entity (like learning triads in music theory). So rather than thinking, “I’m playing C Major 7 here,” instead play the C Major 7 arpeggio and hear all of the chord tones. If we learn each chord as a separate entity and get good at recognizing them, it makes transposing and soloing that much easier.

Finally, the next steps of learning how to play Jazz are putting these different elements together and getting your ear involved more. Try spending some time playing songs that you like with a teacher or bandmate. This will help you get comfortable improvising while remembering things like chord progressions and rhythms of the tune at the same time. This will help you learn the changes, melodies and rhythms in each song you are learning. Jazz is a complex style of music that takes years to master, however knowing these key elements can make getting started on your Jazz journey much easier.