The TAL-J-8 Roland Jupiter 8 emulation is good. I mean, really good and also enjoyable. Who doesn’t know the Jupiter 8? This is a rhetorical question, if you are on this website and you regularly follow the content here, you are no stranger to synths. Now, this one is actually THE synth. Top of the line.
Roland has made a couple of good synths and a couple of bad synths. They have also made some excellent pieces of music production hardware. The Jupiter 8 is one of them, and for me it is the ultimate polyphonic subtractive experience. It sounds T-H-I-C-K. It sounds classy. It NEVER sounds outdated.
A lot of replicas have tried to recreate it’s unique, full and organic sounds. We have of course the Arturia replica, which is our opinion captures it pretty well. Then we have of course the Roland Cloud offering the sound. Then we have a lot, and I mean a lot of presets in other VSTs that are trying to give you a piece. If you want more information about emulating the Roland Jupiter 8 in VST form then we recommend this brilliant article here.
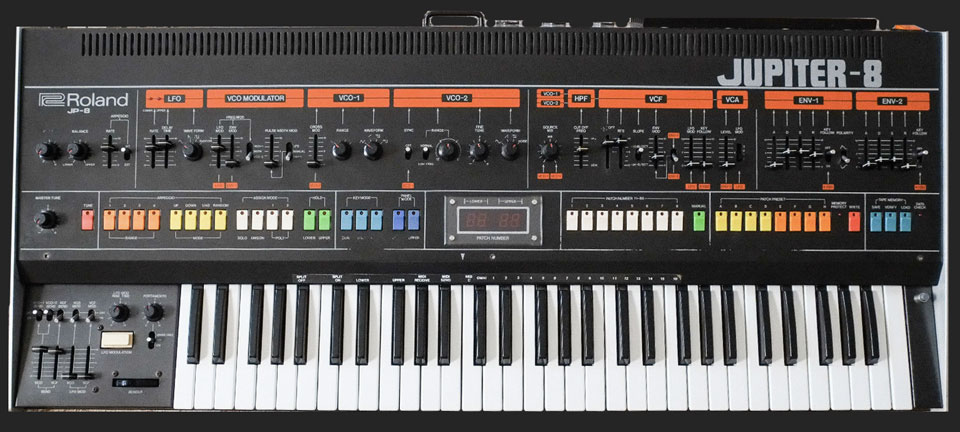
Or better yet, for the ones that can affort it, we actually recommend buying the hardware itself. If you can find a serviced, fully working model that is. I mean, just look at it:
For today though, we will come back to earth from Jupiter and discuss the newest addition to the synth’s ever expanding arsenal of VST Plugin emulations. I am talking about the TAL-J-8 product.
Tal has been in the space for quite some time now, emulating (successfully in our oppinion) Roland gear.
They have done the Juno pretty well. They have recreated the SH-101. They actually offer the Juno chorus as a separate VST. We love Tal, and we think that their output truly helps out music producers.
This VST captures the brassy, powerful but also mellow sound of the Roland Jupiter 8 very well.
Yes you know what I’m talking about. If you don’t, the most accessible example for me right now is Michael Jackson’s Thriller. Just listen to those gorgeous pads and the harmony that this 8 voice VCO powered monster can create.
The synth is truly cosmic, one of a kind. It can be powerful, it can be smooth, it can be in the background and it surely can be in your face. It can sound classy and it can also be new age. As you can see, I love the Jupiter 8. I could not fit it into my studio in the keyboard, standard version, so I did the next best thing and bout the 2U Rack version, the MPG-80 (Rev.4 of course). It is cheaper and it is much more compact, but it lacks the front panel (sold separately). No problem, i’ll just use the VST editor.
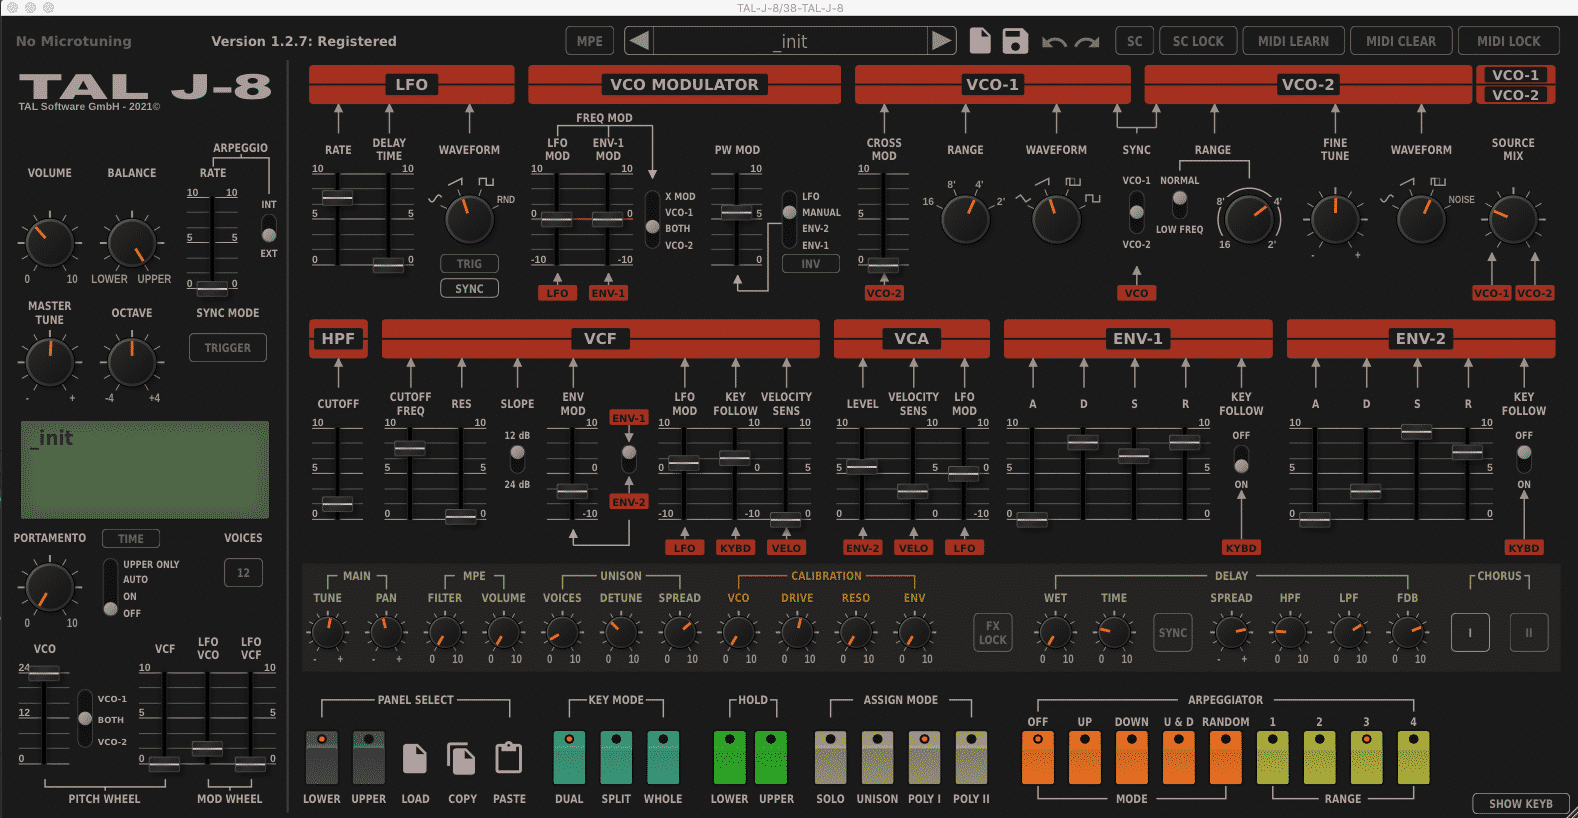
The TAL-J-8 VST also has MPE support, we can’t recall right now any other Roland Jupiter 8 emulation that has this.
This one is very interesting, and at this time this is the only Jupiter 8 emulation that can suport MPE. If MPE will not be huge in 2021, it will be extremely sought after in 2022. It is very interesting what you can actually do with just a keyboard, if it has the right sensors. For now you can use MPE to individually adjust the filter and volume on a per-note basis, with pitch pretty soon to follow I guess.
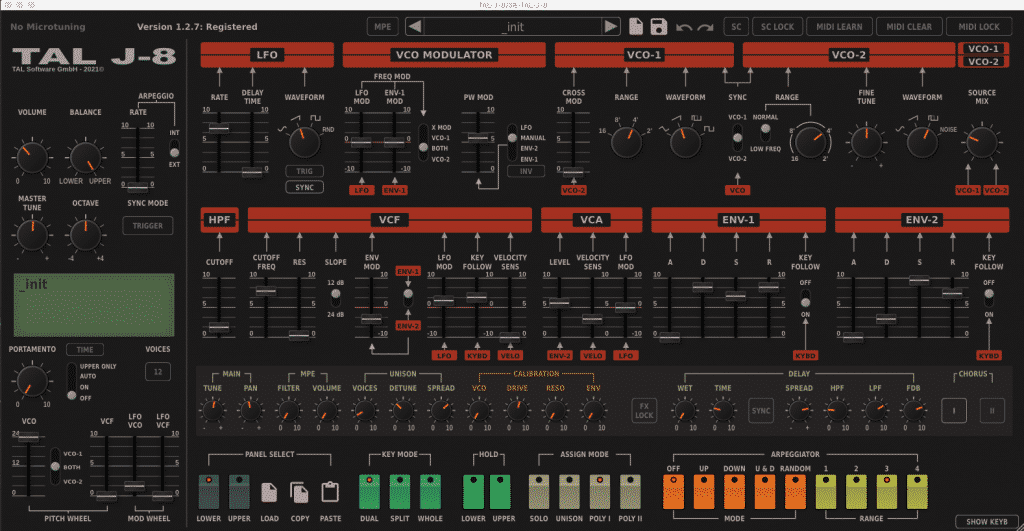
You can see the MPE controls in the screenshot below, showing the synth control interface.
We used it for two weeks, doing all kinds of sounds on it. it shines on classic analog synth stuff like bass and chords/harmony. The filter is very nice, and if you increase the resonance a little bit, you will get that trumpet like sound for which the Roland Jupiter 8 is famous. It is hard to integrate in contemporary electronic music, but still is nice, especially if you are into sound design for movies and games.
While the unison function is nice, we do not recommend you use it on a VST Synth as it will pale in comparison to real unison on a real hardware synth.
Oh and one more thing, the 8 number in the TAL-J-8 is only to reflect the Jupiter 8. It’s not a voice count though, because the TAL-J-8’s polyphony count goes all the way up to 12.
Also noted is the upper/lower system implemented in most high end synths of that era, like the Yamaha CS80, Roland Jx10 and the Prophet 10. You basically get to layer two separate synths, and can play them simultaneously or split the keyboard.
Delay is also a very nice addition to the virtual synth
The delay sounds very nice, reminding me on classic analog BBD style circuits. There is also a Chorus on board, with option I and II in very classy Roland fashion. It sounds tremendous, but even without chorus, this VST has a very surprisingly wide stereo image. Pop the Chorus on and it takes it to the next level.
TAL-J-8 presets and preset browser
As requested here on iDesignSound, we will provide you with our thoughts on the preset browser, as there are more and more musicians traveling and doing live sets (well, not right now due to COVID-19) so browsing through presets on your VST synths is very important. It is not very good for browsing in a live environment. You use your mouse to browse a drop-down style menu, with folders and sub folders. But the presets are really nice.
You get the original factory presets on the hardware, some original TAL sounds plus 6 other folders, with more than 500+ presets onboard immediately after you buy it.
You can get the TAL-J-8 Roland Jupiter 8 VST at a good price.
Yes it is time limited but still it’s a very good deal. TAL is a very nice VST company and I really enjoy their products.
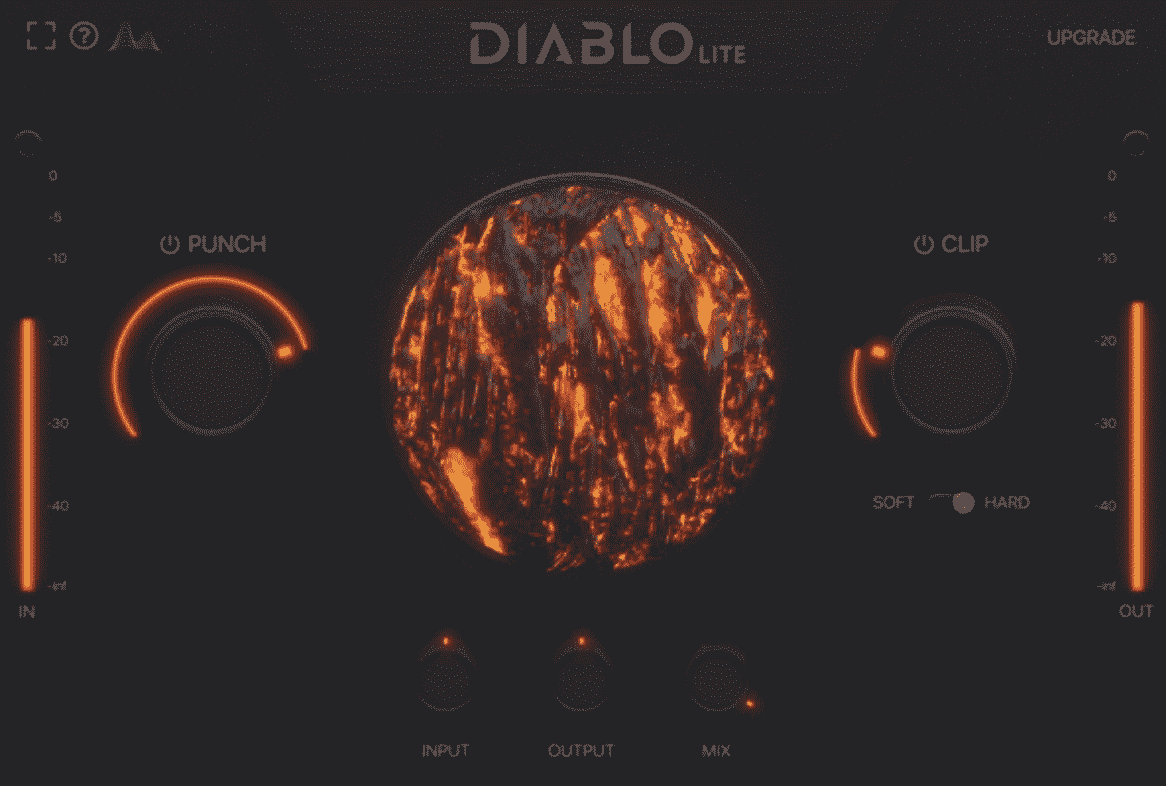
If you always compared your own drum works to the professional sound and felt a little off, Diablo lite is for you. This VST is pretty nice, as our test shown, and really works especially on electronic drums.
So what is Diablo lite?
Diablo lite is a FREE VST offering by Cymatics. You know them mostly for their (paid) sample packs but they actually have a lot of free products too. And not just sample packs but plugins and also presets for popular plugins.
Now, about Diablo lite, this VST is part compressor and part transient shaper. The compressor is actually a clipper, so the compression ratio is very high, close to the well-known “brick wall” style of compression. Because of this dual nature of this sound treatment device, it is excellent for drums.
How do you use it?
So basically every producer uses some form or compression on the drums, either on the whole drum bus or individually. This is because most source material, be it sample-based, synth or live recorded is kind of in the middle in terms of dynamics. It can cut through your whole song but in it’s dry form doesn’t. It has the neutral drum sound, is not in your face but is also not absent. What you want to do is actually fit the drums in your sound.
Let’s take the 808 for example, it is ubiquitous and used in a lot, i mean A LOT of music genres. Some genres use it in a more aggressive flavour, some prefer it more mellow. So you basically do this with either a compressor, a transient shaper or both. Transient shapers basically dictate the initial snap and also the remaining tail of the sound.
This is the Punch control knob and dictates the presence. For dynamics, you have the Clip setting, which actually enganges the limiter and makes the sound more compact as you crank it. If you used too much Punch and the drum just jumps out of the mix and commands too much of the user’s attention, try to not use Clip and just turn it down in the mix instead.
But if the Punch knob does not actually do the trick for you because it makes the drum loose it’s initial character, then Clip can save you and achieve the strength that you are looking for in that particular sound.
Hey friends, good to talk to you again! For those of you that are not subscribed to the iDesignSound.com newsletter, you may have missed this very interesting document in regards to mixing or should I say, fitting, vocals into tracks.
It would be so not like you to miss out on this very important information so we would suggest that you sign-up for the iDesignSound.com newsletter. We will not spam you, but provide very important and relevant information in the field. Our subscribers got this information ahead of time but we figured it is too good to miss so we are providing it to you as well, at the bottom of the article.
Please find the newsletter register form below:
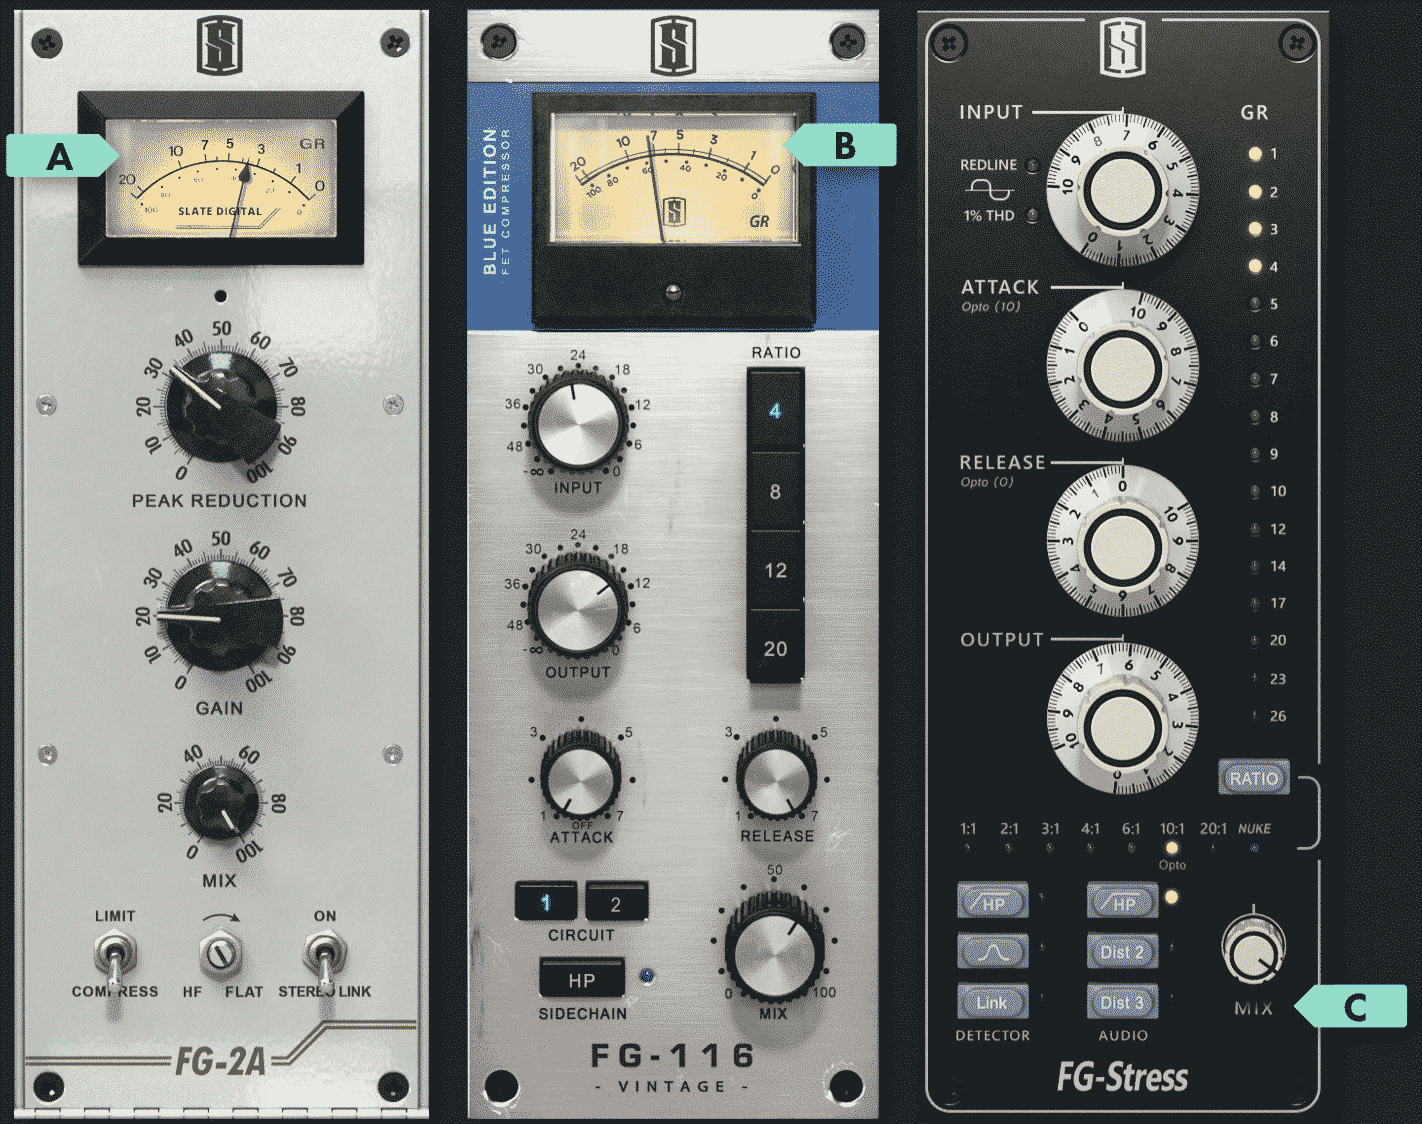
Now, Slate Digital, the company know for very very good emulation of hardware outboard unit, have released this very good pdf booklet about mixing vocals.
Vocals are extremely tricky to get right given the dynamic nature of the human voice, the broad range of frequencies it covers and the somewhat hard to obtain sweet spot of modern music mixing.
Slate Academy, the tutorial side of Slate Digital’s business, has got this covered with six parts, following the signal path and the natural way of sound treatment:
Corrective Eq
Compression
Tone shaping
De-essing
Air
Stereo processing (Reverb/Delay)
We found this list very handy, from the perspective of information contained as well as structuring, so without further ado, here is the download link for the PDF:
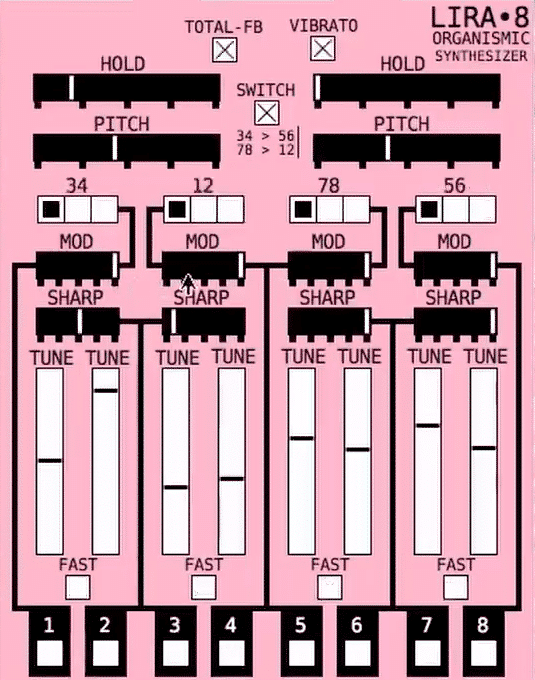
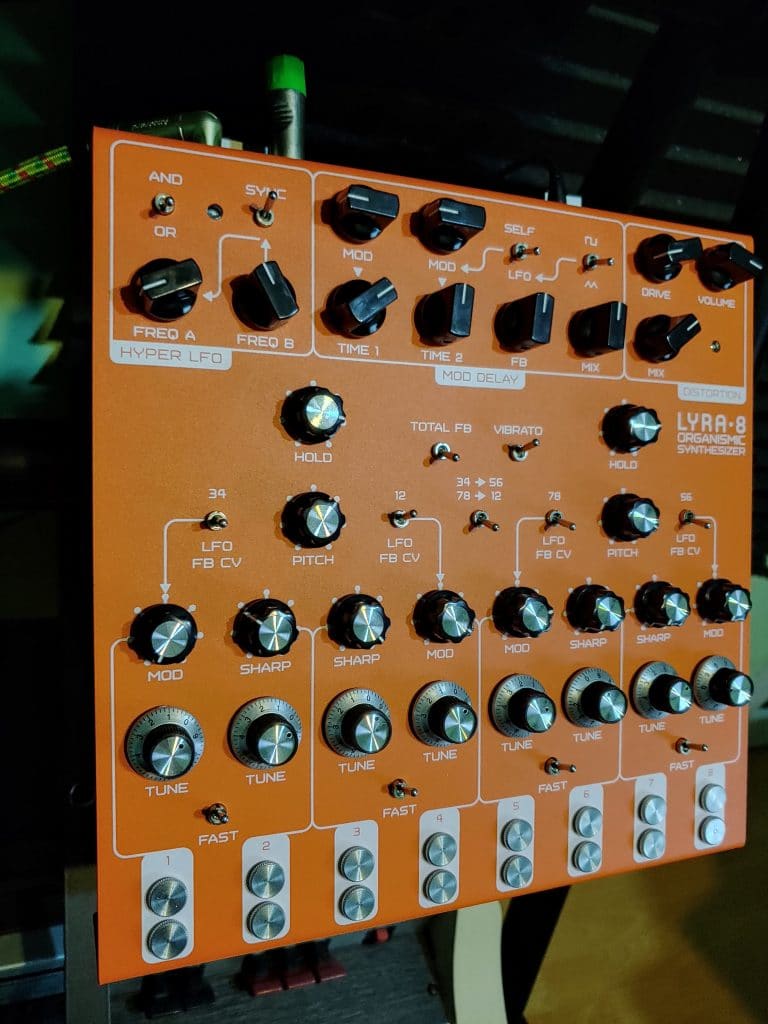
For those that know and for those that don’t, Lyra-8 is a very interesting synth with a very interesting sound engine and layout.
I know, because I own it (the orange sunset colorway of course) and I can say that it is nothing short of incredible.
Lyra 8 is all about cross modulation and finding atmospheric chords
Yes, that’s right, there is no keyboard you don’t really get to play standard notes (western division into notes and semitones). There is also no MIDI so the VST version is interesting because you can get to play standard chords very easily. I got it mostly for that.
On the hardware unit you close the circuit and play the note with the two buttons on the bottom, by putting your finger or any conductive material on both for each oscillator. You only have knob tuning to select the note/pitch that each oscillator plays.
There is a also external processing on the hardware.
So having both the hardware unit and the VST makes sense if you plan to use the hardware for the BBD style delay and distortion on external sounds only.
Be sure to check also our list of 400+ free VSTs (regularly updated, we just added the Lyra 8 VST here as well).
Here is a video demonstrating the hardware, it is advised you check it first to see what to expect from the VST:
To be honest, it does not really matter what you plan to do because the VST is free. I fully recommend you test it out as I am sure you will find a place for it in your sound design pallettte.
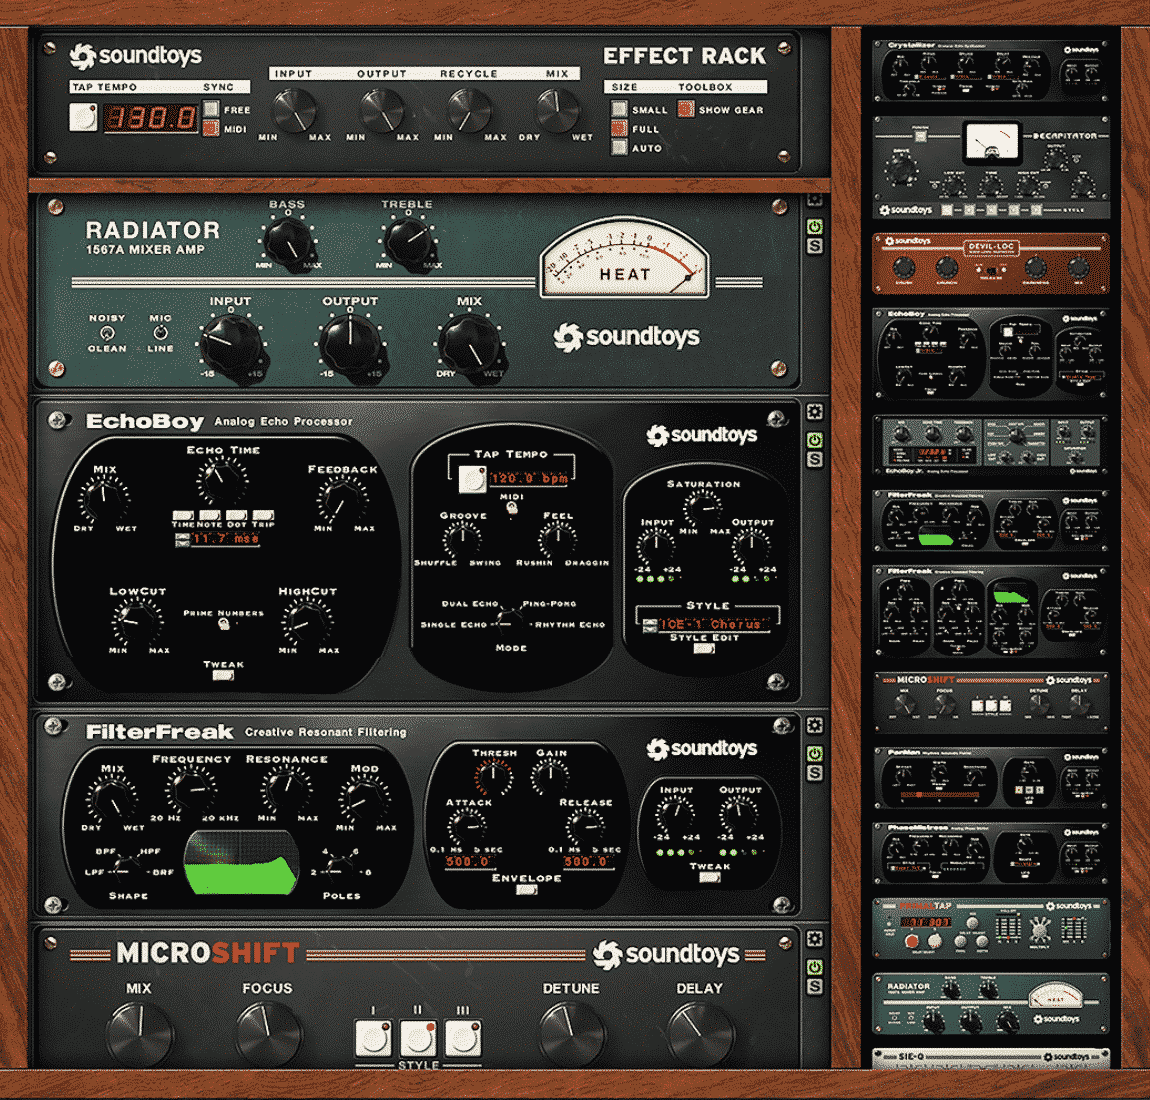
Hey guys, just your friendly reviewer logging in this wonderful time, somewhere between Christmas and New Year with a huge deal. I was pretty sure you were interested so here it is: Soundtoys has huge discounts in place up until mid January.
So here they are, and also don’t forget to first demo them before purchase, the offer is said to be live until 15th of January. Our personal favourites are
MicroShift – a classic, although one that is hard to describe. Technically it is somewhat like a chorus device, but a bit more subtle. Definitely have to try it and you will want to use it to widen stereo fields and to blend in pronounced instruments.
EchoBoy – again this is kind of timeless. It is all the tape delay heaven that you can possibly dream of in this little plugin.
Crystallizer – for the experimental types. Delay again, but instead of BBD/tape style found in EchoBoy, this one is all about grain and recycling. You can also change the pitch of the feedback to get really weird.
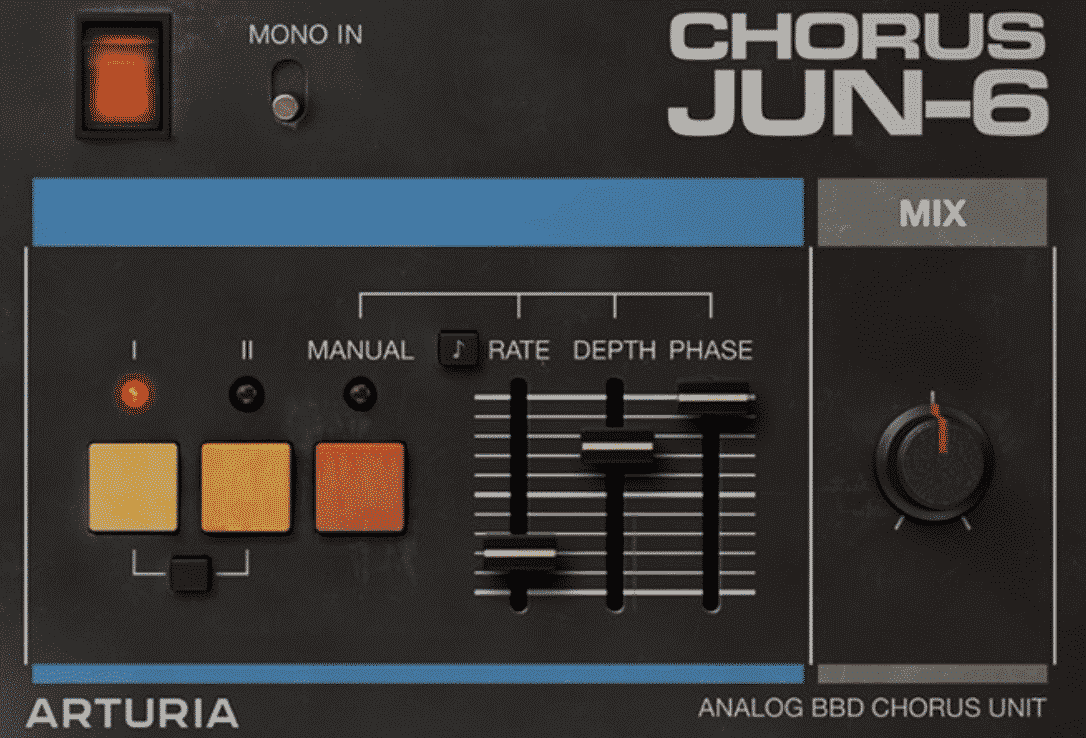
Ho! Ho! Ho! Arturia has done a very good clone of vintage vibe and it’s free of charge until 29th of December 2020
Let’s end this year in style and in class!
This plugin is good. Sure, it will never be like the real thing, right? This is not really that important, what is more important is that you as a producer will have one more tool to fit your sound design ideas in. You all know what this is, namely a clone of the legendary chorus found on the Juno synth. Arturia’s take is exactly the one that can be heard on their Juno software emulation. They even put a web preview for you, so you can instantly hear it.
Wavetable synthesis in a VERY convenient and affordable virtual instrument + X-MAS GIFT FOR YOU!
I guess we can’t really consider this a vacation, because it’s either that we are sad, struggling with the global situation in our inner circle or we are just so bored with 2020 that we can’t wait to get it over with. Still, it’s been a great year for musicians, as the companies behind our beloved instruments have helped us with good deals, new product and just more and more stuff for us as musicians to do.
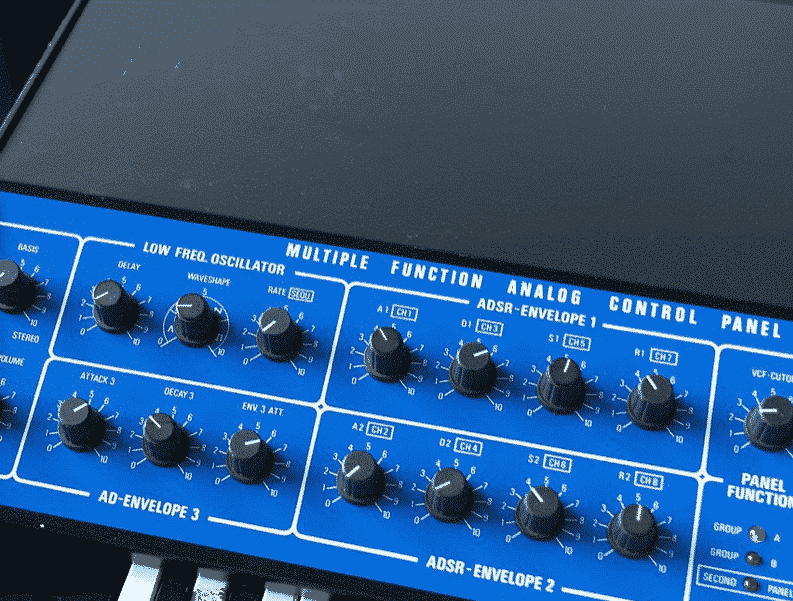
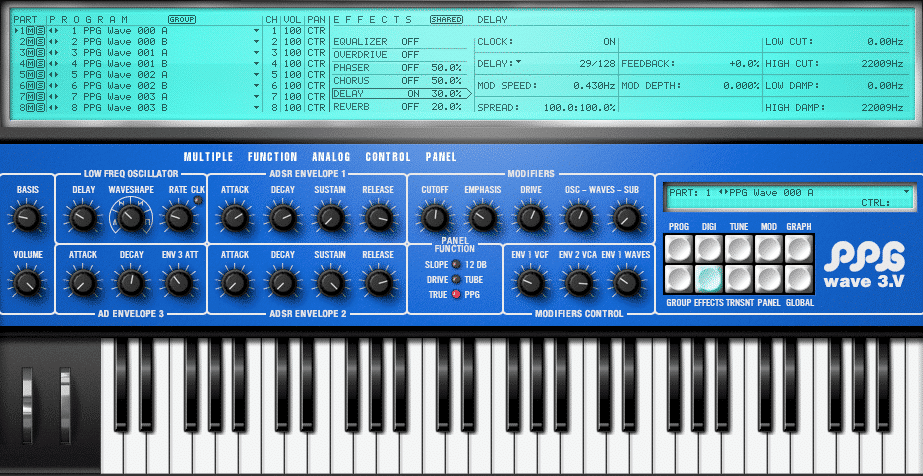
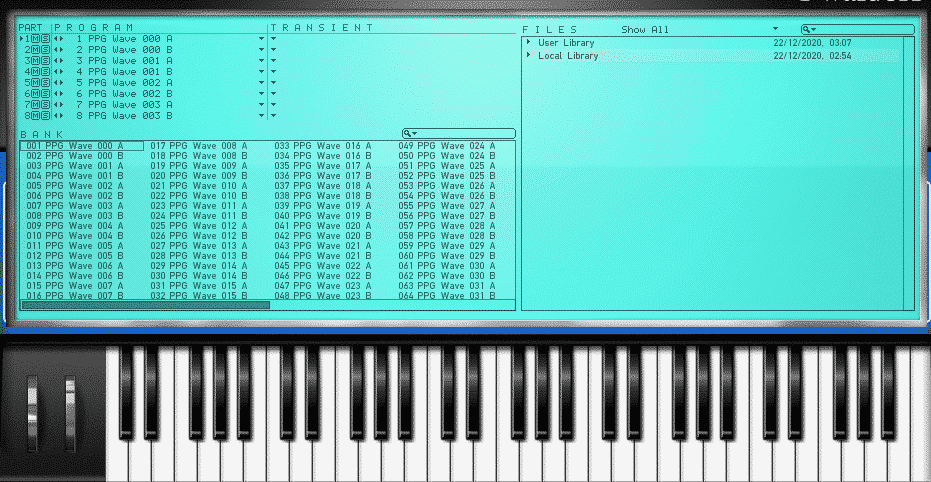
Today I will be listening to some brilliant piece of music making nostalgia. Yes out with the SQUARE SAW SINE waves and in with the WEIRDOS. It’s time for some wavetable virtual goodness, so bring out your mulled wine and your slight holiday cheer and let’s get ready for the review of the PPG WAVE 3.V
And since it is that time of the year (no matter what year it is and how hard it was), I will give you 5 sounds that I designed on this plugin, in sample form, free of charge. There will only be one C note played, so you can load them in your favourite sampler and fit chromatically into your own tracks.
What is the PPG Wave?
This interesting piece of software is simulating one of the most sought-after poly synth of all time. If you know Waldorf, if you know or love german music instruments, you know the PPG Wave. A real legend. An inspirational piece of kit and let’s face it, a VERY good investment if you have the money, the space, and the storage conditions for the real thing. At it’s heart, it is like a regular analog subtractive synth. The original 80s beast even had analog filters (faithfully recreated in the VST). But the waves that generate the sound are not just created digitally with 0s and 1s (so extremely stable), but also much more interesting (in my opinion) than the classic geometric shapes that we are used to. So the sonic capabilities are extreme, even to this day. Just imagine how it sounded back in the day, when everybody was so used to those saw waves. The effects on it sound good, but the best part is that they are surprisingly customisable. I mean you can have a delay clock to 28/128. Don’t see this division very often on synths
What it’s not.
Sure, it is wavetable synthesis, but it’s a very very initial form of it. It is NOT competing with the likes of the Arturia Pigments in terms of modulation. No, there is no waveshaping. No, there is no Mod Matrix and of course there is only one LFO. This is not a tinker’s tool. People who want to play with the miracle of wavetable should buy a VIRUS C like I did and forme it is a dream come true. Sure, the Virus is limited to arround 60 waves, no wavefolding, but it is gear and not software (although it is digital) and it sounds much better than the Arturia VST can.
If you just want to go for the Wave’s authentic sound (and the “authentic” user interface), you are going to be extremely pleased with this VST. Plus you can load your own waves, which is always cool.
Up to 256 voices per instance (depending on available CPU power)
8 part Multimode
8 Stereo Outputs
Host automation of most parameters
MIDI Controller automation of most parameters
More than 100 new Wavetables created by Wolfgang Palm
Original Waveterm B Factory Sample Library
Original PPG Wave Factory Sounds
Per Voice
2 Wavetable Oscillators
Sample Playback with 8 bit, 12 bit or up to 32 bit
Authentic Aliasing Emulation of the PPG Wave 2.2/2.3/2.V or no aliasing
12dB / 24 dB Low Pass Filter
Authentic Filter Emulation of the PPG Wave 2.2/2.3
Overdrive behind Filter
1 LFO
3 Envelopes
Authentic Emulation of the modulation graininess (switchable with True PPG)
Per Part (up to 8 parts available)
Poly, Dual, Quad and Mono (8 voices) mode with 8 different semitone offsets to create chords or melodic lines
Arpeggiator with Up, Down, Alternate and Cascade (PPG special) mode
True PPG Mode switchable between PPG Wave 2.2, Wave 2.3 and Wave 2.V
4-Band EQ
Overdrive with various types
Phaser with up to 12 stages
Chorus with up to 6 stages
Flanger
Stereo Delay
Reverb
Other Features
Sample loading via drag&drop or load file dialog
Multisample playback by using the 8 part Multimode
8 adjustable Cutoff / Resonance deviations to simulate analog inexactness
Finer adjustments of several values in Fine Modulatione mode
How it feels
It feels extremely outdated, but nostalgic. The VST really captured the interface style, and we all know how important interfacing with our electronic music instruments is. It has these buttons to access parts of the interface labeled “Digi”, “Graph”, “Tune”, so retro, but after that you just click on the imitation screen on the parameter and use your mouse to change values pretty easily (to be honest I was expecting to click on left/right arrows all the time, so this is a relief). Browser is ok-ish, more cool than useful, but there is a simple windows explorer or mac finder option aswell.
To create big sounds you go to the right side of the “screen” where you can just assign multitimbral parts to the same midi channel, I found that to be the most interesting way to create complex stuff (mostly because like I said I own the Virus C which is a multi-timbral diamond). When you first play with it you feel overwhelmed, there is the illusion of infinite modulation, but for me at least it seems pretty limited by today’s VST standards (and pretty counter-intuitive).
How it sounds
It sounds great. Excellent for long pads, and hollow/weird sounds. Sub oscillator is really nice, but this is not going to be a fat synth. The filter does not self-resonate, nor is it smooth by any means. It gets very weird when resonance is up but i like that. There is a certain buzz about it that makes me understand just how complex the waves are, when compared to traditional analog subtractive. The filter shines well on mid frequencies, and with some modulation it will sound very profane, almost perverse.
I would not use the drive option on the filter, and for sure I would not expect a proper tube emulation, but the features are there if there is a place in your soundscape.
The envelopes are very snappy, they sometimes click pretty hard, but again, there can be space for this as well so tune it to taste. They are of course mostly suited for pads and slow cooked sound design. The Chorus effect is pretty decent, but as with most VSTs, you will not have a very realistic stereo image so don’t get your hopes that up. Still, sound design wise, it is impressive and interesting to play with, and the guys at the “factory” packed a lot of wavetables along, so you have a lot of source material to modulate, filter and arpeggiate. Some of these waves are actually design by the Wave’s daddy Wolfgang Palm.
As promised, here are five samples from the VST. They don’t do it justice because they are monophonic (only the C note), but I think they are both representative and also useful.
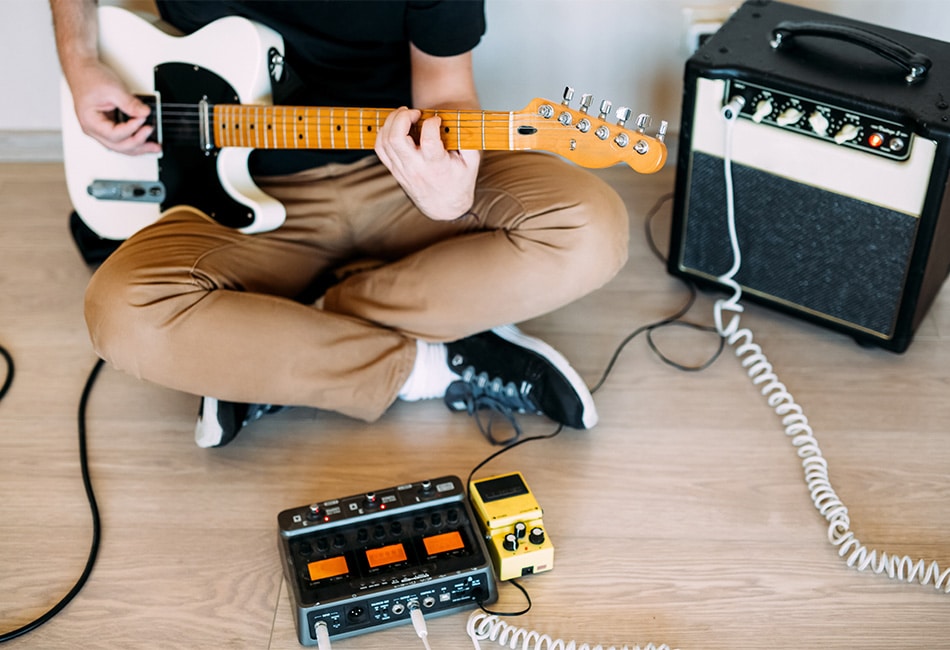
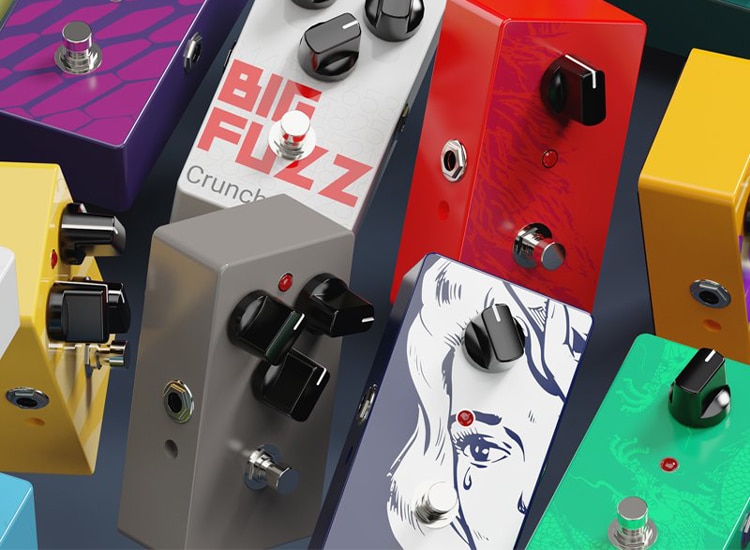
If guitars were rifles, pedal effects would be ammunition.
There’s only so much you can achieve with a clean guitar sound, and it’s more than safe to say that effects such as Chorus, Flanger, and Phaser are capable of completely shifting and changing your tone, for better or worse.
Now, skilled guitar players instinctively know the differences between various pedal effects, but most of the time people are more concerned about where and when they can use a certain type of sound rather than wreck their heads trying to explain ‘how and why’.
Today we are going to attempt to thoroughly examine some of the key differences between chorus, flanger, and phaser effects, so buckle up and stay for a while.
The ‘chorus effect’ is easily one of the most iconic pedal effects among guitar players.
We could go as far as to call it ‘choir-us’ mainly because it’s supposed to make the guitar sound much bigger than it actually is.
It’s ideal for single-guitar bands, troupes, and performers who want to duplicate (or triplicate) their sound in a live setting and for studio musicians who don’t particularly like laying down numerous tracks where they can achieve the same effects with a pedal as simple as this.
How it works
The Chorus effect modulates the pitch of your tone ever so slightly; it basically reproduces the exact signal of your guitar’s vibrations but at a slightly different pitch and time.
The potential of the chorus effect is vast, which means that it can subtly enhance the depth of your tone or it can simulate another live guitar, depending on how you set its parameters.
In a bit more technical terms, the chorus effect is achieved when the pedal takes the signal before melding it with pitch-modulated copies of the original signal.
Depending on the model and parameters, the post-produced signal copy can be singular or there could be numerous. The more ‘layers’ the pedal makes, the bigger your tone will become.
How to use it properly
Essentially, it’s a straightforward effect that doesn’t exactly require much skill and experience to be used, although it’s kind of addictive in the sense that it may leave you with the feeling that you always need ‘more’.
It’s a modulation pedal, which basically means that it’s supposed to sit at the back end of the signal chain, right after wah-wahs, compressors, overdrives, or distortions.
Due to the fact that chorus pedals aren’t necessarily the most intricate contraptions and feature only a handful of control knobs, you’ll typically only have depth and rate to worry about.
Set these parameters low to enrich your sound in a subtle, delicate way; when set at halfway you’ll add plenty of character to your tone while going anywhere beyond this point is not recommended if your signal chain is encumbered as it is.
Flanger in a nutshell
The flanger effect is one of the most enigmatic guitar gizmos to this day; it was artificially created (by accident) in old-school studios back in the tape-recording days (4-track and 8-track machines) by touching the flange (the rim of the tape), although nowadays the process of ‘flanging’ has been tamed and digitalized.
The ‘flanger’ effect sports characteristics of numerous other pedal effects – it’s based on delay pedals, but its unpredictability often leads it towards phasers, overdrives, and distortions, obviously depending on its parameters.
Furthermore, this effect was created by playing two tracks at the same time, which further means that it also shares some similarities with choruses to some extent. As we’ve already discussed, chorus pedals modulate and blend the altered signal with the original one, which is partially what happens with the ‘flanging’ effect too.
How it works
Flanger works in the same way as most modulation pedals do; this pedal splits the signal in 2 identical paths where the original is untouched and the second one is just slightly delayed (measured in milliseconds).
The tweaked signal is then modulated both by speeding it and slowing it cyclically. The ‘modulated’ signal is then blended with the original signal.
What’s most important to understand about flangers is that their altered signal is actually tweaked at ‘random’ unpredictable intervals whereas other modulation pedals offer more control and precision.
The randomness of this effect is the reason why some people use it as their go-to pedal and other guitarists avoid it.
How to use it properly
Flanger pedals are by default wild and pretty hard to tame, but there are more ways than one by which you can gap the small obstacles they present.
The most intimidating parameter of typical flangers is the ‘manual control’, which basically allows guitarists to pick and choose which frequencies they want to alter.
When untouched, the pedal will automatically calculate compatible frequencies and reinforce them (incompatible frequencies will always nullify each other), leading to a slightly clearer tone without sacrificing the punchy feel.
Most flangers typically feature ‘resonance’ or ‘intensity’, both of which relate to the same thing. This parameter affects the effect’s intensity by clipping or feeding a portion of the delay straight back to the original input.
By increasing the ‘intensity’ you’ll add more grit to your tone and achieve a more distorted high-gain sound.
Phaser pedals sound almost identical to laymen and beginner guitarists, but in actuality, they share more differences than similarities.
This effect can potentially be used to achieve a mild flanging effect only if its parameters are basically untouched and set on ultra-low settings.
A well-known fact among veteran guitar players is that the phaser effect was introduced to the scene around the same time when flangers came to be. This is probably the reason why new-school players typically don’t make a clear distinction between the two.
In a nutshell, Phasers create a swirling-like sound, much akin to a plane taking off with the only difference being that it is constantly circulating in the fashion of stereo speakers.
One of the most notable benefits of Phaser pedals is that it allows guitar players to create a much bigger atmosphere and ambient, even with smallish amps and relatively mediocre gear.
How it works
Flangers and phasers operate on similar principles; the original signal is divided into two paths, one path is modulated and the other is completely untouched.
The modulated signal path passes through a series of all-pass filters, which shift the signal’s phase revolving around a variety of (pre-calculated) frequencies. In this regard, the Phaser is not as unpredictable as the flanger, but it’s not as controllable as the chorus.
The modulated signal path is later mixed with the untouched signal path, which results in the ‘swooping’ circular tone.
How to use it properly
The Flanger effect is significantly less punishing towards beginner players; its parameters are not as sensitive, and it’s a bit more versatile altogether.
As far as we’re talking about the signal chain, most people don’t use both flanger and phaser pedals, so you should ideally place either of the two near the end of the chain (after distortion, equalizers, compressors, delays, and choruses).
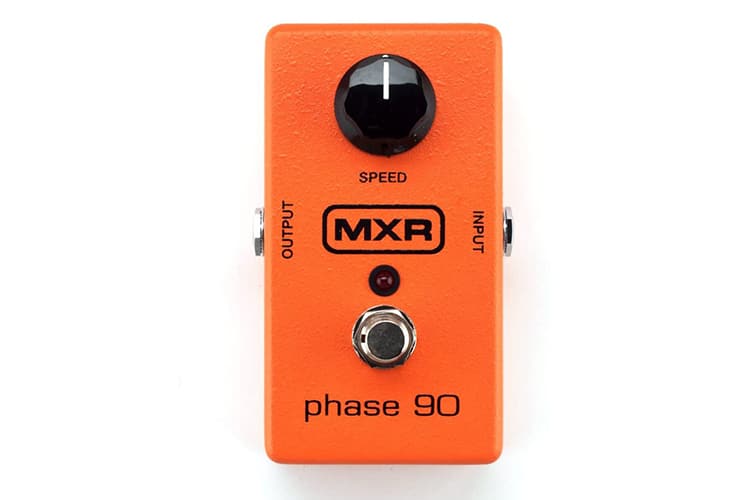
Typical phaser pedals (such as MXR’s Phase 100) feature simplistic tone controls like Intensity and Speed. The ‘intensity’ basically governs the number of phased stages whereas the ‘speed’ affects the rapidity of signal shifts.
In simpler words, the ‘intensity’ knobs allow you to create different ‘geometric’ signal patterns while the ‘speed’ knobs are there for you to finalize and shape them in more concrete ways.
Similarities between Chorus, Phaser, and Flanger
Essentially, Chorus, Phaser, and Flanger pedals belong to the ‘modulation effect’ category.
Aside from this little formality, they’re also meant to be used in similar ways and operate under similar principles.
All three of these effects divide the original guitar signal path in two after which they alter it in different ways. Although the outcomes are vastly different, these split signals all utilize delays to modulate the frequencies.
From a more practical side, all of these effects have been made available in both pedal and plug-in formats.
The initial modes of achieving chorus, flanger, and phaser (particularly the last two) were almost unwieldy and required a dose of technical expertise, whereas today these effects are beginner-friendly and suitable for use by immediate beginner players.
In technical terms, these pedal effects always leave one signal path completely untouched, which means that at least ‘half’ of your tone will remain exactly the same as it originally was, even though this is not entirely a quantifiable matter.
Even though there are numerous minor other similarities, the most crucial and highlighted ones are:
Chorus, Phaser, and Flanger effects all belong to the ‘modulation’ category
The same method of operation and functional principles
The unfiltered signal path is always non-modulated and identical to the original
All three effects utilize delays to affect the filtered signal path
Modern-day pedals have made these effects more accessible to beginner guitar players
Differences between Chorus, Phaser, and Flanger
Now that we’ve touched upon the similarities between Chorus, Phaser, and Flanger it’s time to dig into the main course – the key differences that separate them.
Though there are many dissimilarities between them, we’ve plucked out the most notable ones and grouped them in the appropriate categories, starting with…
Sonic differences
The Chorus effect is, essentially, much different from Phaser and Flanger, at least sound-wise. It’s ‘mellow’ tonally whereas Phaser and Flanger are closer to overdriven types of sounds.
Even when the parameters of a Chorus pedal are set to their extremes the end result still boasts clarity when isolated. However, choruses are seldom used as standalone effects.
This pedal effect is more of an ‘adhesive’ type in the sense that it extends itself across the spectrum of other effects used in the chain. Phasers and Flangers tend to dominate the chain with their grit.
Differences in application
Distortion effects are commonly associated with rock & heavy metal while chorus, phaser, and flanger effects can be used in pretty much any music genre and can fit into any playing style.
These effects are as versatile as the player’s creativity; in that regard, they can be used in almost any song or performance piece, although exceptions should be obvious.
Since phasers and flangers affect the frequencies of the guitar’s signal in a relatively similar way, they almost cross each other out.
In simpler words, most guitar players use either a phaser pedal or a flanger; rarely both.
Differences in versatility
In this particular scenario, ‘versatility’ refers to the flexibility and freedom as far as tweaking with control knobs and parameters are in question.
Tuning up all the knobs to their extreme would make any sound muddy, but especially so in the case of phasers and flangers.
As mentioned before, these effect types tend to dominate the signal chain, which oftentimes diminishes the presence of other pedals and effects.
In that regard, Phasers and Flangers are slightly less versatile than choruses.
Obviously, Phase and Flange pedals are fairly different between themselves too. Phasers are slightly easier to control, but more importantly, they offer a more calculated and more predictable approach to tone-tweaking.
On the opposite end of the spectrum, Flangers don’t affect the tone so drastically and can be used for extended periods of time without compromising the tone’s integrity.
The swirling of Phasers makes them ideal for song parts that need to be accentuated (particularly solo sections) whereas Flange pedals can easily substitute for overdrive and distortion when need be.
Conclusion
Every pedal effect type is different. Moreover, every model is different from another; two different pedals that belong to the same category can be so strikingly different that some people would assume they serve different purposes.
Even so, the contrasts between Chorus, Flanger, and Phaser are undeniable and to a certain extent obvious.
From the variance in sound, over dissimilarities in application to differences in application, by now we hope that we’ve helped you make a distinction between these pedal effects.
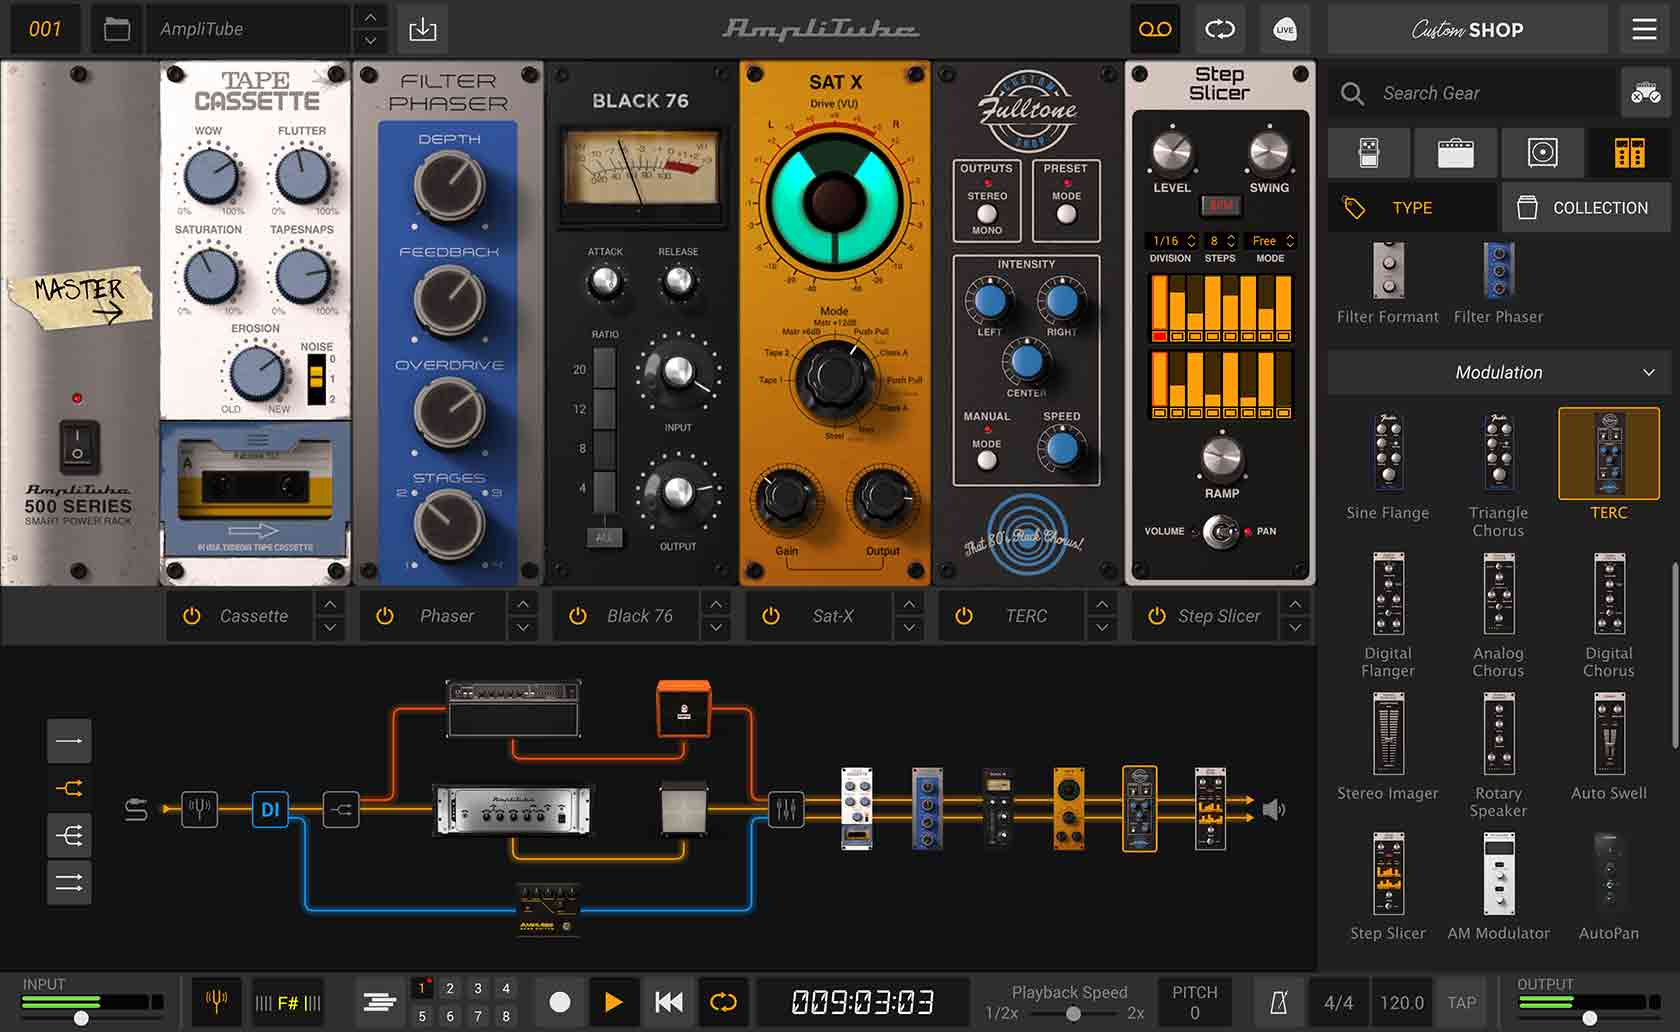
For any guitarist looking for an amp sim, the question of ‘Amplitube VS Guitar Rig’ inevitably will arise.
Guitar Rig and Amplitube are undoubtedly two of the most famous and popular guitar emulators available. They’re the best at what they do, but which one is actually THE BEST?
We have updated our article in light of the Compared to Amplitube 4, this one has been upgraded user experience department, being by far much more user friendly It now supports Retina-displays and the GUI is fully-scalable.
In the new department you now have the option to do parallel effects, with the addition of the dry/wet control and a lot more devices to play with. Plus, a smaller, more recent update integrates Aplitube 5 with TONEX Capture technology, allowing you to upload custom amp and cab presets.
We’ve also updated this based on Guitar Rig 7 – the first update in three years from Native Instruments for their Guitar Rig amp sim which sees plenty of new amps and exciting new FX geared at pushing guitar to its limit.
For those interested in an upgrade path from Amplitube 4 to 5, , explaining the differences and also listing the contents of the Amplitube 5 package.
So, if you are wondering about the differences between Amplitube VS Guitar Rig, this article will break it down. , Here, we take a deep dive into their pros and cons, features, specs, and ultimately decide which platform offers the most benefits. Let’s begin with the most recent price- available by clicking these buttons:
To be fair, we will compare Amplitube 5 to the “PRO” version of Guitar Rig – because the free version is in a league of its own. Sadly there is no free entry point to Amplitube, so we have to have an apples-to-apples comparison.
For the lack of better words, the selection of amps, cabinets, and effects stacked into the Guitar Rig is absolutely incredible. Of course, its eclecticism and versatility mainly depends on which package you’ve opted for, but even the factory Guitar Rig 6 Player is better-rounded than the vast majority if boutique guitar emulators.
You’ll be able to choose between some of the iconic amps, such as Hot Plex, Citrus, Tweed Delight, Jazz Amp, Hot Solo+, and many others, although the bulk of these presets are reserved for Guitar Rig 6 Pro users.
What new additions are there?
THE NEWEST ADDITIONS (IN COMPARISON TO THE GUITAR RIG 5 PRO) ARE THE CHICAGO, BASS INVADER, AND THE FIRE BREATHER AMPS, ALL OF WHICH BRING BRAND-NEW AND HIGHLY UNIQUE FEATURES TO THE TABLE.
Overall, Guitar Rig offers surprisingly authentic, great-sounding amps. We have a full review of Guitar Rig 6 available by clicking right here!
Furthermore, the Guitar Rig 7 update sees 4 new amps and a bundle of FX pedals. These are mostly geared towards rock and other guitar-based genres. Likewise, the pedals include classic FX such as tape wobble, noise machine, vintage vibrato, hardware distortion, and a new loop machine. Check out our review of Guitar Rig 7 right here.
Some reviewers have found these outstrip some of the classic FX on Guitar Rig 6, so bear this in mind if you want consistency of emulation across your amp sim.
Amplitube’s selection of amps is perfect for literally all kinds of music styles and subgenres. The Standard Amplitube 5 package has 34 devices while the MAX version has a whopping 107 items.
You’ll be able to use five British Stack amps, including Brit 8000 and Brit 9000, the Red Pig, Brit Valve, the Brit Silver, two American Tube amps, as well as a solid-state Bass preamp. The standard edition of Amplitube 5
If you want the full list of devices available, IK Multimedia has created We have a full and honest review of Amplitube 5, you can read it by clicking here!
These amps work wonders regardless of whether you’re looking for a poppy sound, a fuzzed jazzy tone, or a heavily distorted metal timbre. However, in a guitar rig 6 vs Amplitube comparison, Guitar Rig’s selection of amps is just slightly broader.
Guitar Rig 6 offers matched cabinets for their amps, which is generally pretty great. Furthermore, you’ll be able to make great use of the Control room cabinets & mics features if you’ve upgraded to Guitar Rig 6 Pro.
However, the downside here is that you won’t be able to mix and match ‘unmatched’ cabinets like you would with Amplitube.
What other great cabinet features does Guitar Rig have?
The new update (guitar rig 7) comes with four new amps:
Super Fast 100
Reverb Delight
AC Box XV
Bass Rage
However, guitar rig has a broad range of flexible cabinet capabilities in general, including:
Mono and stereo
Enough FX to model and build your own cabinet, plus compatibility with the sim’s existing cabinets
Ability to use multiple amps and cabinets for a ‘wall of sound’ effects
Control room feature of ‘pro’ simulates the acoustics of a real recording studio
Pedals for a variety of genres including Seattle fuzz (grunge), chainsaw (90s death metal), skreamer deluxe, and IVP stompbox.
As far as cabinets go, , including six 4 by 12s (matching the amps), one 1 by 12 Open Vintage cab, a 2 by 12 Closed Vintage cab, and a 1 by 15 Bass Vintage cabinet.
While Guitar Rig had the upper hand in terms of the amp selection, Amplitube does a bit better job in the realm of cabinets, offering more than twice as many models and presets.
In a nutshell, this is more than you’ll need to capture the sonic essence of the recognizable sounds of guitar heroes with ease.
There are almost more guitar effects aboard the Guitar Rig 6 platform than can be counted, starting with:
five delays (Twin, Delay Man, Psyche Delay, Quad Delay and Tape Echo), 12 Distortions (Fuzz, MeZone, Sledgehammer, Gain & Treble boosters, Cat, Demon, Skreamer and more),
10 Dynamic effects,
5 EQs,
7 filters,
8 modulation effects,
3 Pitch effects,
9 reverbs,
three ‘Special’ effects (Resochord, Ring Modulator and Grain Delay).
Barely a dozen of these effects are available as factory presets, though,.In short, this means you need the Guitar Rig 6 Pro package. However, we have a full review of Guitar Rig 6 – including pro vs player and the pros and cons of each – available by clicking right here!
Guitar Rig 7 Update:
The first update Guitar Rig has had in 3 years, Guitar Rig 7 brings new FX, most of which are more specialist, adding something extra to the classic sounds of Guitar Rig 6.
Thus, if you want to really experiment or alternatively are after a specific sound, Guitar Rig may be the way to go.
The Amplitube simulator offers 10 different stompbox models, including choruses, flangers, delays, wahs, diode overdrives, volume pedals, graphic equalizers, compressors, tremolos, and acoustic simulators. With the new Amplitube 5 version you can run them in paralel with the dry/wet setting.
All of these effects are taken from actual analogue effect pedals and sound as original and authentic as can be. The same. We have a full and honest review of Amplitube 5, you can read it by clicking here!
The good and the bad of Guitar Rig 6
Basically, Guitar Rig 6 is free to download, which is a massive benefit in itself. However, the factory presets selection is modest, to say the very least, which means that it’s a pretty basic software with relatively poor versatility if you don’t upgrade to the ‘Pro’ version at some point.
Let’s discuss the positives and negatives of Guitar Rig 6 PRO:
Pros:
Decently affordable upgrade to Guitar Rig 6 free
Exceptional range of guitar amps
Quality analogue bass amp
Authentic sounding tools, models and presets
Unparalleled selection of effects
Decently easy to use, even by beginners
Cons:
The basic (free) package is not overly versatile
Difficult to mix and match cabinets
Almost no effect pedals and stompboxes to speak of in the free package
The good and the bad of Amplitube
Amplitube is decently approachable guitar software that packs a hefty selection of stompboxes, amplifiers, cabinets, speakers, microphones, effects, and rack units. With the new update to Amplitube 5, the user interface is extremely well built, scalable and looks great on Apple devices. We have a full and honest review of Amplitube 5, you can read it by clicking here!
Obviously, it’s more expensive than the (free) Guitar Rig 6, but it is well worth the buck considering how beginner-friendly and eclectic it is. Some of the highlighted advantages and disadvantages of Amplitube are:
Pros:
Highly intuitive interface
Excellent selection of stompbox effects, amplifiers, cabinets and microphones
Several rack effects and speakers
Onboard tuners
Constantly expanding roster of amps and effects
Great for beginners and seasoned veterans alike
Cons:
Not available for free, although demo can be downloaded free of charge
Conclusion
The specs, features, and UI were some of the most notable parameters we took into consideration when comparing the performance of Amplitube and Guitar Rig.
Even though these guitar simulator programs are completely different, they actually do have a lot in common. Both programs are laden with a myriad of top-quality amps and effects, and both actually sound extraordinarily great.
Be it as it may, Guitar Rig tends to do a bit better only because there is a free version to which Amplitube cannot compete. Overall, Guitar Rig offers surprisingly authentic, great-sounding amps. We have a full review of Guitar Rig 6 available by clicking right here!
Without cutting Amplitube’s worth short, it’s amazing software that has enormous potential to usurp Guitar Rig’s throne in near future.
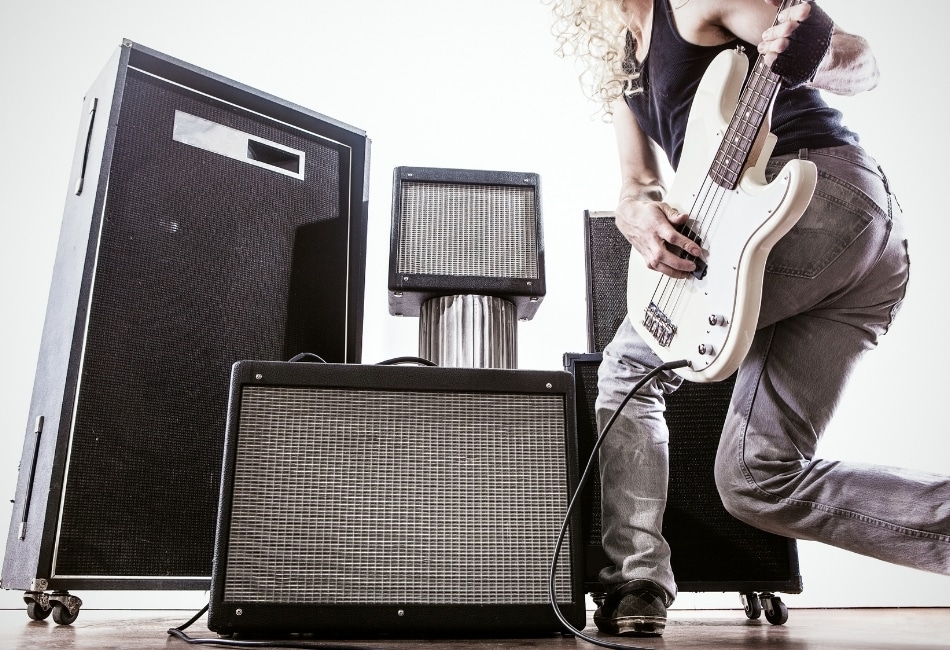
A good bass amp is big, weighs a ton, and usually costs a fortune.
Given that most people can’t afford hauling a 100-pound metal-plated chunk of wood from their rehearsal space every time a gig is on the horizon, finding a good bass amp simulator might save you a bit of troubles.
However, there are numerous plugins and programs on the market, so finding the adequate simulator isn’t exactly a walk in the park.
That’s why we’ve taken the liberty of handpicking the finest bass amp simulators for your convenience, so let’s start with:
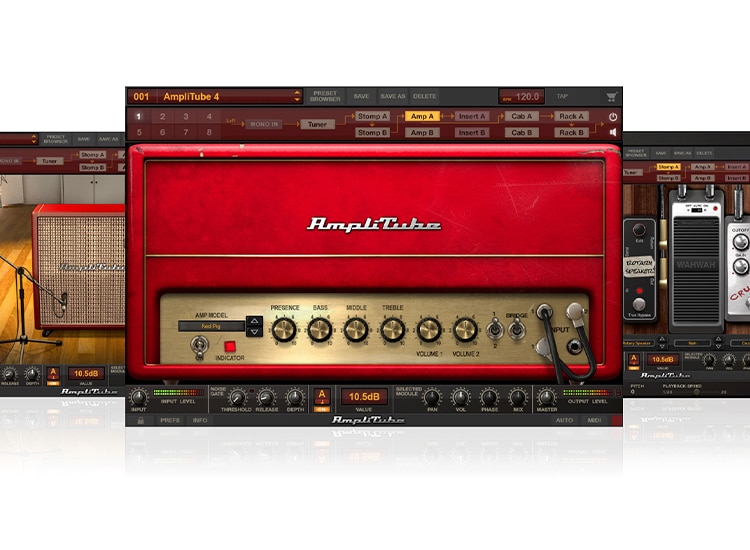
Amplitube is incredible software that offers much in terms of convenience while boasting remarkable versatility and beginner-friendliness.
It’s pricey, but it’s not overly expensive, and the fact that it’s available in various formats justifies the price tag.
The Amplitube rocks a wide selection of premium-quality modelled amplifiers for both guitars & basses, and it also sports numerous stompboxes, reverbs, modulators, fuzzes, distortions, delays, and a myriad of similar effects.
While its rack effect selection is pretty modest to say the least, Amplitube 4 sports excellent visuals, a highly intuitive interface, a built-in tuner, as well as a comprehensive recording suite.
There are a couple of drawbacks to this bass simulator, though. Aside from the fact that it’s pretty expensive, it does not support 32-bit systems, which is quite a downfall for people who have older (but functional) setups.
Amplitube offers a couple of pricing options, with the most affordable one (base version) still being more than versatile enough to cater to your performing, playing, practicing, and recording needs.
Now, most people would rather buy a boutique bass amp than invest in a boutique bass amp simulator; Line 6’s Helix Native begs to differ.
The Helix Native is a beautifully designed bass amp sim that packs 60 amps in total, 13 of which are dedicated bass simulators, 30 cabinets, and more than 100 effects that you can utilize in your rig.
It also sports a variety of distortions, equalizers, modulators, pitch shifters, synths, and numerous other goodies along the same lines.
Obviously, the biggest disadvantage of Helix Native is its price tag, but that’s not what dissuades most people from trying it out. Namely, the vast majority of amp sims in this software are guitar simulators.
Even though there are substantially simpler and more cost-effective alternatives, Helix Native remains one of the most exquisite, most powerful and versatile bass amp simulators available on the market.
The Amp Room takes ‘quality over quantity’ to another level, compromising for the modest selection of bass amps and bass effects with a sheer, raw quality and function.
Its simplicity is its forte – the Amp Room features a single bass amp simulator and three bass cabinets only, all of which were recorded in real-time with authentic microphones by professional players.
If you’re more concerned about your actual tone and sound rather than the ability to toy around with different presets and timbres, then the Amp Room might be the perfect solution for you.
As far as tone-shaping capabilities are of concern, this bass amp sim features a dedicated head equalizer, click & drag method of microphone placement, DI equalizer controls, and a variety of tone-blending features.
It is, sadly, not available in a standalone format, and its eclecticism is obviously not something to boast about.
However, it’s decently affordable and a no-brainer pick for serious bass players who want to get the most out of their bass in an analog yet digital way.
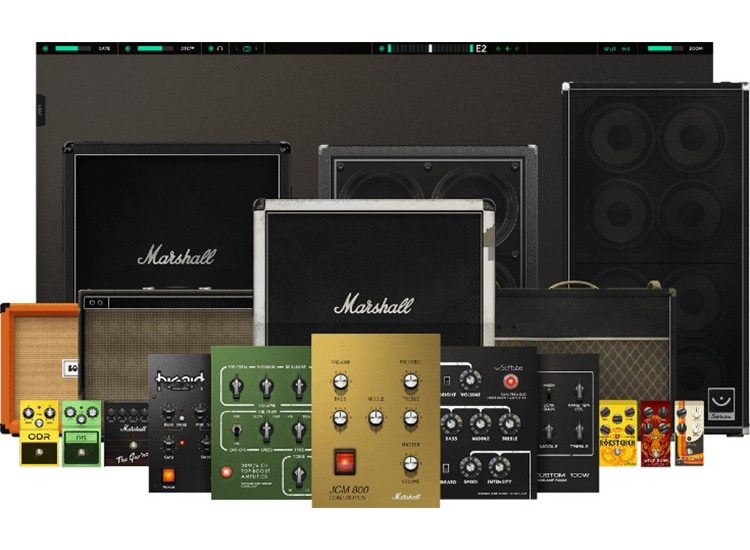
Cheap and authentic would be the words that best describe Wave’s GTR 3 amp simulator.
This is one of the cheapest multi-bass sims that is available in both standalone and plug-in format, but just like some of our previous picks it only supports 64-bit operating systems.
It packs seven dedicated bass amps, 26 effects, and a digital pedalboard that can ‘fit’ six stompboxes simultaneously.
Obviously, this is not necessarily the most versatile bass amp simulator on the market, but it is among those that are the easiest to use. Its beginner-friendliness is a huge bonus considering that it’s also remarkably cheap, but that’s about everything this simulator has to provide.
Here’s yet another cheap bass amp simulator that offers authentic bass tones, effects and timbres alongside a variety of unique bass amps. In terms of convenience, the GK-Amplification 2 Pro is available in both standalone and plug-in format.
This bass amp simulator features three Gaillain & Kruker amps, three bass heads (MB150, 800RB and 2001RB), and two speaker cabinets.
Even though this doesn’t really reflect the versatility of GK-Amplification 2 Pro, the fact that all of these analog components are manufactured by the same brand and put into a digital format speaks volumes about their quality.
Furthermore, you’ll be able to tweak and adjust a number of tonal parameters, such as bass head equalizers, boosts, voicing filters, types, angles and positions of microphones, and blending of the cabinets.
The brand also provides the opportunity to download a free demo so you can get acquainted with its features before deciding whether you want to buy it or not.
There are no stompboxes onboard, and there are only three amps for you to choose from, but considering that this is a fairly inexpensive bass amp simulator, it’s quite obvious that it’s well worth the buck.
Let’s wrap things up with SHB-1, which is a free bass amp for Windows and Mac. It does have a single amp preset, but it’s built after real, authentic amp components and features an exact replica of the original SHB 1 bass head.
The SHB-1 offers a simple, straightforward interface, an exceptionally great sound, and it supports both 32 and 64-bit operating systems.
It’s idiosyncratic in a lot of ways, and you’ll need your own cabinet plugin in order to actually utilize it, but it’s easily one of the finest bass amp simulators for hard rock and metal music out there.


![Audified GK Amplification [LEGACY]](https://i.ytimg.com/vi/FESHEEi-2UI/hqdefault.jpg)